Sony CDX-GT700HD Operating Instructions - Page 14
iTunes Tagging - support
 |
UPC - 027242778566
View all Sony CDX-GT700HD manuals
Add to My Manuals
Save this manual to your list of manuals |
Page 14 highlights
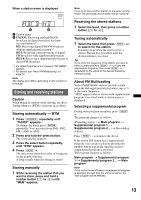
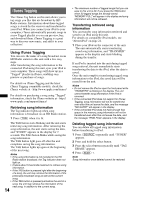
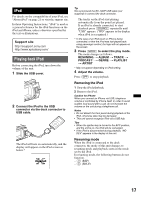
iTunes Tagging The iTunes Tag button on this unit allows you to tag songs you like that are broadcast by HD Radio stations. Information about these tagged songs is stored by the receiver and transferred to your iPod. When you connect your iPod to your computer, iTunes automatically presents songs in a new Tagged playlist so you can preview, buy, and download them. iTunes Tagging is a great way to discover new music, and add it to your collection! Using iTunes Tagging You can save the name of a song broadcast on an HD Radio station to this unit with a few easy steps. After transferring the song information to the connected iPod using this unit, sync your iPod to your computer. These songs will show up in a "Tagged" playlist in iTunes, enabling easy preview or purchase of songs. For details on iTunes Tagging and the latest iTunes Tagging compatible models, check the iTunes website at - http://www.apple.com/itunes/ For details on purchasing a song using "Tagged" information, check the iTunes website at - http:// www.apple.com/support/itunes/ Retrieving song information The Tag indicator lights up when song information is broadcast on an HD Radio station. 1 Press (TAG) when it is lit. The TAG button starts blinking and the unit starts retrieving song information. After retrieving the song information, the unit starts saving the data, and "STORE" appears in the display for 2 seconds. The TAG button blinks while saving the song information. The TAG button light goes off after the unit completes saving the song information. The TAG button lights up again at the beginning of the next song. Notes • If the song information is not included in the HD Radio station broadcast, the Tag indicator does not light up. • It takes about 10 seconds maximum to retrieve song information. • If the TAG button is pressed right after the beginning of a song, the unit may retrieve the information of the previously broadcast song as well as the current song. • If the TAG button is pressed just before the end of a song, the unit may retrieve the information of the next song, in addition to the current song. 14 • The maximum number of tagged songs that you can save to this unit is 50. If you press the TAG button when 50 tagged songs are already saved, "MEMORY FULL" will appear in the display and song information will not be retrieved. Transferring retrieved song information You can transfer song information retrieved and saved to an iPod using this unit. For details on compatible iPod models, see "About iPod" on page 21. 1 Place your iPod on the connector of the unit. The unit automatically starts transferring saved song information, and "TRANSFER" appears in the display and starts blinking during the transfer. If an iPod is inserted into the unit during tagged song retrieval, the unit immediately starts transferring the data to the iPod, after the data is saved. Once the unit completes transferring tagged song information to the iPod, the saved data will be erased from the unit. Notes • Do not remove the iPod or open the front panel while "TRANSFER" is blinking in the display. The unit cannot transfer song information if the iPod is removed. • If the connected iPod does not support for iTunes Tagging, song information will not be transferred, even after this unit saves the data, and the message "NO SUPRT" will appear in the display. • If the connected iPod does not have enough free space in the memory, song information will not be transferred even after this unit saves the data, and the message "IPOD FULL" appears in the display. Deleting tagged song information You can delete all tagged song information before transferring to iPod. 1 Press (SOURCE) repeatedly until "TUNER" appears. 2 Press and hold the select button. 3 Press the select button repeatedly until "TAG ERASE" appears. 4 Press (SEEK) +. Note Song information once deleted cannot be restored.
-
 1
1 -
2
-
3
-
4
-
5
-
6
-
7
-
8
-
 9
9 -
 10
10 -
 11
11 -
 12
12 -
 13
13 -
 14
14 -
 15
15 -
 16
16 -
 17
17 -
 18
18 -
 19
19 -
20
-
21
-
22
-
23
-
24
-
25
-
26
-
27
-
28
-
29
-
30
-
31
-
32
-
33
-
34
-
35
-
36
-
37
-
38
-
39
-
40
-
41
-
42
-
43
-
44
-
45
-
46
-
47
-
48
-
49
-
50
-
51
-
52
-
53
-
54
-
55
-
56
 |
 |