Sony CSS SA Operating Instructions - Page 10
Charging the battery pack, Viewing images on a TV screen, Set the DISPLAY SELECT switch to TV.
 |
UPC - 027242655119
View all Sony CSS SA manuals
Add to My Manuals
Save this manual to your list of manuals |
Page 10 highlights
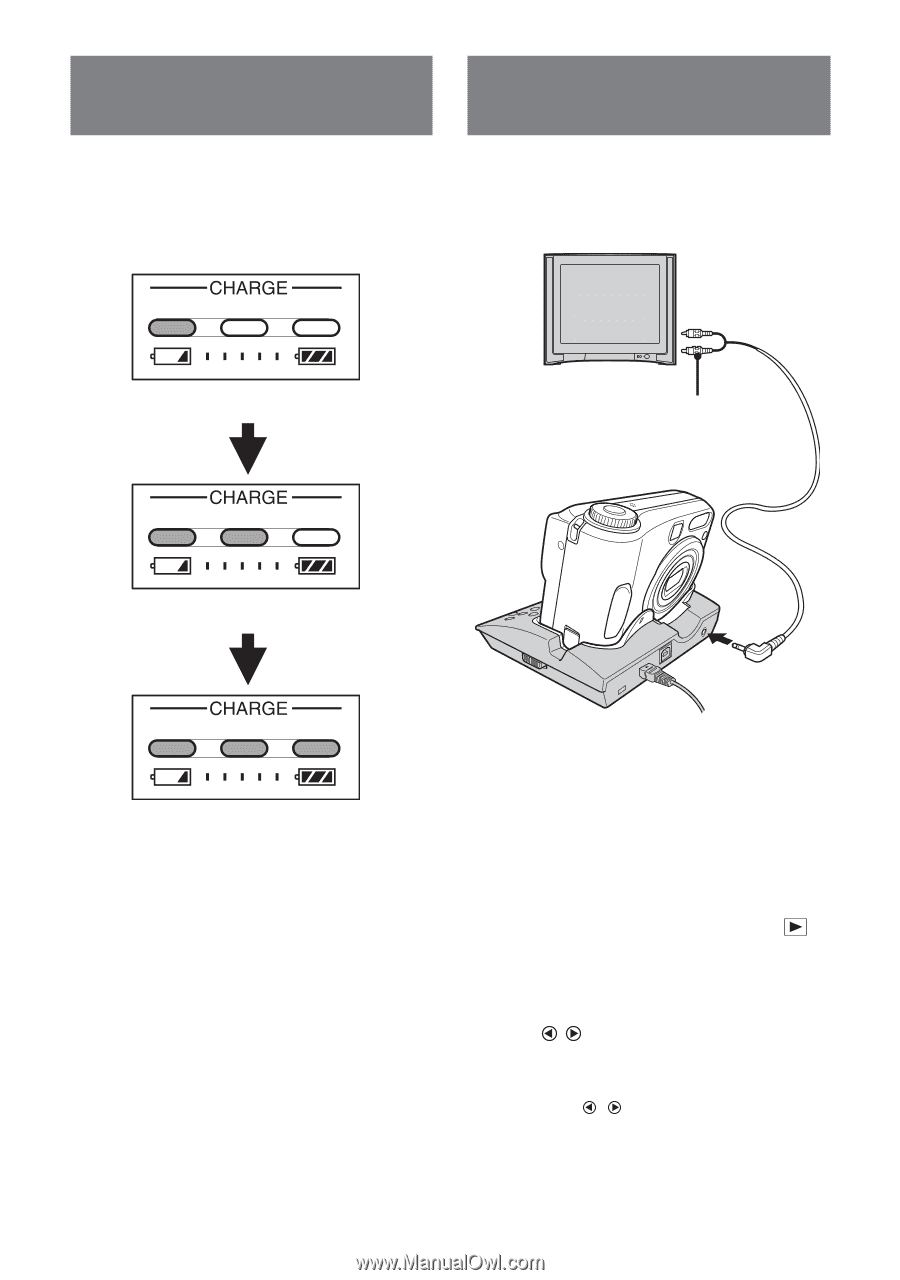
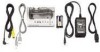
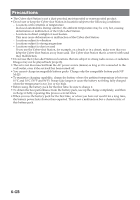
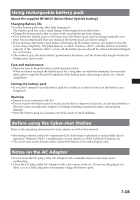
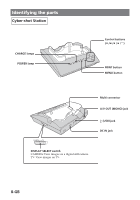
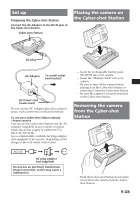
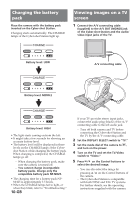
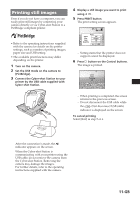
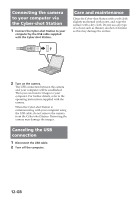
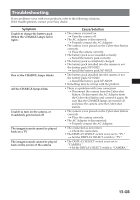
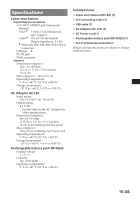
Charging the battery pack Place the camera with the battery pack inserted on the Cyber-shot Station. Charging starts automatically. The CHARGE lamps of the Cyber-shot Station light up. Viewing images on a TV screen 1 Connect the A/V connecting cable (supplied) to the A/V OUT (MONO) jack of the Cyber-shot Station and the audio/ video input jacks of the TV. Battery level: LOW A/V connecting cable Battery level: MIDDLE Battery level: HIGH • The light starts coming on from the left. • It might take a few seconds for showing an accurate battery level. • The battery level will be displayed in three levels on the CHARGE lamps of the Cybershot Station while charging the battery pack. When charging is completed, the CHARGE lamps go off. - When charging the battery pack, make sure the camera is turned off. - You cannot charge incompatible battery packs. Charge only the compatible battery pack NP-NH25. • The charging time for a battery pack NPNH25 is approximately 3.5 hours. • When the CHARGE lamps fail to light, or when they blink, refer to "Troubleshooting." 10-GB If your TV provides stereo input jacks, connect the audio plug (black) of the A/V connecting cable to the left audio jack. - Turn off both camera and TV before connecting the Cyber-shot Station and the TV by the A/V connecting cable. 2 Set the DISPLAY SELECT switch to "TV." 3 Set the mode dial of the camera to , and turn on the power. 4 Turn on the TV and set the TV/Video switch to "Video." 5 Press / on the Control buttons to select the desired image. - You can also select the image by pressing / on the Control buttons of the camera. - The Cyber-shot Station is compatible with both NTSC and PAL TV systems. For further details, see the operating instructions supplied with the camera.
-
 1
1 -
2
-
3
-
4
-
 5
5 -
 6
6 -
 7
7 -
 8
8 -
 9
9 -
 10
10 -
 11
11 -
 12
12 -
 13
13 -
 14
14 -
 15
15 -
16
-
17
-
18
-
19
-
20
-
21
-
22
-
23
-
24
-
25
-
26
-
27
-
28
-
29
-
30
-
31
-
32
 |
 |