Sony D-SJ303 Operating Instructions - Page 1
Sony D-SJ303 - Sports Cd Walkman Manual
 |
View all Sony D-SJ303 manuals
Add to My Manuals
Save this manual to your list of manuals |
Page 1 highlights
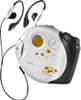
2-583-525-11 (1) Portable CD Player Operating Instructions D Label side up D-SJ303 ©2005 Sony Corporation Printed in Malaysia "WALKMAN" is a registered trademark of Sony Corporation to represent Headphone Stereo products. is a trademark of Sony Corporation. CD player (front) 1 HOLD 2 3-way control key Push toward Press x/CHG. N*/> or .. 3 VOL (volume)** control DC IN 4.5 V (external power input) jack 4 PLAY MODE button 5 REPEAT/ENTER button 6 SOUND button i (headphones) jack A Display * There is a tactile dot. ** There is a tactile dot beside VOL to show the direction to turn up the volume. Buckle CD player (inside) B 7 G-PROTECTION Open the battery compartment lid. Insert the # end first (for both batteries). Display on the CD player Track number Play mode Sound mode AVLS C to an AC outlet Playing time CHG Remaining battery power WARNING To prevent fire or shock hazard, do not expose the AC power adaptor to rain or moisture. Do not install the appliance in a confined space, such as a bookcase or built-in cabinet. To prevent fire, do not cover the ventilation of the apparatus with newspapers, tablecloths, curtains, etc. And don't place lighted candles on the apparatus. To prevent fire or shock hazard, do not place objects filled with liquids, such as vases, on the apparatus. CAUTION The use of optical instruments with this product will increase eye hazard. Certain countries may regulate disposal of the battery used to power this product. Please consult with your local authority. CAUTION • INVISIBLE LASER RADIATION WHEN OPEN • DO NOT STARE INTO BEAM OR VIEW DIRECTLY WITH OPTICAL INSTRUMENTS • CLASS 1M INVISIBLE LASER RADIATION WHEN OPEN • DO NOT VIEW DIRECTLY WITH OPTICAL INSTRUMENTS The validity of the CE marking is restricted to only those countries where it is legally enforced, mainly in the countries EEA (European Economic Area). For customers who purchased this product in the USA Owner's Record The model number and the serial number are located at the rear of the CD player. Record the serial number in the space provided below. Refer to these number whenever you call upon your Sony dealer regarding this product. Model No. D-SJ303 Serial No Product registration Please register this product on line at www.sony.com/ walkmanreg Proper registration will enable us to send you periodic mailings about software upgrades, new products, services and other important announcements. Thank you. This equipment has been tested and found to comply with the limits for a Class B digital device, pursuant to Part 15 of the FCC Rules. These limits are designed to provide reasonable protection against harmful interference in a residential installation. This equipment generates, uses, and can radiate radio frequency energy and, if not installed and used in accordance with the instructions, may cause harmful interference to radio communications. However, there is no guarantee that interference will not occur in a particular installation. If this equipment does cause harmful interference to radio or television reception, which can be determined by turning the equipment off and on, the user is encouraged to try to correct the interference by one or more of the following measures: - Reorient or relocate the receiving antenna. - Increase the separation between the equipment and receiver. - Connect the equipment into an outlet on a circuit different from that to which the receiver is connected. - Consult the dealer or an experienced radio/TV technician for help. You are cautioned that any changes or modifications not expressly approved in this manual could void your authority to operate this equipment. AC power adaptor (not supplied) 3-way control key (N/>) to DC IN 4.5V to i (headphones) Headphones E Power Sources To use the AC power adaptor (C) 1 Connect the AC power adaptor (not supplied) to an AC outlet. To use the batteries (B) Use only the following batteries for your CD player: Rechargeable batteries Charge the rechargeable batteries before using them for the first time. • NH-WM2AA (NH-WMAA × 2) (not supplied) Dry batteries • LR6 (size AA) alkaline batteries (not supplied) To insert the batteries 1 Open the battery compartment lid inside your CD player. 2 Insert two batteries by matching the 3 to the diagram in the battery compartment and close the lid until it clicks into place. 3 When using the rechargeable batteries, connect the AC power adaptor to the DC IN 4.5 V jack of your CD player and an AC outlet, then press x/CHG to start charging. The CD player charges the batteries. The "CHG" indicator turns on in the display, and the indicator sections of light up in succession. When the batteries are completely charged, the "CHG" and indicators turn off. If you press x/CHG after the charge has already been completed, the indicator flashes and "Full" appears in the display. 4 Disconnect the AC power adaptor. Battery life* (approx. hours) (When the CD player is used on a flat and stable place.) Playing time varies depending on how the CD player is used. NH-WM2AA (charged for about 5 hours**) G-PROTECTION 1 2 30 32 Two Sony alkaline 47 50 batteries LR6(SG) (produced in Japan) * Measured value by the standard of JEITA (Japan Electronics and Information Technology Industries Association). ** Charging time varies depending on how the rechargeable battery is used. To check the remaining power of the batteries You can check it in the display. Replace the batteries when " " flashes. t t t t t Lo batt* *Beep sounds. Notes • The indicator sections of roughly shows the remaining battery power. One section does not always indicate one-fourth of the battery power. • Depending on operating conditions, the indicator sections of may increase or decrease. When to replace the rechargeable batteries If the battery life becomes shorter by about half, replace the batteries with new rechargeable batteries. Note on the rechargeable batteries If the battery is new or has not been used for a long time, it may not be charged completely until you charge and discharge it several times. Note on carrying the rechargeable batteries Use the battery carrying case to prevent unexpected heat. If the rechargeable batteries and the metallic objects are contacted, heat or fire may occur due to a short circuit. Notes on using the dry batteries • Be sure to remove the AC power adaptor. • When the batteries are depleted, replace both batteries with new ones. Playing a CD To insert a CD 1 Unfasten the buckle to open the lid (A). 2 Fit the CD to the pivot, then close the lid (D). 3 While holding the lid closed, fasten the buckle securely (D). Notes • This CD player can play CD-Rs/CD-RWs recorded in the Compact Disc Digital Audio (Audio CD) format, but playback capability may vary depending on the quality of the disc and the condition of the recording device. • This product is designed to play back discs that conform to the Compact Disc (CD) standard. Recently, various music discs encoded with copyright protection technologies are marketed by some record companies. Please be aware that among those discs, there are some that do not conform to the CD standard and may not be playable by this product. To operate the CD player Button/Switch 1 HOLD Function/Operation Use to lock the controls to prevent accidental button presses. 2 3-way control key N (play) Push toward N to start play. To start from the first track, push toward N and hold it for 2 seconds or more while the CD player is stopped. ./> (AMS*1/search) Push toward ./> once quickly to find the beginning of the current/next track. Push toward ./> repeatedly to find the beginning of the previous/ succeeding tracks. Push toward ./> and hold it to go backward/forward quickly. x/CHG (stop/charge) Press to stop play. 3 VOL Rotate to adjust the volume. 4 PLAY MODE During play, press repeatedly until the play mode you want appears on the display. No indication: Normal play "1": Single track play "SHUF": Shuffle play "PGM": PGM (program) play 5 REPEAT/ENTER During play, press to repeat the play mode you selected. " " appears. 6 SOUND*2 • Use to emphasize the bass- boosted sound. Press repeatedly to select BASS or BASS . BASS enhances more than BASS .*3 • Also use to keep down the maximum volume to protect your hearing. Press and hold until "AVLS*4" appears in the display. The AVLS function is turned on. To turn off the AVLS function, press and hold again until "AVLS" disappears. 7 G-PROTECTION Protect against sound skipping.*5 Switch to set "1" or "2". "2" enhances more than "1". *1 AMS = Automatic Music Sensor *2 If you disconnect the power sources, all settings returns to the defaults. *3 If the sound is distorted when using the SOUND function, turn down the volume. *4 AVLS = Automatic Volume Limiter System *5 Sound may skip: - if the CD player receives stronger continuous shock than expected, - if a dirty or scratched CD is played or - when using poor-quality CD-Rs/CD-RWs or if there is a problem with the recording device or application software. To remove the CD Remove the CD while pressing the pivot (E). To turn off the operation beep sound You can turn off the beep sound that is heard from your headphones/earphones when you operate your CD player. 1 Remove the power source (AC power adaptor, rechargeable batteries or dry batteries) from the CD player. 2 Connect the power source while pressing x/CHG. To turn on the beep sound Remove the power source and then connect the power source without pressing x/CHG.
-
 1
1 -
 2
2
 |
 |