Sony DPP-EX50 Note: attaching the Clamp Filter - Page 1
Sony DPP-EX50 Manual
 |
UPC - 027242639546
View all Sony DPP-EX50 manuals
Add to My Manuals
Save this manual to your list of manuals |
Page 1 highlights
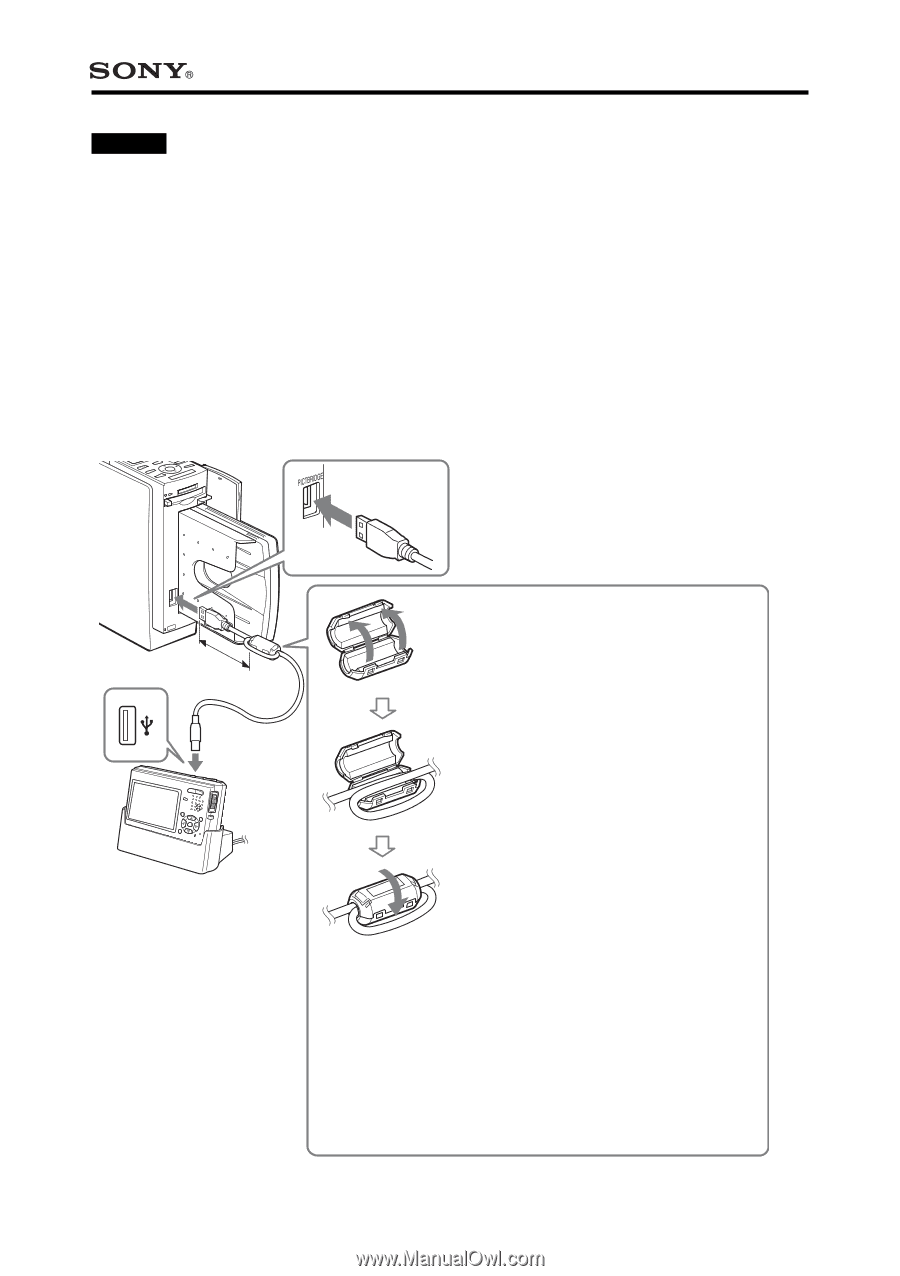
DPP-EX50 English How to attach the clamp filter (On connecting a PictBridge-compliant digital camera, page 82, Operating Instructions) If the USB cable supplied with your PictBridge-compliant digital camera is not equipped with ferrite cores, be sure to attach the supplied clamp filter for noise prevention as illustrated below before using the unit. To conform to radiation standards, you must attach ferrite cores to one end of the USB cable. If no ferrite cores are attached, other devices may be affected by radiation noise. (4Winitchhiens1) 0 cm 1 Release the lock of the clamp filter with a screwdriver or a similar tool. 2 Wind the cable into the clamp filter one time. 3 Close the clamp filter. Attach the clamp filter as close to the plug as possible (within 10 cm (4 inches)) that is connected to the printer's USB connector. © 2004 Sony Corporation Printed in Korea 2-024-048-11(1)
-
 1
1 -
 2
2
 |
 |