Sony DPP-SV55 Operating Instructions: Software Guide - Page 1
Sony DPP-SV55 - Ms Printer Manual
 |
View all Sony DPP-SV55 manuals
Add to My Manuals
Save this manual to your list of manuals |
Page 1 highlights
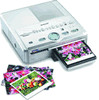
Additional Information Precautions On safety • Operate the printer on 120 V AC, 60 Hz (for the US model) or 220 to 240 V AC, 50/60 Hz (for the models for other areas) only. • Be careful not to set or drop any heavy objects on the power cord, or to damage the power cord in any way. Never operate this printer with a damaged power cord. • Should any solid object or liquid fall into the cabinet, unplug the printer and have it checked by qualified personnel before operating it any further. • Never disassemble the printer. • To disconnect the power cord, pull it out by the plug. Never pull the power cord itself. • When the printer is not going to be used for an extended period of time, disconnect the power cord from the wall outlet. • Do not handle the printer roughly. • To reduce the risk of electrical shock, always unplug the printer from the electrical outlet before cleaning and servicing the printer. On installation • Avoid placing the printer in a location subject to: - vibration - high humidity - excessive dust - direct sunlight - extremely high or low temperatures • Do not use electrical equipment near the printer. The printer will not work properly in electromagnetic fields. • The printer is designed to operate horizontally. Never attempt to operate the printer in a tilted position. • Do not place heavy objects on the printer. • Leave enough room around the printer so that the ventilation holes are not blocked. Blocking these holes may cause internal heat build-up. On moisture condensation If the printer is brought directly from a cold location to warm location or placed in an extremely warm or humid room, moisture may condense inside the unit. In such cases the printer will probably not work properly and may even develop a fault if you persist in using it. If moisture condensation occurs, turn off the power and do not use the printer for at least one hour. On transport When you transport the printer, remove the print cartridge, paper tray, the "Memory Stick" or PC card from the printer and put the printer and its peripherals in the original box with the protective packaging. If you no longer have the original box and packing parts, use similar packing material so that the printer will not be damaged while transporting. On cleaning Clean the cabinet, panel and controls with a soft dry cloth, or a soft cloth lightly moistened with a mild detergent solution. Do not use any type of solvent, such as alcohol or benzine, which may damage the finish. On restrictions on duplication If duplicating documents with the printer, pay special attention to the following: • Duplication of banknotes, coins, or securities is against the law. • Duplication of blank certificates, licenses, passports, private securities, or unused postal stamps is also against the law. • TV program, films, video tapes, others' portraits or other materials may be copyrighted. Unauthorized video printing of such materials may infringe the provisions of the copyright law. Troubleshooting If you run into any problems using the printer, use the following to solve the problem. If the problem persists, consult your Sony dealer. Cannot operate the printer after the power switch is turned on. m Connect the AC power cord to an AC outlet securely. The television displays no images. m Set the input selector of the television to "VIDEO." m Connect the printer to the television properly and turn them on. m Insert a "Memory Stick" or PC card securely. Check that images are recorded. m Press INPUT SELECT to turn on the proper indicator. Cannot remove the print cartridge. m Turn the printer off then on. After the motor sound stops, try to remove the cartridge. Cannot print. m Insert the correct set of print cartridge and print paper. m Check that the paper tray has paper. m The thermal head may be overheated. Leave the printer until the head cools down and the printer resumes printing. m Remove the jammed paper, if any. An image in thumbnail list is not properly displayed or printed. m If the image is displayed but is not be printed, the file for printing is damaged. m If an image is not compatible with DCF (Design rule for Camera File system), it may not be printed with the printer even if it is displayed on the PC monitor. m Some types of PC card adaptor that is not compatible with PCMCIA ATA cannot be used with the printer. The beeps sound. m Check that you operate with the correct procedures. The or indicator is lit or an error message is displayed. m Follow the instructions on the screen. If paper jams If the print paper jams, the paper error indicator lights and an error message is displayed. Printing stops. Turn off and on the printer and remove the jammed paper from the paper outlet or take out the paper tray to remove the jammed paper. Note If you cannot remove the jammed paper, contact your Sony dealer. Take out the paper tray to remove the jammed paper. Pull out the jammed paper slowly. About "Memory Stick" and PC card The printer can read and write "Memory Stick" and PC card (PCMCIA ATA compatible type II flash memory cards with a power specification of 5V or 3.3/5V). By using a commercially available PC card adaptor, you can also use Smart Media and other types of compact flash cards. On "Memory Stick" There are two types of "Memory Stick": general "Memory Stick" and "MagicGate Memory Stick." The "MagicGate Memory Stick" is equipped with the MagicGate copyright protection technology that uses encryption technology. You can use both types of "Memory Stick" with your printer. However, because the printer does not support the MagicGate standards, data recorded with the printer is not subject to MagicGate copyright protection. To protect "Memory Stick" images To prevent accidental erasure of important image data, slide the write protect switch on the "Memory Stick" to the write protect position when you just view the images. Only when you write, delete data, or format a "Memory Stick," slide it to the write enable position. Connector Write enable Write position protect position LOCK LOCK Place the label here Notes •You cannot use the PC cards with the power specification of 3V only. •Do not insert other types of PC card into the printer's insertion slot. The printer may be damaged. •Do not drop, bent, or submit the "Memory Stick" or PC card to external shock. •Do not disassemble or modify the "Memory Stick" or PC card. •Avoid getting liquids on the "Memory Stick" or PC card. •Avoid using or storing the "Memory Stick" or PC card in a location subject to: - extremely high temperature such as the hot inside of a car or the outdoors exposed to a burning sun, or a place near a heater. - direct sunlight - high humidity - corrosive substances - excessive dust - electrostatic or electronic noises - magnetic fields •Avoid touching the connector of the "Memory Stick" or contacting it with a metal object. •When attaching a label to the "Memory Stick" as specified in the illustration, use the label supplied for the "Memory Stick" only. Do not use any other labels. •When storing and carrying the "Memory Stick" or PC card, keep it in its original case to ensure protection of important data. •Avoid removing the "Memory Stick" or PC card from the insertion slot or turning off the power of the printer while the printer is accessing the "Memory Stick" or PC card. Otherwise, data may be rendered unreadable. • When using a compact flash card or Smart Media, use a commercially available PC card adaptor that is compatible with the card. Attach the card into the adaptor and then insert it into the printer. For how to install the card and adaptor, refer to the operating instructions of the PC card adaptor. •Avoid inserting or removing the compact flash card or Smart Media into or out of the PC card adaptor while the PC card adaptor is inserted in the printer. The data may be rendered unreadable or erased. Specifications Printing system Sublimation dye transfer printing (Yellow/ Magenta/Cyan 3 pass) Resolution 403 (H) x 403 (V) dpi Image processing 256 levels (8 bits for each Yellow/Magenta/ Cyan), approx. 16,770,000 colors Printing size 152.4 (H) x 101.6 (V) mm (maximum, Post Card Size, borderless) (6 x 4 inches) Printing time Approx. 90 seconds per sheet (Post Card Size Paper) Approx. 60 seconds per sheet (Small Size Paper) (excluding the time for data processing and data transferring from the personal computer or "Memory Stick" or PC card) Input/output connectors USB connector (1) VIDEO OUTPUT connector (phono jack x 1) 1 Vp-p, 75 ohms (unbalanced), sync negative Slot "Memory Stick" insertion slot (1) PC card insertion slot (PCMCIA II) (1) Compatible image file formats JPEG: 4:4:4, 4:2:2, 4:2:0 (baseline JPEG) BMP: 24 bits full color, Windows format (Note that some versions of the file formats may not be compatible.) Maximum number of files to be handled 999 files Print cartridge/Print Paper See "Using the printing pack" of the Operating Instructions - Basic Operations. Power requirements 120 V AC, 60 Hz, 1.16 A (for the US model) 220 - 240 V AC, 50/60 Hz, 0.62A (for the models for other areas) Power consumption (standby mode) Approximately 1 W Operating temperature 5 ˚C to 35 ˚C (41 ˚F to 95 ˚F) Dimensions Approx. 242 x 72 x 267 mm (w/h/d, excluding protruding parts) (9 5/8 x 2 7/8 x 10 5/8 inches) (363 mm (14 3/8 inches) of depth when the paper tray is installed.) Mass Approx. 2.1 kg (4 lb 10 oz) (excluding the 0.1 kg (4 oz) paper tray) Supplied accessories See "Unpacking the printer" of the Operating Instructions - Basic Operations. Design and specifications are subject to change without notice. Identifying the parts Printer 1 2 3456 7 POWER MEMORY PC INPUT AUTO CREATIVE STICK CARD PC SELECT ALL DPOF PRINT MENU EFFECT PRINT SAVE CANCEL PICTURE ENTER PRINT QTY PRINT qf qd qs qa q; 9 8 qg qh qj qk ql w; wa Front 1 POWER switch 2 INPUT SELECT button Switches the input among "MEMORY STICK," "PC CARD," or "PC." (The selected indicator lights.) 3 AUTO PRINT button Selects the automatic printing of "ALL" images or "DPOF" images. (The selected printing indicator lights.) 4 MENU button Displays the menu to change printer settings. 5 EFFECT button Displays the menu to add effects to the pictures. 6 CREATIVE PRINT button Displays the menu to make creative prints. 7 SAVE button Saves an image on a "Memory Stick" or PC card. 8 Cartridge error indicator 9 PRINT button 0 Paper error indicator qa ENTER/PRINT QTY button qs CANCEL button qd Arrow (B/b/V/v) button qf PICTURE button Switches the thumbnail list and preview image. qg PC card eject button qh PC CARD insertion slot qj "MEMORY STICK" insertion slot qk Cartridge compartment lid ql Paper tray compartment lid w; Print cartridge eject lever wa Print cartridge 12 Rear 1 USB connector 3 2 AC IN connector 3 VIDEO OUT connector Paper tray 1 1 lid 2 Partition 2 Screen Thumbnail list 12 3 45 6 7 8 1 Print preset (DPOF) indication Indicates the image is DPOF preset for printing by a digital still camera. 2 Image number 3 "Memory Stick"/PC Card indication Indicates the type of current media. 4 Protect indication 9 Indicates the image is protected by a digital still camera. 5 Cursor (yellow frame) q; Indicates the image with the cursor. 6 Selection (orange) Indicates the image is selected. Preview image 192 3 qa 7 Image quantity indication Displays the quantity of all the images inside the card when no image is selected. Displays the quantity of the selected images when an image is/images are selected. 8 Print cartridge indication 78 Indicates the type of print cartridge currently loaded (S: Small Size). 9 Print quantity indication Indicates the print quantity specified by pressing ENTER button. 0 Scroll bar q; Indicates the position of the image currently displayed or selected in the total number of images. qa Guide message Displays the simplified instructions for the next step. qa 4 3-205-182-13(1) Digital Photo Printer Operating Instructions - Software Guide/Additional Information This manual describes the additional information and the installation and basic operations of the software supplied with the Sony Digital Photo Printer DPP-SV55. First read "Operating instructions - Basic Operations" and then read this manual and retain it for future reference. For advanced operation of the printer, also refer to "Operating Instructions - Advanced Operations." DPP-SV55 2000 Sony Corporation Notice for users Program © 2000 Sony Corporation Documentation ©2000 Sony Corporation All rights reserved. This manual or the software described herein, in whole or in part, may not be reproduced, translated or reduced to any machine readable form without prior written approval from Sony Corporation. IN NO EVENT SHALL SONY CORPORATION BE LIABLE FOR ANY INCIDENTAL, CONSEQUENTIAL OR SPECIAL DAMAGES, WHETHER BASED ON TORT, CONTACT, OR OTHERWISE, ARISING OUT OF OR IN CONNECTION WITH THIS MANUAL, THE SOFTWARE OR OTHER INFORMATION CONTAINED HEREIN OR THE USE THEREOF. User Registration To receive customer services, complete and return the registration card included in your package. Any design data such as sample pictures provided in this software cannot be modified or duplicated except for the purpose of personal use. Any unauthorized duplication of this software is prohibited under copyright law. Please note that unauthorized duplication or modification of others' portraits or copyrighted work could infringe the rights reserved by right holders. By breaking the seal of the envelope of the CDROM package, you accept all the terms and conditions of this agreement. If you do not accept these terms and conditions, please return this disk envelope unopened, along with the rest of the package, immediately to the dealer where you obtained it. Sony Corporation reserves the right to make any modification to this manual or the information contained herein at any time without notice. The software described herein may also be governed by the terms of a separate user license agreement. Printed in Japan
-
 1
1 -
 2
2
 |
 |
