Sony DSC S50 Operating Instructions - Page 9
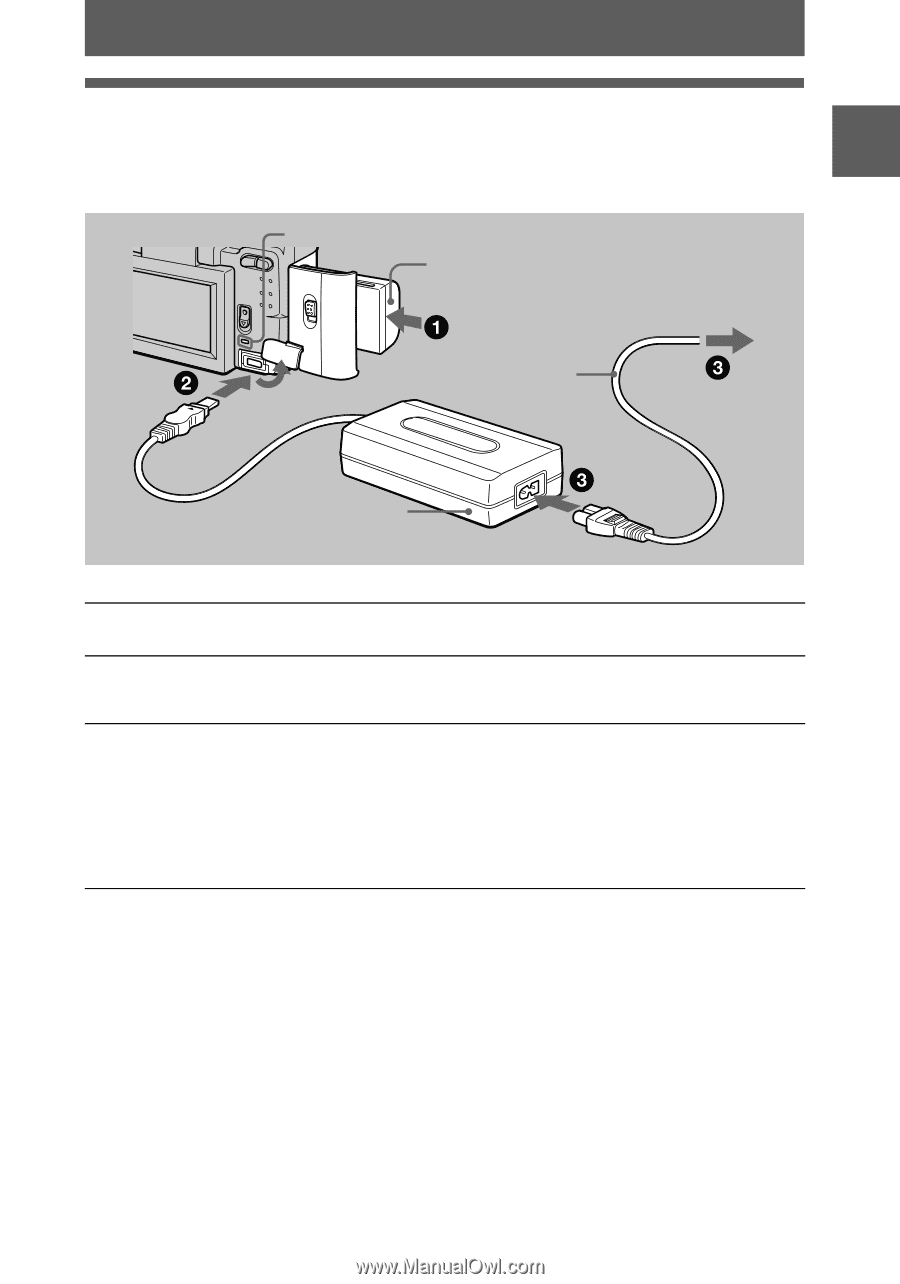
Charging the battery pack, AC-L10, AC power adaptor, DC IN jack cover, To the wall outlet mains - power switch
 |
UPC - 027242571679
View all Sony DSC S50 manuals
Add to My Manuals
Save this manual to your list of manuals |
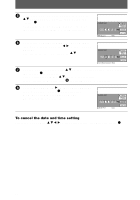
Page 9 highlights
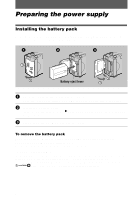
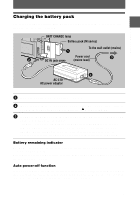
Getting started Charging the battery pack You cannot charge the battery pack while your camera is turned on. Be sure to turn off your camera before charging. BATT CHARGE lamp Battery pack (M series) To the wall outlet (mains) DC IN jack cover Power cord (mains lead) AC-L10 AC power adaptor 1 Insert the battery pack into your camera. 2 Open the DC IN jack cover and connect the DC connecting cable to the DC IN jack of your camera with the v mark facing up. 3 Connect the power cord (mains lead) to the AC power adaptor and then to a wall outlet (mains). The BATT CHARGE lamp lights orange when charging begins. When the BATT CHARGE lamp goes off, normal charge is completed. For full charge, which allows you to use the battery longer than usual, leave the battery pack inserted for about one hour after normal charge is completed. Battery remaining indicator The LCD screen on the camera shows the remaining time for which you can still record or play back images. This indication may not be entirely accurate depending on the conditions of use and the operating environment. Auto power-off function If you do not operate the camera for about three minutes during recording, the camera turns off automatically to prevent wearing down the battery. To use the camera again, slide down the POWER switch to turn on the camera again. 9
-
 1
1 -
2
-
3
-
 4
4 -
 5
5 -
 6
6 -
 7
7 -
 8
8 -
 9
9 -
 10
10 -
 11
11 -
 12
12 -
 13
13 -
 14
14 -
15
-
16
-
17
-
18
-
19
-
20
-
21
-
22
-
23
-
24
-
25
-
26
-
27
-
28
-
29
-
30
-
31
-
32
-
33
-
34
-
35
-
36
-
37
-
38
-
39
-
40
-
41
-
42
-
43
-
44
-
45
-
46
-
47
-
48
-
49
-
50
-
51
-
52
-
53
-
54
-
55
-
56
-
57
-
58
-
59
-
60
-
61
-
62
-
63
-
64
-
65
-
66
-
67
-
68
 |
 |