Sony DSLR A350 Instruction Manual - Page 20
counterclockwise until it stops., Replace the cap on the lens - parts
 |
UPC - 027242727281
View all Sony DSLR A350 manuals
Add to My Manuals
Save this manual to your list of manuals |
Page 20 highlights
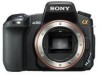
To remove the lens 1 Press the lens release button all the way in and turn the lens counterclockwise until it stops. • When changing the lens, quickly change the lens away from dusty locations so as to keep dust from getting inside the camera. 2 Replace the cap on the lens and attach the body cap to the camera. • Before you attach the cap, remove dust from the cap. Lens release button Note on changing the lens When changing the lens, if dust or debris gets inside the camera and lands on the surface of the image sensor (the part that acts as the film), it may appear on the image, depending on the shooting environment. The camera is equipped with an anti-dust function to prevent dust from landing on the image sensor. However, quickly change the lens away from dusty locations when attaching/removing a lens. If dust or debris lands on the image sensor Clean the image sensor using [Cleaning mode] in the (page 32). Setup menu 20
-
 1
1 -
2
-
3
-
4
-
5
-
6
-
7
-
8
-
9
-
10
-
11
-
12
-
13
-
14
-
 15
15 -
 16
16 -
 17
17 -
 18
18 -
 19
19 -
 20
20 -
 21
21 -
 22
22 -
 23
23 -
 24
24 -
 25
25 -
26
-
27
-
28
-
29
-
30
-
31
-
32
-
33
-
34
-
35
-
36
-
37
-
38
-
39
-
40
-
41
-
42
-
43
-
44
-
45
-
46
-
47
-
48
-
49
-
50
-
51
-
52
-
53
-
54
-
55
-
56
-
57
-
58
-
59
-
60
-
61
-
62
-
63
-
64
-
65
-
66
-
67
-
68
-
69
-
70
-
71
-
72
-
73
-
74
-
75
-
76
-
77
-
78
-
79
-
80
-
81
-
82
-
83
-
84
-
85
-
86
-
87
-
88
-
89
-
90
-
91
-
92
-
93
-
94
-
95
-
96
-
97
-
98
-
99
-
100
-
101
-
102
-
103
-
104
-
105
-
106
-
107
-
108
-
109
-
110
-
111
-
112
-
113
-
114
-
115
-
116
-
117
-
118
-
119
-
120
-
121
-
122
-
123
-
124
-
125
-
126
-
127
-
128
-
129
-
130
-
131
-
132
-
133
-
134
-
135
-
136
-
137
-
138
-
139
-
140
-
141
-
142
-
143
-
144
-
145
-
146
-
147
-
148
-
149
-
150
-
151
-
152
-
153
-
154
-
155
-
156
-
157
-
158
-
159
-
160
-
161
-
162
-
163
-
164
-
165
-
166
-
167
 |
 |
