Sony DSLR-A500H Instruction Manual - Page 99
Compensating automatically with rich gradation (Auto High Dynamic Range), D-RANGE button, Auto HDR
 |
View all Sony DSLR-A500H manuals
Add to My Manuals
Save this manual to your list of manuals |
Page 99 highlights
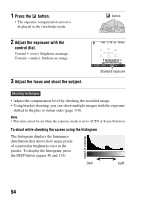
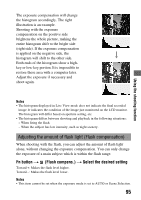
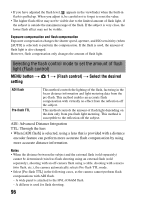
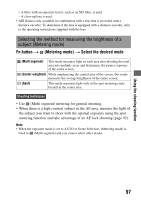
Using the shooting function Notes • The setting is fixed to (Off) when (Sunset) or (Night Port./View) is selected in Scene Selection. The setting is fixed to (Auto) when other modes are selected in Scene Selection. • When shooting with the D-Range optimizer, the image may be noisy. Select the proper level by checking the recorded image, especially when you enhance the effect. Compensating automatically with rich gradation (Auto High Dynamic Range) 1 D-RANGE button t (Auto HDR) 2 Select an optimal level with b/B on the controller. (Auto Exposure Diff.) (Exposure Difference Level)* Corrects the exposure difference automatically. Sets the exposure difference, based on the contrast of the subject. Select the optimal level between 1.0Ev (weak) and 3.0Ev (strong). * _Ev displayed with is the step currently selected. Shooting technique • Since the shutter is released twice for one shot, be careful about the following: - Use this function when the subject is motionless or does not blink. - Do not recompose. - When you photograph people, we recommend that you use the Live View mode. Notes • When the exposure mode is set to AUTO or Scene Selection, you cannot select [Auto HDR]. • You cannot start the next shoot until the capture process is completed after you shoot. 99
-
 1
1 -
2
-
3
-
4
-
5
-
6
-
7
-
8
-
9
-
10
-
11
-
12
-
13
-
14
-
15
-
16
-
17
-
18
-
19
-
20
-
21
-
22
-
23
-
24
-
25
-
26
-
27
-
28
-
29
-
30
-
31
-
32
-
33
-
34
-
35
-
36
-
37
-
38
-
39
-
40
-
41
-
42
-
43
-
44
-
45
-
46
-
47
-
48
-
49
-
50
-
51
-
52
-
53
-
54
-
55
-
56
-
57
-
58
-
59
-
60
-
61
-
62
-
63
-
64
-
65
-
66
-
67
-
68
-
69
-
70
-
71
-
72
-
73
-
74
-
75
-
76
-
77
-
78
-
79
-
80
-
81
-
82
-
83
-
84
-
85
-
86
-
87
-
88
-
89
-
90
-
91
-
92
-
93
-
 94
94 -
 95
95 -
 96
96 -
 97
97 -
 98
98 -
 99
99 -
 100
100 -
 101
101 -
 102
102 -
 103
103 -
 104
104 -
105
-
106
-
107
-
108
-
109
-
110
-
111
-
112
-
113
-
114
-
115
-
116
-
117
-
118
-
119
-
120
-
121
-
122
-
123
-
124
-
125
-
126
-
127
-
128
-
129
-
130
-
131
-
132
-
133
-
134
-
135
-
136
-
137
-
138
-
139
-
140
-
141
-
142
-
143
-
144
-
145
-
146
-
147
-
148
-
149
-
150
-
151
-
152
-
153
-
154
-
155
-
156
-
157
-
158
-
159
-
160
-
161
-
162
-
163
-
164
-
165
-
166
-
167
-
168
-
169
-
170
-
171
-
172
-
173
-
174
-
175
-
176
-
177
-
178
 |
 |
