Sony F35 Product Manual (F35 Operation Manual) - Page 25
Mounting the Camera to a Tripod, When the second viewfinder is required, To detach the viewfinder - weight
 |
View all Sony F35 manuals
Add to My Manuals
Save this manual to your list of manuals |
Page 25 highlights
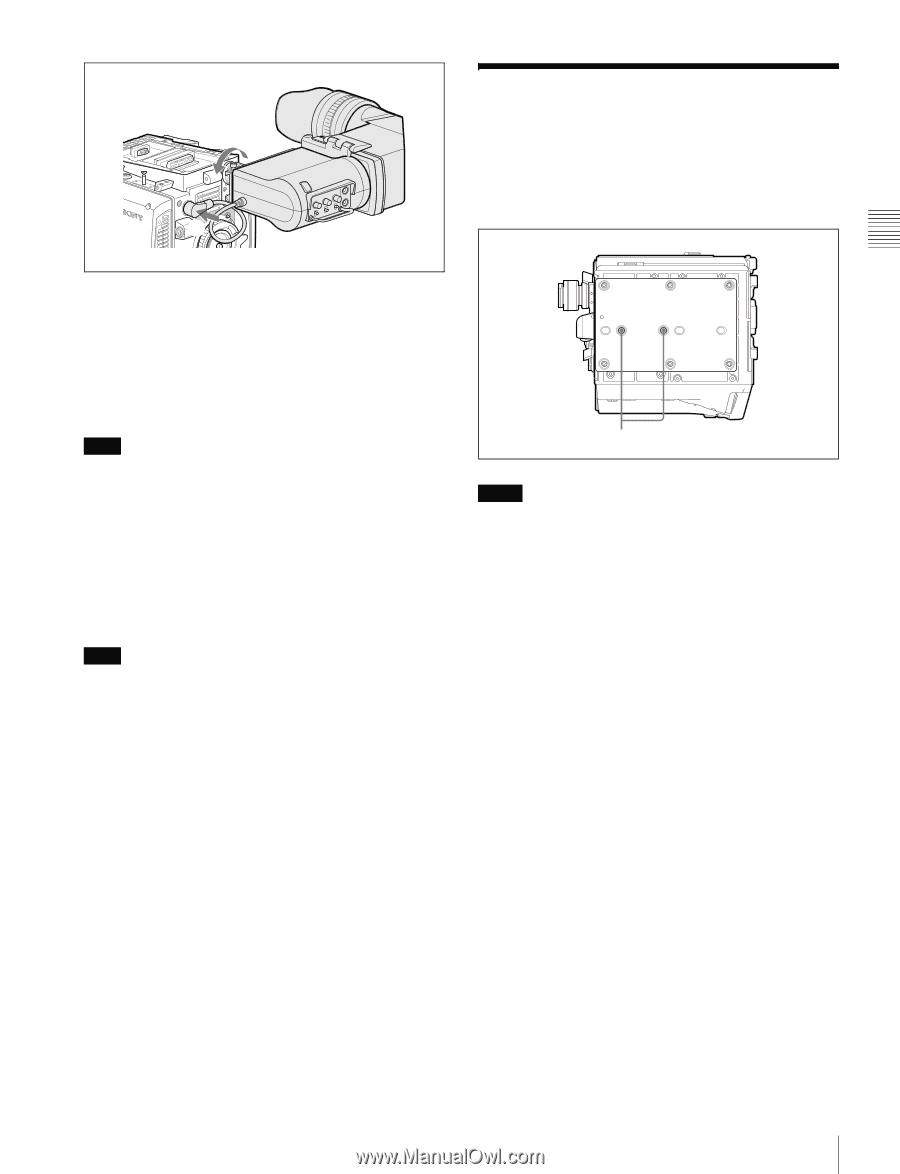
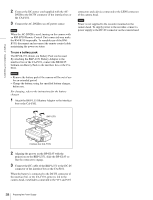
Chapter 2 Installation and Preparations 1 VF1 2 CTRL 2-6 Mounting the Camera to a Tripod Two tripod receptacles (for 3/8" camera screws) are provided on the bottom of the camera head. When the supplied center handle is attached to the top of the camera head, you can attach the viewfinder to the viewfinder shoe of the center handle. In this case, first remove the viewfinder shoe from the camera head. For details on the center handle, see "2-7-2 Center Handle (Supplied)" (page 26). Note When the L handle is attached to the camera head, the attaching condition may be limited, owing to the viewfinder position and the rotating position of the hood. When the second viewfinder is required Connect it to the VF2 connector. Using the menus, you can specify the display condition independently of the viewfinder connected to the VF1 connector. Note When two viewfinders are connected at the same time (via the VF1 and VF2 connectors), the HDVF-C950W cannot be used because of a limitation of current capacity. To detach the viewfinder Loosen the viewfinder positioning ring, pull on the viewfinder stopper, then pull out the viewfinder by sliding it in the direction opposite that when attaching. Tripod receptacles Notes • Select an appropriate hole, considering the balance of the weight of the camera. If an inappropriate hole is selected, the camera may fall over. • Check that the size of the selected hole matches that of the screw of the tripod. If they do not match, the camera cannot be attached to the tripod securely. 25 Mounting the Camera to a Tripod
-
 1
1 -
2
-
3
-
4
-
5
-
6
-
7
-
8
-
9
-
10
-
11
-
12
-
13
-
14
-
15
-
16
-
17
-
18
-
19
-
 20
20 -
 21
21 -
 22
22 -
 23
23 -
 24
24 -
 25
25 -
 26
26 -
 27
27 -
 28
28 -
 29
29 -
 30
30 -
31
-
32
-
33
-
34
-
35
-
36
-
37
-
38
-
39
-
40
-
41
-
42
-
43
-
44
-
45
-
46
-
47
-
48
-
49
-
50
-
51
-
52
-
53
-
54
-
55
-
56
-
57
-
58
-
59
-
60
-
61
-
62
-
63
-
64
-
65
-
66
-
67
-
68
-
69
-
70
-
71
-
72
-
73
-
74
-
75
-
76
-
77
-
78
-
79
-
80
-
81
-
82
-
83
-
84
-
85
-
86
-
87
-
88
-
89
-
90
-
91
-
92
-
93
-
94
-
95
-
96
-
97
-
98
-
99
-
100
-
101
-
102
-
103
-
104
-
105
-
106
-
107
-
108
-
109
-
110
-
111
-
112
-
113
-
114
-
115
-
116
-
117
-
118
-
119
-
120
-
121
-
122
-
123
-
124
-
125
-
126
-
127
-
128
-
129
-
130
-
131
-
132
-
133
-
134
-
135
-
136
-
137
-
138
-
139
-
140
-
141
-
142
 |
 |