Sony HDR-FX1 Operating Instructions
Sony HDR-FX1 - Handycam Camcorder - 1080i Manual
 |
UPC - 027242654815
View all Sony HDR-FX1 manuals
Add to My Manuals
Save this manual to your list of manuals |
Sony HDR-FX1 manual content summary:
- Sony HDR-FX1 | Operating Instructions - Page 1
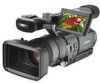
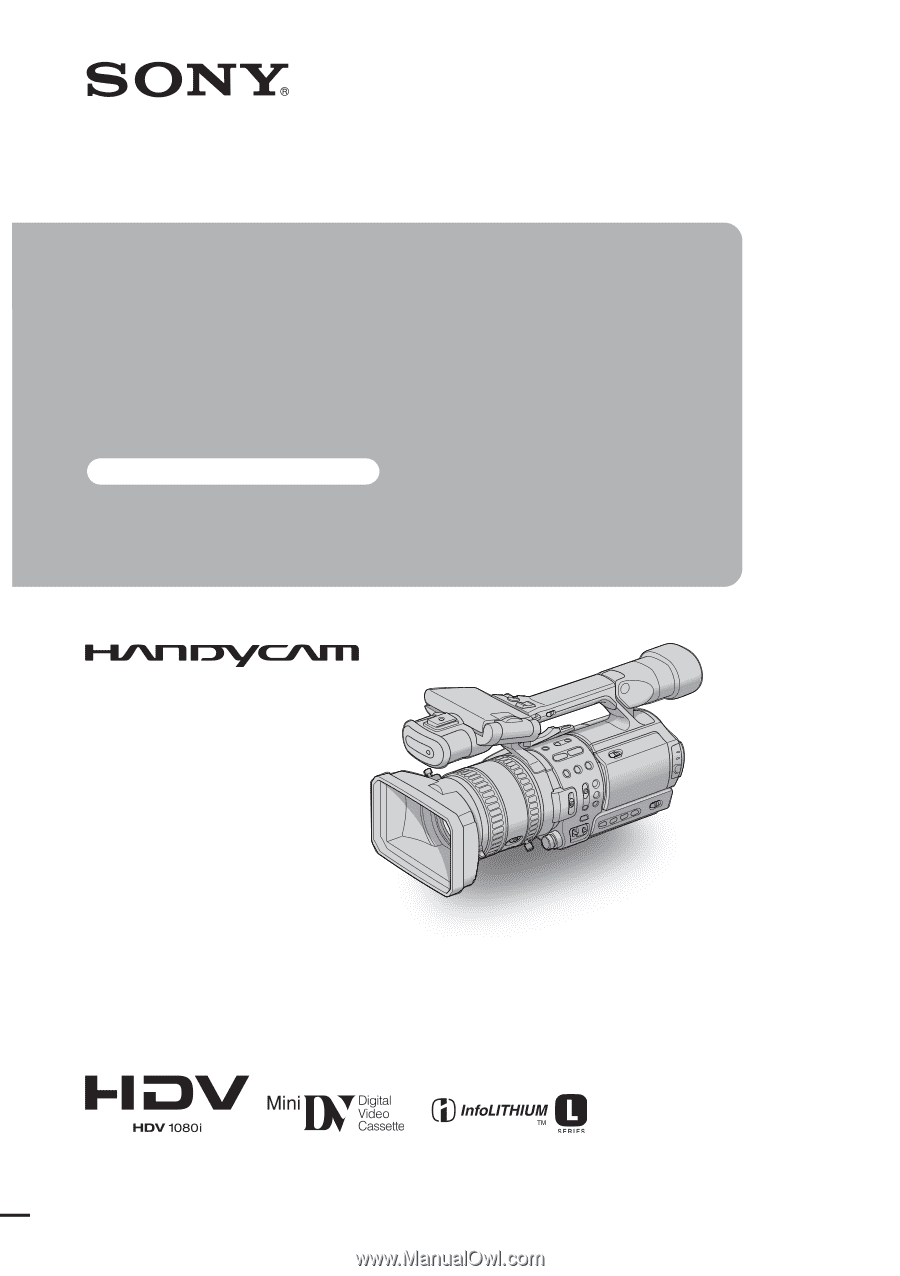
Operating Instructions Read this first Digital HD Video Camera Recorder HDR-FX1 2-178-348-11(1) © 2004 Sony Corporation - Sony HDR-FX1 | Operating Instructions - Page 2
please read this manual thoroughly, and retain to the presence of important operating and maintenance (servicing) instructions in the literature accompanying the appliance. For Declaration of Conformity Trade Name: SONY Model No.: HDR-FX1 Responsible Party: Sony Electronics Inc. Address: 16450 W. - Sony HDR-FX1 | Operating Instructions - Page 3
expressly approved in this manual could void your authority to radio frequency energy and, if not installed and used in accordance with the instructions, may cause harmful interference to radio the picture and sound are recorded without any problems. • Compensation for the contents of recordings - Sony HDR-FX1 | Operating Instructions - Page 4
the wrong direction, the terminal may be damaged, or this may cause a malfunction of your camcorder. Using this manual The images of the LCD screen and the viewfinder used on this manual are captured using a digital still camera, and thus may appear different from what you see. Using the camcorder - Sony HDR-FX1 | Operating Instructions - Page 5
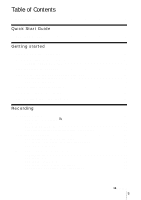
Table of Contents Read this first 2 Quick Start Guide Recording movies 8 Getting started Step 1: Checking supplied lit by strong light - SPOT LIGHT 25 Adjusting the white balance 26 Recording using manual adjustments 27 Adjusting the iris ...28 Adjusting the gain ...28 Adjusting the shutter - Sony HDR-FX1 | Operating Instructions - Page 6
Adjusting the focus 32 Adjusting the focus manually 32 Enhancing the outline to focus - PEAKING SEARCH 44 Displaying the screen indicators 44 Displaying the date/time and camera settings data - Data code 44 Displaying the video information - Status check 45 Playing the picture on a TV 46 - Sony HDR-FX1 | Operating Instructions - Page 7
your camcorder - Signal conversion function ........81 Troubleshooting Troubleshooting 83 Warning indicators and messages .....88 Additional Information 98 Quick Reference Identifying parts and controls ...........100 Index 107 Note on the icons used in this manual : Features available for the - Sony HDR-FX1 | Operating Instructions - Page 8
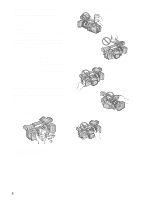
Quick Start Guide Recording movies 1 Attach the charged battery pack to the camcorder. To charge the battery, see page 11. Press the battery pack compartment cassette. the cassette compartment comes out automatically. slides back in by itself. OPEN/EJECT lever Window-side 8 Quick Start Guide - Sony HDR-FX1 | Operating Instructions - Page 9
Quick Start Guide 3 Start recording while checking the subject on the LCD screen. The date and time is not set up in the default setting. To set (rewind). c Press N (play) to start the playback. To stop, press x (stop). To turn off the power, set the POWER switch to OFF (CHG). Quick Start Guide 9 - Sony HDR-FX1 | Operating Instructions - Page 10
camcorder, see page 16. Rechargeable battery pack NP-F570 (1) Size AA (R6) batteries (2) To insert the batteries in the Remote Commander, see page 105. Cleaning cassette (1) Shoulder strap (1) To attach it to your camcorder, see page 101. Operating Instructions (This manual) (1) 10 Getting started - Sony HDR-FX1 | Operating Instructions - Page 11
Getting started Step 2: Charging the battery pack You can charge the battery by attaching the "InfoLITHIUM" battery pack (L series) to your camcorder. b Note • You cannot use batteries other than the "InfoLITHIUM" battery pack (L series) (p. 92). • Do not short-circuit the DC plug of the AC Adaptor - Sony HDR-FX1 | Operating Instructions - Page 12
5 Set the POWER switch to OFF (CHG). The CHG (charge) lamp lights up and charging starts. To check the remaining battery - Battery Info After charging the battery The CHG (charge) lamp turns off when the battery is fully charged. Disconnect the AC Adaptor from the DC IN jack. To remove the battery - Sony HDR-FX1 | Operating Instructions - Page 13
Charging time Approximate number of minutes required when you fully charge a fully discharged battery pack at 25°C (77°F). (10 - 30°C (50 - 86°F) recommended.) Battery pack NP-F570 (supplied) 260 NP-F770 370 NP-F970 485 b Note • NP-F330/F530/500/510/710 battery packs cannot be used with your - Sony HDR-FX1 | Operating Instructions - Page 14
• The CHG (charge) lamp flashes during charging, or the battery information will not be correctly displayed in following conditions. - The battery pack is not attached correctly. - The battery pack is damaged. - The battery pack is fully discharged. (For Battery information only.) Using an outside - Sony HDR-FX1 | Operating Instructions - Page 15
Getting started Step 4: Adjusting the LCD panel and viewfinder Adjusting the LCD panel You can adjust the angle and brightness of the LCD panel to meet various recording situations. Even when there are obstructions between you and the subject, you can check the subject on the LCD screen during - Sony HDR-FX1 | Operating Instructions - Page 16
When the picture in the viewfinder is hard to see If you cannot see the picture in the viewfinder clearly under bright circumstances, use the supplied large eyecup. To attach the large eyecup, stretch it a little and align it with the groove of the viewfinder, then slide it up to the end. You can - Sony HDR-FX1 | Operating Instructions - Page 17
Getting started 3 Press MENU. CAMERA SET WB PRESET AE RESPONSE GA I N SETUP SHOT TRANS STEADYSHOT STDYSHOT TYP FLCKR REDUCE [ MENU ] : END 4 Select the (OTHERS) menu by turning the SEL/PUSH EXEC dial, then press the dial. OTHERS RETURN ASS I GN BTN CLOCK SET WORLD T I ME LANGUAGE BEEP REC LAMP - Sony HDR-FX1 | Operating Instructions - Page 18
2 Insert a cassette with its window-side facing out. Window-side Push the center of the back of the cassette lightly. Step 7: Setting the screen language You can select the language to be used on the LCD screen. 3 Press on the cassette compartment. The cassette compartment automatically - Sony HDR-FX1 | Operating Instructions - Page 19
Getting started 5 Select [LANGUAGE] by turning the SEL/PUSH EXEC dial, then press the dial. 0:00:00 LANGUAGE ENGLISH ENG [ S I MP ] FRANÇA I S ESPAÑOL PORTUGUÊS [ MENU ] : END 6 Select the desired language by turning the SEL/PUSH EXEC dial, then press the dial. 7 Press MENU to hide the menu screen. - Sony HDR-FX1 | Operating Instructions - Page 20
Recording Recording movies You can record movies in either the HDV or the DV format. Before recording, follow steps 1 to 7 in "Getting started" (p. 10 - p. 18). Movies will be recorded along with stereo sound. Format lamps Camera recording lamp Camera recording lamp POWER switch and REC START/ - Sony HDR-FX1 | Operating Instructions - Page 21
1 minute to display the correct remaining battery time. C Recording status ([STBY] (standby) or [REC] (recording)) D Time code or tape counter (hour: minute: second) The time code of this camcorder utilizes the drop-frame system. E Recording capacity of the tape (p. 64) F Microphone volume - Sony HDR-FX1 | Operating Instructions - Page 22
back only on this camcorder. Using zoom 1 Set the ZOOM switch to LEVER/ REMOTE. 2 Press the power zoom lever slightly for a slower zoom. Press it further with that side of the lever. 22 Recording 1 Set the ZOOM switch to LEVER/ REMOTE. 2 Set the handle zoom switch to H (high) or L (low). You - Sony HDR-FX1 | Operating Instructions - Page 23
as the zoom motor rotates at high speeds. If the motor noise is so loud that can be recorded, use the zoom lever or the Remote Commander. Recording in mirror mode You can turn the LCD panel towards the subject so that you and your subject can share the image being - Sony HDR-FX1 | Operating Instructions - Page 24
Displaying the recording setup information - Status check b Note • Information of the picture profile setup does not appear when it is set to [OFF]. You can check the setup value of the following items in the standby mode or during recording. • Audio setup such as microphone volume level (p. 36) • - Sony HDR-FX1 | Operating Instructions - Page 25
darker pictures than those of the auto exposure adjustment, use the manual adjustment function (p. 27), or customize the picture quality by if 2 or more items out of iris, gain, and shutter speed are adjusted manually. Recording the subject lit by strong light - SPOT LIGHT When the subject is lit - Sony HDR-FX1 | Operating Instructions - Page 26
Adjusting the white balance You can adjust the white balance according to the light of the recording environment. The white balance adjustment data for 2 different recording conditions can be set up and memorized separately in memory A and B. During recording, you can recall the setup data from the - Sony HDR-FX1 | Operating Instructions - Page 27
the settings of these functions. Position Purpose AUTO LOCK To adjust automatically. Center (to To adjust manually. release the auto lock mode) HOLD Select this position after adjusting the settings manually to retain them. See page 26 for details on how to adjust the white balance. b Note - Sony HDR-FX1 | Operating Instructions - Page 28
iris You can manually adjust the light LOCK. b Note • If you set the AUTO LOCK switch to AUTO LOCK, other manually adjusted items (gain, shutter speed, white balance) also become temporarily automatic. • As you Adjust the gain manually when shooting blackish or dark objects if you do not want the AGC - Sony HDR-FX1 | Operating Instructions - Page 29
settings for each position are 18 dB (H), 9 dB (M) and 0 dB (L). The larger the number, the greater the gain. Adjusting the shutter speed You can manually adjust and fix the shutter speed for your convenience. Depending on the shutter speed, you can make the subject look still, or on the contrary - Sony HDR-FX1 | Operating Instructions - Page 30
off the indicator. b Note • If you move the ND FILTER switch during recording, the picture and sound may be distorted. • If you adjust the iris manually, no ND filter indicator will appear even if the ND filter should be activated. z Tip • If you close the iris extensively when recording a bright - Sony HDR-FX1 | Operating Instructions - Page 31
select [70], the zebra pattern appears at the part of 70±5 % of the brilliance signal. If you select [100+], the zebra pattern appears at all areas of the brilliance signal over 100 %. The default setting is [100+]. 5 Press MENU to hide the menu screen. 6 Set the ZEBRA/PEAKING switch to ZEBRA - Sony HDR-FX1 | Operating Instructions - Page 32
the focus. 9 changes to when the focus cannot be adjusted any farther. 9 changes to when the focus cannot be adjusted any closer. Tips for focusing manually • It is easier to focus on the subject when you use the zoom function. Move the power zoom lever towards T (telephoto) to adjust the focus - Sony HDR-FX1 | Operating Instructions - Page 33
cases. (It will not be displayed correctly if you are using a conversion lens (optional).) - When the focus mode is switched from automatic to manual. - When you rotate the focus ring. Enhancing the outline to focus - PEAKING z Tip • For easier focusing, use peaking together with the expanded focus - Sony HDR-FX1 | Operating Instructions - Page 34
Customizing the picture quality or sound Customizing the picture quality - PICTURE PROFILE You can customize the picture quality by adjusting the color intensity, brightness, white balance, etc. You can set 6 different picture quality settings depending on the recording time of day, the weather, or - Sony HDR-FX1 | Operating Instructions - Page 35
Item Adjustment [SKINTONE DTL] To make wrinkles less noticeable by suppressing the outlines on the part of skin color to be enhanced. [TYPE1] (the color range recognized as a skin color is narrow) to [TYPE3] (the color range recognized as a skin color is wide) In the case of [TYPE3], the effect - Sony HDR-FX1 | Operating Instructions - Page 36
bright that the aperture value set in [AT IRIS LMT] is not appropriate, the shutter speed may reach 1/2000 automatically. • If you adjust the gain manually, you cannot obtain the effect of [AGC LIMIT]. • If you select [CINEFRAME 24] when the shutter speed is slower than 1/30, the shutter speed is - Sony HDR-FX1 | Operating Instructions - Page 37
the depth of field by adjusting the iris. In addition, you can develop scenes under different recording conditions smoothly. If you register the manual adjustment function of the white balance, the scenes will develop smoothly between objects indoor and those outdoor. Use a tripod to avoid camera - Sony HDR-FX1 | Operating Instructions - Page 38
to the stored ones. 120min REC SHOT TRANS 0:00:05 EXEC SHOT A SHOT B S E Transition bar S: start E: end b Note • You cannot zoom, focus, or adjust manually while checking or activating the Shot transition. • When you change [SHOT TRANS] on the (CAMERA SET) menu, turn off the STORE/ CHECK/EXEC - Sony HDR-FX1 | Operating Instructions - Page 39
Recording 2 Press REC START/STOP. The FADER indicator stops flashing and disappears when the fade is complete. To cancel the operation Press the ASSIGN button assigned to the FADER function repeatedly until the FADER indicators disappear. b Note • You cannot use the FADER function together with [ - Sony HDR-FX1 | Operating Instructions - Page 40
format on the entire TV screen by setting [DV WIDE REC] on the (CAMERA SET) menu at the time of recording. Refer to the operating instructions supplied with your TV as well. [ON] Select [ON] to view the recorded pictures on a 16:9 wide TV screen. On the LCD screen or viewfinder - Sony HDR-FX1 | Operating Instructions - Page 41
Recording Reviewing the most recently recorded scenes - Rec Review You can view a few seconds of the scene recorded just before you stopped the tape. In the standby mode, press REC REVIEW. The last few seconds of the most recently recorded scene are played back. Then, your camcorder is set to the - Sony HDR-FX1 | Operating Instructions - Page 42
cassette inserted into your camcorder. Some of the operations are possible using the Remote Commander. When you want to play back recordings on your TV, see page ) B Remaining battery C Tape transport indicator D Time code (hour: minute: second: frame) or tape counter (hour: minute: second) The time - Sony HDR-FX1 | Operating Instructions - Page 43
. Also, you may see mosaic-like images of the previously played picture remaining on the screen. To Press change the playback direction* I (reverse) on the Remote Commander during playback. play back slowly y (slow) during playback. To reverse direction 1 Press I (reverse) on the - Sony HDR-FX1 | Operating Instructions - Page 44
the camera settings data that are automatically recorded while recording pictures on a tape. 1 Set the POWER switch to VCR. 2 Press DATA CODE on the camcorder or Remote Commander during playback or playback pause. Each time you press the button, the indicators appear in turn as follows: Date/time - Sony HDR-FX1 | Operating Instructions - Page 45
the date and time is displayed in the same area. If you record the picture without setting the clock off B Exposure C Aperture value If you manually adjust the aperture value to the maximum, OTHERS) menu, [DATA CODE] then [DATE] (p. 63). Each time you press DATA CODE, the date/ time indicator - Sony HDR-FX1 | Operating Instructions - Page 46
differ depending on the type of TV. Connect the supplied AC Adaptor to the wall outlet for the power supply (p. 14). Refer also to the instruction manuals supplied with the devices to be connected. To copy to another tape, see page 70. Viewing the picture on a high definition TV When you have - Sony HDR-FX1 | Operating Instructions - Page 47
format is played back, an equivalent signal with [480i] is output, even if [1080i/480i] is selected. • Only video signals are output from the COMPONENT OUTPUT jack. To output audio signals, connect the white and red plugs of the A/V connecting cable to the audio input jack of your TV. To connect the - Sony HDR-FX1 | Operating Instructions - Page 48
Viewing the picture on a 16:9 TV or a 4:3 TV When you have an S video jack on your TV or VCR S video cable (optional) TV or VCR A/V connecting Yellow cable (supplied) Component video cable (supplied) White Red Green Signal flow Blue Red Connect your camcorder and your TV or VCR using either - Sony HDR-FX1 | Operating Instructions - Page 49
Locating a scene on a tape for playback Searching quickly for a desired scene - Zero set memory Playback 1 During playback, press ZERO SET MEMORY on your camcorder or Remote Commander at the point you want to locate later on. The tape counter is reset to "0:00:00" and appears on the screen. If the - Sony HDR-FX1 | Operating Instructions - Page 50
b Note • There may be a discrepancy of several seconds between the time code and the tape counter. • Zero set memory will not function correctly if there the point where the date changes. To cancel the operation Press STOP on the Remote Commander. b Note • If 1 day's recording is less than 2 minutes, - Sony HDR-FX1 | Operating Instructions - Page 51
dial. CAMERA SET (p. 52) AUDIO SET (p. 56) LCD/VF SET (p. 58) REMOTE CTRL ON OFF [ MENU ] : END 5 Select the desired setting by turning the SEL I R I S D I AL LETTER S I ZE REMA I N I NG D I SP OUTPUT REMOTE CTRL [ MENU ] : END OFF STBY 6 Press MENU to hide the menu screen. To return to the - Sony HDR-FX1 | Operating Instructions - Page 52
Using the (CAMERA SET) menu - STDYSHOT TYP/FRAME REC, etc. You can select the items listed below on the CAMERA SET menu. For details on how to select items, see "Selecting menu items" (p. 51). The default settings are marked with G. The indicators in parentheses appear when the setting is selected. - Sony HDR-FX1 | Operating Instructions - Page 53
SHOT TRANS Select this setting to set the transition duration and time. See page 37 for details on using the shot transition function. TRANS TIME Select the time that takes to make a transition from the current setting to the selected setting. Duration from [2.0 sec] through [15.0 sec] are - Sony HDR-FX1 | Operating Instructions - Page 54
on the picture so the picture looks natural. Select when a wide conversion lens (optional) is attached. This mode is the most effective with Sony VCL-HG0872 wide conversion lens. FLCKR REDUCE GON OFF Select to record under normal conditions. Flickering of the screen under a light source such as - Sony HDR-FX1 | Operating Instructions - Page 55
pictures with a stop-motion animated effect by alternately recording a few frames and then moving the subject a little. Operate your camcorder using the Remote Commander to prevent camera shake. GOFF ON ( ) Select to record in the standard recording mode. Select to record pictures using the FRAME - Sony HDR-FX1 | Operating Instructions - Page 56
Using the (AUDIO SET) menu - AUDIO MIX, etc. You can select the items listed below on the AUDIO SET menu. For details on how to select items, see "Selecting menu items" (p. 51). The default settings are marked with G. The indicators in parentheses appear when the setting is selected. The settings - Sony HDR-FX1 | Operating Instructions - Page 57
WIND GON OFF MIC/LINE IN GEXT MIC LINE Standard setting. Select when you want to record the sound as it is without reducing the noise caused by wind. Select to input an audio signal when a microphone is connected to the MIC/LINE jack. Select to input an audio signal when an audio device is - Sony HDR-FX1 | Operating Instructions - Page 58
Using the (LCD/VF SET) menu - LCD COLOR, etc. You can select the items listed below on the LCD/VF SET menu. For details on how to select items, see "Selecting menu items" (p. 51). The default settings are marked with G. The settings you can adjust vary depending on the power mode of your camcorder. - Sony HDR-FX1 | Operating Instructions - Page 59
Using the Menu Using the (IN/OUT REC) menu - REC FORMAT/TV TYPE, etc. You can select the items listed below on the IN/ OUT REC menu. For details on how to select these items, see "Selecting menu items" (p. 51). The default settings are marked with G. The indicators in parentheses appear when the - Sony HDR-FX1 | Operating Instructions - Page 60
time to 1.5 times that of the SP mode (Long Play). The use of Sony Excellence/Master mini DV cassettes is recommended to get the most out of your on one tape, the playback picture may be distorted or the time code may not be written properly between the scenes. COMPONENT 480i G1080i/480i - Sony HDR-FX1 | Operating Instructions - Page 61
Using the Menu TV TYPE • Disconnect the i.LINK cable before setting [i.LINK CONV]. Otherwise, the connected video device may not be able to recognize the video signal from this camcorder. You need to convert the signal depending on the TV connected. G16:9 Select to view your pictures on a 16:9 - Sony HDR-FX1 | Operating Instructions - Page 62
can operate at the moment. Unavailable items will be grayed out. OTHERS RETURN ASS I GN BTN CLOCK SET WORLD T I ME LANGUAGE BEEP FORMAT LAMP DATA CODE [ MENU ] : END ASSIGN BTN You can assign functions to the ASSIGN buttons (p. 68). CLOCK SET You can set the date and time (p. 16). WORLD TIME - Sony HDR-FX1 | Operating Instructions - Page 63
rotate counter clockwise when looked at from the lens side to close the iris and decrease the light volume. DATA CODE Select the item to be displayed when you press DATA CODE (p. 44). GDATE/CAM DATE Select to display the date and time, or the camera settings data during playback. Select to - Sony HDR-FX1 | Operating Instructions - Page 64
INFO while [V-OUT/PANEL] is selected. REMOTE CTRL GON OFF Select when using the Remote Commander supplied with your camcorder. Select to deactivate the Remote Commander to prevent your camcorder from responding to a command sent by another VCR remote control unit. b Note • The setting returns to - Sony HDR-FX1 | Operating Instructions - Page 65
Using the Menu Customizing Personal Menu The available items vary depending on the power mode of your camcorder. Unavailable items will be grayed out. You can add frequently used menu items to Personal Menu, or sort them in the order you like (customizing). You can customize the Personal Menu for - Sony HDR-FX1 | Operating Instructions - Page 66
4 Select a menu category by turning the SEL/PUSH EXEC dial, then press the dial. 1 2 0min STBY Se l ec t t he i t em. RETURN WB PRESET AE RESPONSE GA I N SETUP SHOT TRANS STEADYSHOT STDYSHOT TYP [ P-MENU ] : END 0:00:00 5 Select a menu item by turning the SEL/ PUSH EXEC dial, then press the dial. - Sony HDR-FX1 | Operating Instructions - Page 67
Arranging the order of menus displayed on Personal Menu - Sort You can sort the menus added to Personal Menu in the desired order. 1 Press P-MENU. 1 2 0min STBY P-MENU END SHOT TRANS ASS I GN BTN REC FORMAT AE RESPONSE WB PRESET GA I N SETUP [ P-MENU ] : END 0:00:00 2 Select [P-MENU SETUP] by - Sony HDR-FX1 | Operating Instructions - Page 68
3 Select [RESET] by turning the SEL/ PUSH EXEC dial, then press the dial. 1 2 0min STBY 0:00:00 RESET I n i t i a l i ze CAMERA m o d e ' s P-MENU s e t t i n g ? YES NO [ P-MENU ] : END 4 Select [YES] by turning the SEL/ PUSH EXEC dial, then press the dial. 120min RESET STBY 0:00:00 Are - Sony HDR-FX1 | Operating Instructions - Page 69
Using the Menu by turning SEL/PUSH EXEC dial, then press the dial. [ASSIGN1] through [ASSIGN3] are available. [------] is displayed at the number that no function is assigned. 5 Select the function to be assigned by turning SEL/PUSH EXEC dial, then press the dial. 6 Select [OK] by turning SEL/PUSH - Sony HDR-FX1 | Operating Instructions - Page 70
Dubbing/Editing Dubbing to another tape Connecting a VCR You can copy a picture played back on your camcorder to other recording devices (such as VCRs). Connect your camcorder to a VCR as shown in the following illustration. To dub to an HDV compatible device Connect your camcorder to an HDV - Sony HDR-FX1 | Operating Instructions - Page 71
To dub to a DV device Connect your camcorder to a VCR using an i.LINK cable (optional). i.LINK compatible devices Dubbing/Editing HDV/DV jack i.LINK jack i.LINK cable (optional) Signal flow To select the video format to be dubbed The video format to be dubbed depends on the settings of [VCR - Sony HDR-FX1 | Operating Instructions - Page 72
To dub to an AV device Connect your camcorder to a VCR using the A/ V connecting cable (supplied). When you have an S video jack on your VCR * S video cable (optional) VCRs AUDIO/VIDEO jack Signal flow A/V connecting cable (supplied) * When there is an S video jack on the device to be connected - Sony HDR-FX1 | Operating Instructions - Page 73
the recorded cassette. • Set the POWER switch to VCR. 4 Start the playback on your camcorder, and record it on the VCR. Refer to the operating instructions supplied with your VCR for details. 5 When the dubbing is finished, stop your camcorder and the VCR. b Note • When you use an i.LINK cable, the - Sony HDR-FX1 | Operating Instructions - Page 74
Recording pictures from a VCR or TV Connecting a VCR or TV You can record pictures or TV programs from a VCR or TV on a tape inserted in your camcorder. To record from an HDV compatible device You can record and edit pictures from an HDV compatible VCR. Use your camcorder as a recorder and connect - Sony HDR-FX1 | Operating Instructions - Page 75
To record from a DV/AV device You can record and edit pictures or TV programs from a VCR or TV. Use your camcorder as a recorder and connect it to a VCR using the A/V connecting cable (supplied). You can connect a DV compatible device also using an i.LINK cable (optional). When you use an i.LINK - Sony HDR-FX1 | Operating Instructions - Page 76
Recording movies 7 Press x (stop) to stop recording. Insert a cassette for recording in your camcorder before the following operations. 1 Connect your TV or VCR to your camcorder as a playback device (p. 74). 2 If you are recording from a VCR, insert a cassette. 3 Set the POWER switch to VCR. 4 - Sony HDR-FX1 | Operating Instructions - Page 77
, the computer must have an i.LINK interface, and application software to read video signals must be installed on the computer. Refer to the manual supplied with the application software for the system requirements of the computer. HDV/DV jack i.LINK cable (optional) Connecting the computer • Before - Sony HDR-FX1 | Operating Instructions - Page 78
Dubbing sound to a recorded tape Preparing for audio dubbing You can record additional audio to the original sound on a tape recorded in the DV format. You can add sound to a tape already recorded in the 12-bit mode without erasing the original sound. Internal microphone Audio device (such as CD/ - Sony HDR-FX1 | Operating Instructions - Page 79
. The sound may deteriorate when you dub audio on a tape recorded on other camcorders (including other HDR-FX1 camcorders). z Tip • You can manually adjust the microphone volume when you are: - Recording sound from an external microphone or audio device connected to the MIC/LINE jack. - Recording - Sony HDR-FX1 | Operating Instructions - Page 80
5 Turn the SEL/PUSH EXEC dial to adjust the balance between the original sound (ST1) and the sound recorded afterwards (ST2), then press the dial. The original sound (ST1) is output in the default setting. The adjusted audio balance returns to the default setting about 5 minutes after the battery - Sony HDR-FX1 | Operating Instructions - Page 81
. To use the signal conversion function, application software to import video signals must be installed on the computer. Dubbing/Editing Refer to the manual supplied with the application software for the system requirements of the computer. When you have an S video jack on your VCR S video cable - Sony HDR-FX1 | Operating Instructions - Page 82
press the dial. 7 Press MENU to hide the menu screen. 8 Start playback on the analog device. 9 Start importing on the computer. Refer to the manual supplied with the program software or its on-line help for details. After importing the picture and sound Stop importing on the computer, and stop - Sony HDR-FX1 | Operating Instructions - Page 83
following table to troubleshoot the problem. If the problem Overall operations persists, remove the power source and contact your Sony dealer. If "C: linear mechanism. This is not a malfunction. The supplied Remote Commander does not function. cSet [REMOTE CTRL] on the (OTHERS) menu to [ON] (p. - Sony HDR-FX1 | Operating Instructions - Page 84
pack to the camcorder correctly. If the problem the battery pack is being charged. persists, disconnect the AC Adaptor from the wall outlet and contact your Sony dealer. The battery pack may be damaged menu to always displayed. display the remaining tape indicator (p. 64). 84 Troubleshooting - Sony HDR-FX1 | Operating Instructions - Page 85
LCD panel is open (p. 15). Recording Troubleshooting Symptom Cause and/or Corrective Actions The cWhen using the zoom lever on the Remote Commander, set the ZOOM switch to LEVER/REMOTE (p. 23). The handle zoom does for auto focus. Adjust the focus manually (p. 32). A vertical band appears - Sony HDR-FX1 | Operating Instructions - Page 86
was recorded without setting the date and time. • A blank section on the tape is being played. • The data code on a tape with a scratch or noise cannot be read. END SEARCH does not work. • The POWER switch is recorded in both HDV and DV formats. This is not a malfunction. 86 Troubleshooting - Sony HDR-FX1 | Operating Instructions - Page 87
during recording in the DV format while transferring pictures to the connected device, pictures disappear when switching from the normal size to the expanded size. Troubleshooting Troubleshooting 87 - Sony HDR-FX1 | Operating Instructions - Page 88
problem persists even after you tried a couple of times, contact your Sony dealer or local authorized Sony service cContact your Sony dealer or local authorized Sony service facility. Inform them of the 5-digit code, which 95). • The self-diagnosis display code is displayed (p. 88). * You hear a - Sony HDR-FX1 | Operating Instructions - Page 89
format. cStop inputting the playback signal, or reset [VCR HDV/DV] (p. 59). - - cSee page 96. * Appears only for the pictures recorded in the DV format. Troubleshooting Troubleshooting 89 - Sony HDR-FX1 | Operating Instructions - Page 90
to view playback pictures recorded in the HDV format. See the table below. It is recommended to use an i.LINK cable to connect these TVs. Sony TV models KD-34XBR960, KD-36XS955, KD-34XS955, KD-30XS955 KDE-55XBR950, KDE-50XS955, KDE-42XS955, KDE-37XS955 KDF-60WE655, KDF-55WE655, KDF-50WE655, KDF - Sony HDR-FX1 | Operating Instructions - Page 91
copyright protection.] appears on the LCD screen, or on the TV screen if you try to record such software. Your camcorder does not record copyright control signals on the tape when it records. Notes on cassette tapes To prevent accidental erasure Slide the write-protect tab on the cassette to set - Sony HDR-FX1 | Operating Instructions - Page 92
with Cassette Memory. are trademarks. HDV and are trademarks of Sony Corporation and JVC. All other product names mentioned herein may be companies. Furthermore, "™" and "®" are not mentioned in each case in this manual. About the "InfoLITHIUM" battery pack This unit is compatible with the " - Sony HDR-FX1 | Operating Instructions - Page 93
, or when the battery pack is frequently used. Use the remaining battery time indication as a guide to the approximate shooting time. • The E mark that indicates low battery flashes even if there . "InfoLITHIUM" is a trademark of Sony Corporation. Additional Information Additional Information 93 - Sony HDR-FX1 | Operating Instructions - Page 94
and other data to other i.LINK-compatible device. You can also control other device using the i.LINK. i.LINK-compatible device can be connected software, refer also to the operating instructions for the device to be connected. About the required i.LINK cable Use the Sony i.LINK 4-pin-to-4-pin cable - Sony HDR-FX1 | Operating Instructions - Page 95
malfunction. - Near strong radio waves or radiation. The , use the accessories recommended in these operating instructions. • Do not let your camcorder get contacts clean. • Keep the Remote Commander and button- type battery - consult your local authorized Sony service facility. - wash off any - Sony HDR-FX1 | Operating Instructions - Page 96
sound is played back. • If the following problem occurs, clean the video heads for 10 seconds video head is worn. Please contact your Sony dealer or local authorized Sony service facility to have the video head replaced. ventilated location subject to little dirt or dust. 96 Additional Information - Sony HDR-FX1 | Operating Instructions - Page 97
• To prevent molds periodically clean the lens as described above. It is recommended you operate your camcorder about once a month to keep it in an optimum state for a long time. To charge the pre-installed button-type battery Your camcorder has a pre-installed button-type battery to retain the date - Sony HDR-FX1 | Operating Instructions - Page 98
Specification System Video recording system (HDV) 2 rotary heads, Helical scanning system Video recording system (DV) 2 rotary heads, Helical scanning system Audio recording system (HDV) Rotary heads, MPEG-1 Audio Layer2 Quantization: 16 bits (Fs 48 kHz, stereo) Transfer rate: 384 kbps - Sony HDR-FX1 | Operating Instructions - Page 99
General Power requirements DC 7.2 V (battery pack) DC 8.4 V (AC Adaptor) Average power consumption (when using the battery pack) During camera recording using the viewfinder with normal brightness: HDV recording 7.4 W DV recording 6.9 W During camera recording using the LCD with normal brightness: - Sony HDR-FX1 | Operating Instructions - Page 100
Quick Reference Identifying parts and controls Camcorder A SHOT TRANSITION operation buttons (p. 37) B Eyecup (p. 16) C Viewfinder release lever (p. 97) D Rear remote sensor E Rear camera recording lamp (p. 20) F BATT RELEASE (battery release) button (p. 12) G REC START/STOP button (p. 20) H i.LINK - Sony HDR-FX1 | Operating Instructions - Page 101
A Hook for the shoulder strap B Zoom ring (p. 23) C Focus ring (p. 32) D FOCUS switch (AUTO/MAN (manual)/ INFINITY) (p. 32) E ZOOM switch (p. 22) F ND FILTER switch (1/2/OFF) (p. 30) G PUSH AUTO button (p. 33) H WHT BAL (One-push white balance) button (p. 26) I GAIN switch (H/M/L) (p. 28) J - Sony HDR-FX1 | Operating Instructions - Page 102
Profile settings) return to the default. D VOLUME -/+ buttons* (p. 42) E DATA CODE button (p. 44) F DISPLAY/BATT INFO button (p. 12) G END SEARCH (VCR) button (p. 44) H Handle zoom lever (p. 22) I Video control buttons (Rewind, Playback*, Fast-forward, Pause, Stop, Slow, Record) (p. 42) J LCD - Sony HDR-FX1 | Operating Instructions - Page 103
LANC control jack is used for controlling the Microphone (p. 78) K Front camera recording lamp (p. 20) L Front remote sensor M Speaker N Lens (Carl Zeiss Lens) Your camcorder is equipped with developed jointly by Carl Zeiss, in Germany, and Sony Corporation. It adopts the MTF measurement system for - Sony HDR-FX1 | Operating Instructions - Page 104
A Shoe adaptor To connect an accessory, press down and push it to the end, and then tighten the screw. To remove an accessory, loosen the screw, and then press down and pull out the accessory. When you attach the shoe adaptor, be careful not to damage the LCD panel. B Lens hood (p. 20) C OPEN/EJECT - Sony HDR-FX1 | Operating Instructions - Page 105
, Stop, Frame, Slow, ×2) (p. 42) E Transmitter After turning on your camcorder, point towards the remote sensor to control your camcorder. F ZERO SET MEMORY button (p. 49) G REC START/STOP button (p. 20) H DATA CODE button (p. 44) I Power zoom button (p. 22) To insert the batteries 1 Press and pull - Sony HDR-FX1 | Operating Instructions - Page 106
to indicate the state of your camcorder. Example: Indicators in the CAMERA mode Time code (p. 44)/Tape counter (p. 44)/ Self-diagnosis (p. 88) 120min HDV1080i STBY 0: /DV input (p. 76) Zero set memory (p. 49) Warning (p. 88) Manual focus (p. 32) Backlight (p. 25) Spot light (p. 25) Preset white - Sony HDR-FX1 | Operating Instructions - Page 107
12 Battery pack 11 Remaining battery time 21, 93 Remote Commander..105 BEEP 62 BLACK FADER 38 Button-type Customizing Personal Menu 65 D Data code (DATA CODE 44, 63 Date search 50 Date mode (REC MODE) M Main sound See MULTI-SOUND Manual focus 32 Menu AUDIO SET 56 CAMERA SET........... 52 IN - Sony HDR-FX1 | Operating Instructions - Page 108
Recording mode (REC MODE 60 Recording time 13 Remote Commander........ 105 REMOTE CTRL ........ 64 Remote sensor ......... 100, 103 RESET 102 S S sound See MULTI-SOUND T Tape counter 21, 49 Telephoto See Zoom Time code 21 Transition curve (TRANS CURVE 53 Transition time (TRANS TIME 53 TV - Sony HDR-FX1 | Operating Instructions - Page 109
- Sony HDR-FX1 | Operating Instructions - Page 110
- Sony HDR-FX1 | Operating Instructions - Page 111
- Sony HDR-FX1 | Operating Instructions - Page 112
Printed on 100% recycled paper using VOC (Volatile Organic Compound)-free vegetable oil based ink. Printed in Japan
-
 1
1 -
 2
2 -
 3
3 -
 4
4 -
 5
5 -
 6
6 -
 7
7 -
8
-
9
-
10
-
11
-
12
-
13
-
14
-
15
-
16
-
17
-
18
-
19
-
20
-
21
-
22
-
23
-
24
-
25
-
26
-
27
-
28
-
29
-
30
-
31
-
32
-
33
-
34
-
35
-
36
-
37
-
38
-
39
-
40
-
41
-
42
-
43
-
44
-
45
-
46
-
47
-
48
-
49
-
50
-
51
-
52
-
53
-
54
-
55
-
56
-
57
-
58
-
59
-
60
-
61
-
62
-
63
-
64
-
65
-
66
-
67
-
68
-
69
-
70
-
71
-
72
-
73
-
74
-
75
-
76
-
77
-
78
-
79
-
80
-
81
-
82
-
83
-
84
-
85
-
86
-
87
-
88
-
89
-
90
-
91
-
92
-
93
-
94
-
95
-
96
-
97
-
98
-
99
-
100
-
101
-
102
-
103
-
104
-
105
-
106
-
107
-
108
-
109
-
110
-
111
-
112
 |
 |
2-178-348-
11
(1)
© 2004 Sony Corporation
Operating
Instructions
Read this first
Digital HD Video Camera Recorder
HDR-FX1