Sony HDR-PJ670 Operating Instructions - Page 9
Charging the battery pack
 |
View all Sony HDR-PJ670 manuals
Add to My Manuals
Save this manual to your list of manuals |
Page 9 highlights
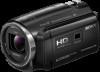
Charging the battery pack 1 Turn off your camcorder by closing the LCD monitor, and attach the battery pack. Getting started Battery pack 2 Pull out the Built-in USB Cable. 3 Connect the AC Adaptor and the camcorder with the USB connection support cable, and connect the AC Adaptor to the wall outlet (wall socket). USB connection support cable AC Adaptor Built-in USB Cable Wall outlet (wall socket) • The POWER/CHG (charge) lamp turns orange. • The POWER/CHG (charge) lamp turns off when the battery pack is fully charged. Disconnect the USB connection support cable from the camcorder. • The shape of the AC Adaptor differs depending on the countries/ regions. GB 9
-
 1
1 -
2
-
3
-
 4
4 -
 5
5 -
 6
6 -
 7
7 -
 8
8 -
 9
9 -
 10
10 -
 11
11 -
 12
12 -
 13
13 -
 14
14 -
15
-
16
-
17
-
18
-
19
-
20
-
21
-
22
-
23
-
24
-
25
-
26
-
27
-
28
-
29
-
30
-
31
-
32
-
33
-
34
-
35
-
36
 |
 |

GB
9
Getting started
Charging the battery pack
1
Turn off your camcorder by closing the LCD monitor,
and attach the battery pack.
2
Pull out the Built-in USB Cable.
3
Connect the AC Adaptor and the camcorder with the
USB connection support cable, and connect the AC
Adaptor to the wall outlet (wall socket).
• The POWER/CHG (charge) lamp turns orange.
• The POWER/CHG (charge) lamp turns off when the battery pack is
fully charged. Disconnect the USB connection support cable from the
camcorder.
• The shape of the AC Adaptor differs depending on the countries/
regions.
Battery pack
Built-in USB Cable
USB connection
support cable
AC Adaptor
Wall outlet (wall socket)