Sony HDR-TG5V Operating Guide - Page 34
Importing movies and photos to a computer (Easy PC Back-up), Easy PC Back-up - handycam
 |
UPC - 027242763005
View all Sony HDR-TG5V manuals
Add to My Manuals
Save this manual to your list of manuals |
Page 34 highlights
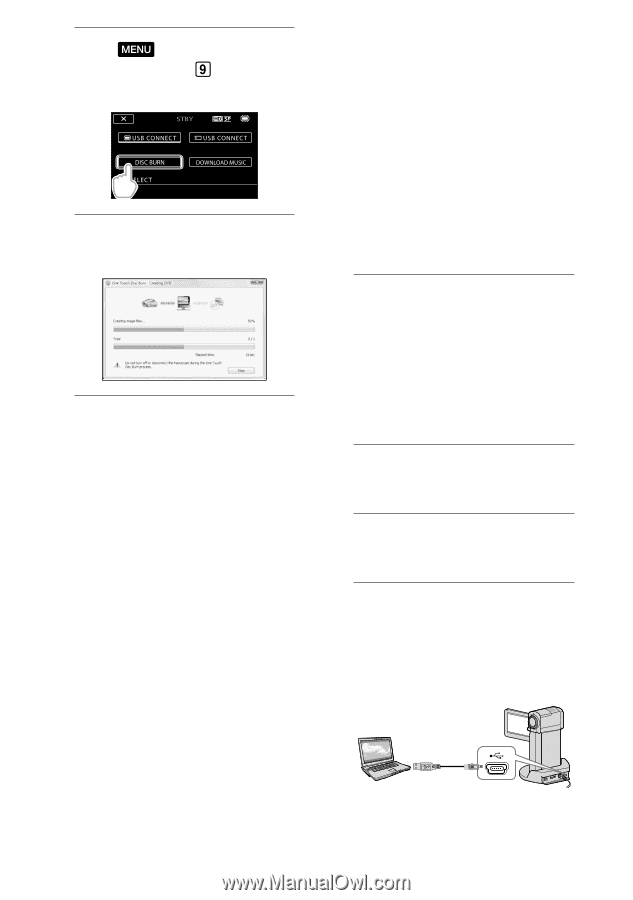
6 Touch (MENU) [USB CONNECT] (under [OTHERS] category) [DISC BURN]. 7 Follow the instructions on the computer screen. Movies and photos are not saved on the computer when you perform One Touch Disc Burn. Importing movies and photos to a computer (Easy PC Back-up) Movies and photos recorded on your camcorder that have not yet been saved with Easy PC Back-up can be imported to a computer automatically. Turn on the computer beforehand. Connect your camcorder to the wall outlet (wall socket) using the supplied AC Adaptor for this operation (p. 15). 1 Connect the AC Adaptor to the "Handycam" Station Cradle and the wall outlet (wall socket). If you do not use the "Handycam" Station Cradle, connect the AC Adaptor and Dedicated USB Terminal Adaptor to the camcorder (p. 14, 65), then proceed to step 3. 2 Set the camcorder onto the "Handycam" Station Cradle. 3 Turn on the camcorder by opening the LCD screen. 4 Connect the (USB) jack of the "Handycam" Station Cradle or the Dedicated USB Terminal Adaptor and the computer with the USB cable (supplied). The [USB SELECT] screen appears on the camcorder screen. If you close the LCD panel when your US 34
-
 1
1 -
2
-
3
-
4
-
5
-
6
-
7
-
8
-
9
-
10
-
11
-
12
-
13
-
14
-
15
-
16
-
17
-
18
-
19
-
20
-
21
-
22
-
23
-
24
-
25
-
26
-
27
-
28
-
 29
29 -
 30
30 -
 31
31 -
 32
32 -
 33
33 -
 34
34 -
 35
35 -
 36
36 -
 37
37 -
 38
38 -
 39
39 -
40
-
41
-
42
-
43
-
44
-
45
-
46
-
47
-
48
-
49
-
50
-
51
-
52
-
53
-
54
-
55
-
56
-
57
-
58
-
59
-
60
-
61
-
62
-
63
-
64
-
65
-
66
-
67
-
68
-
69
-
70
-
71
-
72
-
73
-
74
-
75
-
76
-
77
-
78
-
79
-
80
-
81
-
82
-
83
-
84
-
85
-
86
-
87
-
88
-
89
-
90
-
91
-
92
-
93
-
94
-
95
-
96
-
97
-
98
-
99
-
100
-
101
-
102
-
103
-
104
-
105
-
106
-
107
-
108
-
109
-
110
-
111
-
112
-
113
-
114
-
115
-
116
-
117
-
118
-
119
-
120
-
121
-
122
-
123
-
124
-
125
-
126
-
127
-
128
-
129
-
130
-
131
-
132
-
133
-
134
-
135
 |
 |