Sony ICD BX700 Operating Instructions - Page 21
Selecting the Recording Mode
 |
UPC - 027242739079
View all Sony ICD BX700 manuals
Add to My Manuals
Save this manual to your list of manuals |
Page 21 highlights
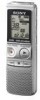
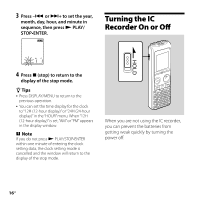
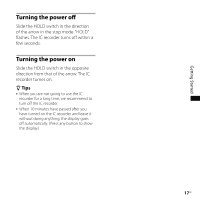
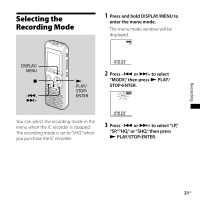
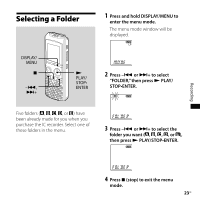
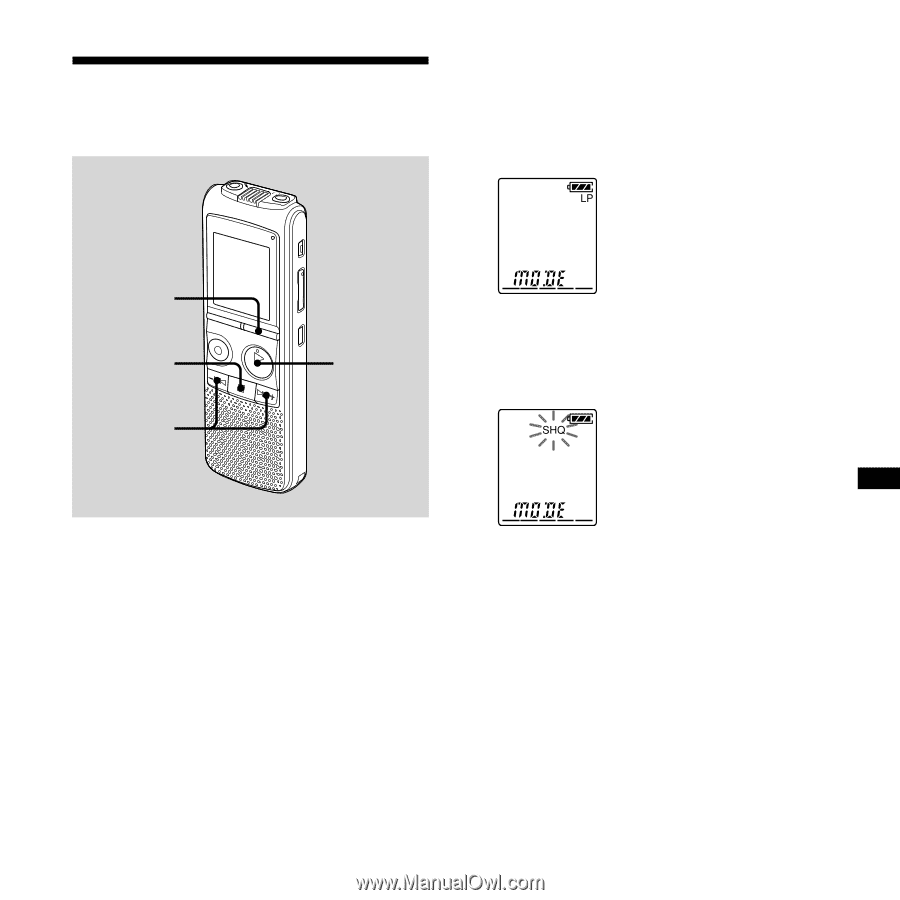
Selecting the Recording Mode 1 Press and hold DISPLAY/MENU to enter the menu mode. The menu mode window will be displayed. DISPLAY/ MENU -, + PLAY/ STOP• ENTER 2 Press - or + to select "MODE," then press PLAY/ STOP•ENTER. You can select the recording mode in the menu when the IC recorder is stopped. The recording mode is set to "SHQ" when you purchase the IC recorder. 3 Press - or + to select "LP," "SP,""HQ," or "SHQ," then press PLAY/STOP•ENTER. Recording 21GB
-
 1
1 -
2
-
3
-
4
-
5
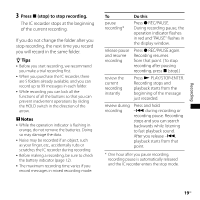
-
6
-
7
-
8
-
9
-
10
-
11
-
12
-
13
-
14
-
15
-
 16
16 -
 17
17 -
 18
18 -
 19
19 -
 20
20 -
 21
21 -
 22
22 -
 23
23 -
 24
24 -
 25
25 -
 26
26 -
27
-
28
-
29
-
30
-
31
-
32
-
33
-
34
-
35
-
36
-
37
-
38
-
39
-
40
-
41
-
42
-
43
-
44
-
45
-
46
-
47
-
48
-
49
-
50
-
51
-
52
-
53
-
54
-
55
-
56
-
57
-
58
-
59
-
60
-
61
-
62
-
63
-
64
-
65
-
66
-
67
-
68
-
69
-
70
-
71
-
72
-
73
-
74
-
75
-
76
 |
 |
±1
GB
Recording
Selecting the
Recording Mode
DISPLAY/
MENU
PLAY/
STOP•
ENTER
–
,
+
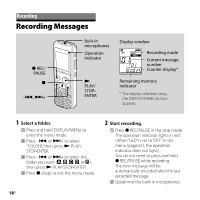
You can select the recording mode in the
menu when the IC recorder is stopped.
The recording mode is set to “SHQ” when
you purchase the IC recorder.
1
Press and hold DISPLAY/MENU to
enter the menu mode.
The menu mode window will be
displayed.
2
Press –
or
+ to select
“MODE,” then press
PLAY/
STOP•ENTER.
3
Press –
or
+ to select “LP,”
“SP,” “HQ,” or “SHQ,” then press
PLAY/STOP•ENTER.