Sony ICD-SX46 Operating Instructions - Page 2
Err Access - accessories
 |
View all Sony ICD-SX46 manuals
Add to My Manuals
Save this manual to your list of manuals |
Page 2 highlights
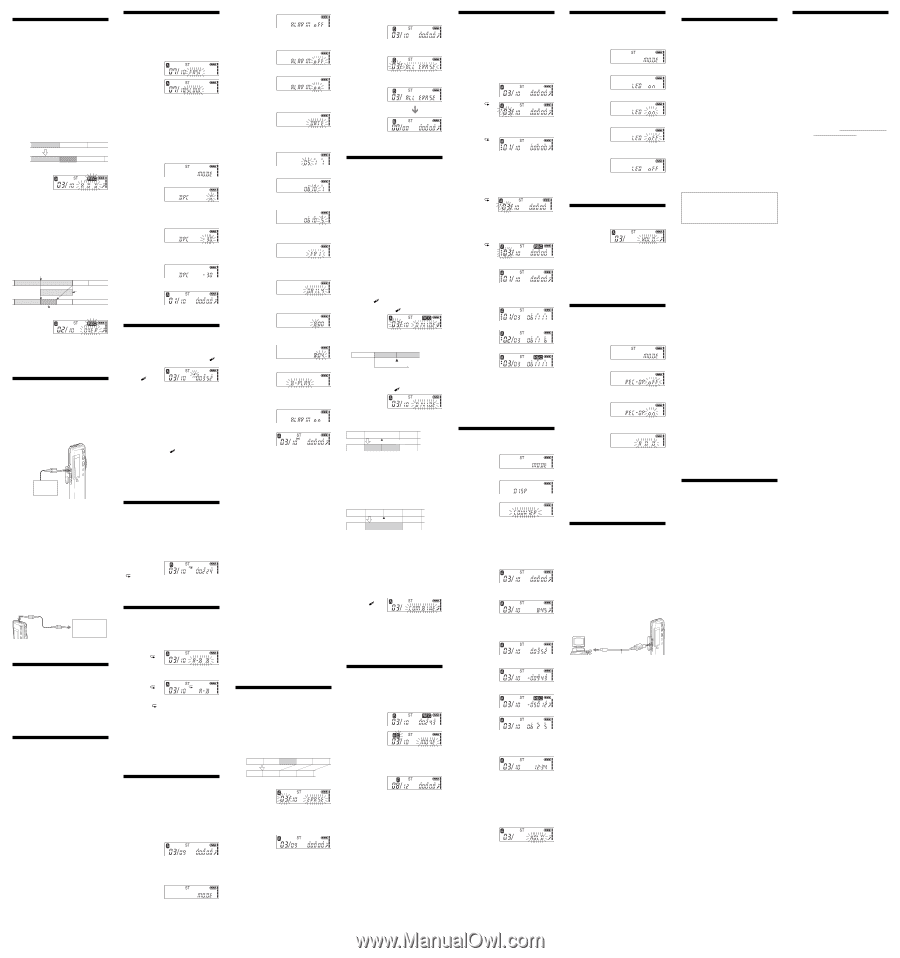
BVarious Ways of Recording Adding a Recording to a Previously Recorded Message You can add a recording to the message being played back. Notes • At a factory setting, you cannot add a recording not to erase the message by accidental operation. See "Using an Adding Recording" to change the setting. • The added or overwritten portion of a message will be recorded in the same recording mode (ST, STLP, SP or LP) as the original message, regardless of the current recording mode setting. • You cannot add or overwrite a recording if the remaining memory is insufficient. For more information, see "Troubleshooting". • You cannot add or overwrite a recording onto an MP3 file. Adding a Recording to a Previously Recorded Message When REC-OP in the menu is set to "ADD", you can add a recording to the message being played back (see "Using an Adding Recording"). The added recording will be placed after the current message and counted as a part of the message. During playback of Message 3 Message 3 Message 4 After adding a recording Message 3 Message 4 Added recording 1 During playback, press zREC/REC PAUSE briefly. "REC" and "ADD" will flash and the unit stops in the recording pause mode. 2 While "REC" and "ADD" are flashing, press zREC/REC PAUSE. "REC" is displayed and "ADD" flashes for 3 seconds on the display window. The OPR indicator will light in red. Then the new recording will be added at the end of the current message. 3 Press xSTOP to stop the recording. Adding an Overwrite Recording during Playback When REC-OP in the menu is set to "OVER", you can add an overwrite recording after the selected point in a recorded message. The part of the message after the selected point is deleted. The starting point of an overwrite recording Message 2 Message 3 Message 4 Message 2 Message 3 The deleted part of Message 2 Message 4 Added overwrite recording in Message 2 1 During playback, press zREC/REC PAUSE briefly. "REC" is displayed. "OVER" flashes on the display window and the OPR indicator flashes in red. 2 Press zREC/REC PAUSE to start recording. The display returns to the display mode set in the menu and the OPR indicator lights in red. 3 Press xSTOP to stop the recording. Recording with an External Microphone or Other Equipment Recording with an External Microphone Connect an external microphone to the m (microphone) jack. When you connect an external microphone, the built-in microphone is automatically cut off. When a plug in power type microphone is connected, power is automatically supplied to the microphone from the IC recorder. mini-plug (stereo) Stereo microphone 1 Recommended types of microphones You can use the ECM-CS10 Sony electret condenser microphone (not supplied). Recording from Other Equipment To record sound of other equipment with the IC recorder, connect the m (microphone) jack of the IC recorder to the earphone jack of other equipment (tape recorder etc.) by using a resistance audio connecting cable. Before you start recording, set the microphone sensitivity by setting SENS in the menu to "H" (high). Note If you use an audio connecting cable without a resistor, sound may be recorded interrupted. Make sure to use a resistance audio connecting cable. Recording with Other Equipment To record the sound of the IC recorder with other equipment, connect the i (headphones) jack of the IC recorder to the audio input connector (minijack, stereo) of other equipment. mini-plug (stereo) mini-plug (stereo) Tape recorder, etc. BVarious Ways of Playback Locating quickly the point you wish to start playback (Easy Search) When EASY-S is set to "on" in the menu, you can quickly locate the point you wish to start playback by pressing the jog lever up or down (>/.) repeatedly during playback or playback pause. You can go back approx. 3 seconds by pressing the jog lever down (.) once, or advance approx. 10 seconds by pressing the jog lever up (>) once. This function is useful when locating a desired point in a long recording. Adjusting the playback sound by amplifying inaudible sound - Digital Voice Up function You can make the playback sound well-balanced and more audible by amplifying only the inaudible low-level part of a recorded message and adjusting the overall recording to its optimum level (Digital Voice Up function). This function is useful to hear a meeting with each speaker's voice more audible. During playback or stop, slide the VOICE UP switch to "ON". The message is played back with adjusted sound. To resume normal playback Slide the VOICE UP switch to "OFF". Note Depending on the area you purchased the unit, the Digital Voice Up switch name shown on the unit may differ. Adjusting the Playback Speed - DPC (Digital Pitch Control) You can adjust the speed of the playback between twice the normal speed (+100%) and half the normal speed (-50%). The message is played back in natural tone thanks to the digital processing function. Playing back a message rapidly or slowly Slide the DPC switch to "ON". "FAST" or "SLOW" flashes for 3 seconds and the message is played back at the speed specified with the menu. To resume normal playback Slide the DPC switch to "OFF". Note When you want to play back an MP3 file of more than 192kbps, set the DPC switch to "OFF", or if the switch is set to "ON", adjust the speed of the playback to slower than 10% (toward -). If the speed is set to faster than 10% (toward +), "NO FAST" will appear and the playback becomes normal. Setting the playback speed You can set the playback speed when the DPC switch is set to "ON". The setting for the playback speed holds effective until you change the setting. 1 Turn the jog lever toward MENU to display the menu mode. 2 Press the jog lever up or down (>/ .) to select "DPC", then press the jog lever (x•B). The playback speed setting mode will be displayed. The flashing number represents the playback speed in percentage with the standard speed as "0". 3 Press the jog lever up or down (>/.) to set the playback speed. • Fast play (up to +100% by 10%): Press up (>). • Slow play (down to -50% by 5%): Press down (.). 4 Press the job lever (x•B). The specified playback speed is confirmed. 5 Press the jog lever toward MENU to exit the menu mode. The normal display appears. Adding a Bookmark You can add a bookmark at a point in a message and use it during playback. You can add only one bookmark in each message. During playback or stop, press DIVIDE/ (bookmark) for more than 1 second. A bookmark is added and the bookmark indicator ( ) flashes for 3 seconds. If you add a bookmark to a message that already has a bookmark, a previously added bookmark is deleted and a bookmark is added to the newly specified point. To start playback at the bookmark Press the jog lever up or down (>/.) during stop so that the bookmark indicator flashes for 3 seconds. Then press the jog lever (x•B). To delete the bookmark 1 In stop mode, press the jog lever up or down (>/ .) to display the number of the message with the bookmark you wish to delete. 2 While pressing DIVIDE/ (bookmark), press ERASE for more than 1 second. 3 Press ERASE while the bookmark indicator and "ERASE " are flashing. Notes • If you want to combine messages to which the bookmark is already added, delete the bookmark before combining messages. • You cannot add a bookmark to an MP3 file. Playing back all messages in a folder continuously - Continuous Play When CONT is set to "on" in the menu, you can play back all the messages in a folder continuously. You can change the setting during playback. Playing back a message repeatedly - Repeat Play During playback, press the jog lever (x•B) for more than one second. " " will be displayed and the selected message will be played back repeatedly. To resume normal playback, press the jog lever (x•B) again. To stop playback, press xSTOP. Playing Back the Specified Section Repeatedly - A-B Repeat While playing back a message, you can set the start (A) and end (B) points for a section you wish to play repeatedly. 1 During playback, press A-B (repeat)/ PRIORITY briefly. The starting point (A) of the section you wish to play repeatedly is set. "A-B B" flashes. 2 During playback, press A-B (repeat)/ PRIORITY briefly. The finishing point (B) of the section is set. "A-B" and " " are displayed and the specified section is played back repeatedly. To resume normal playback Press the jog lever (x•B). To stop A-B Repeat playback Press xSTOP. Notes • You cannot set A-B Repeat for a section that overlaps two or more messages. • If you do not set the finishing point (B), the finishing point is automatically set at the end (or the beginning) of the message. Playing Back a Message at a Desired Time with an Alarm You can sound an alarm and start playback of a selected message at a desired time. You can have the message played back at a specified date, once every week, or the same time everyday. You can also sound the alarm without playing back a message. Note When the clock is not set or no messages are recorded, you cannot set the alarm. 1 Select the message you want to play back. For more information about selecting the desired message, see step 1 and 2 of "Playing Back Messages". 2 Enter the alarm setting mode. 1 Press the jog lever toward MENU. The menu mode will be displayed in the display window. 2 Press the jog lever up or down (>/ .) to select "ALARM oFF". If the alarm has been already set to "on", "ALARM on" will be displayed. 3 Press the jog lever (x•B). The alarm setting mode will be displayed in the display window. 4 Press the jog lever up or down (>/ .) to select "on". If "on" has already been selected, follow the next step. 5 Press the jog lever (x•B). "DATE" will be displayed in the display window. 3 Set the alarm date and time. To play back on a desired date 1 Press the jog lever (x•B) while "DATE" is displayed. The year digits will flash. 2 Press the jog lever up or down (>/ .) to select the year digits and press the jog lever (x•B). The month digits will flash. 3 Set the month and the day in sequence, then press the jog lever (x•B). To play back once a week Press the jog lever up or down (>/ .) to select the day of the week ("SUN" for Sunday to "SAT" for Saturday). Then press the jog lever (x•B). To play back at the same time every day Press the jog lever up or down (>/ .) to select "DAILY". Then press the jog lever (x•B). 4 Select the alarm time. 1 Press the jog lever up or down (>/ .) to select the hour digits, and press the jog lever (x•B). The minute digit will flash. 2 Press the jog lever up or down (>/ .) to select the minute digits, and press the jog lever (x•B). 5 Select the alarm playback. Press the jog lever up or down (>/ .) to select the alarm sound either from "B-PLAY" (for starting playback after the alarm) or "B-ONLY" (for only the alarm). 6 Press the jog lever (x•B). The setting is finished. 7 Press the jog lever toward MENU to exit the menu mode. The normal display appears. "," is displayed when the message having an alarm setting is selected. When the set date and time comes At the set time, the alarm will sound for about 10 seconds and the selected message will be played back (If you have selected "B-ONLY" in step 5, only the alarm will sound). During alarm playback, "ALARM" will flash in the display window. When the playback ends, the unit will stop automatically at the beginning of that message. 1To listen to the same message again Press the jog lever (x•B). The same message will be played back from the beginning. 1To cancel the alarm setting before the playback starts Press xSTOP while the alarm sound is heard. You can stop the alarm playback even when the HOLD function is activated. To cancel the alarm setting In step 2, select "oFF" and then press the jog lever (x•B). To check the alarm setting Follow steps 1 through 2 to display the current alarm date and time. Then follow steps 3 to 7 to change the alarm date and time. Notes • If the alarm time comes while another message is being played back with an alarm, the playback stops and the new message will be played back. • If the alarm time comes during recording, the alarm will sound after the recording is finished. "," will flash when the alarm time comes. • If more than one alarm time comes during recording, only the first message will be played back. • When the alarm time comes when the unit is in the menu mode, alarm will sound and the menu mode will be cancelled. • If you divide a message you set the alarm for, alarm setting remains on only the first part of the divided message. • If you combine messages you set the alarm for, the alarm setting of the latter message will be cancelled. • Alarm setting will not be cancelled when the alarm playback finishes. BEditing Messages Erasing Messages You can erase the recorded messages one by one or all messages in a folder at a time. Note Once a recording has been erased, you cannot retrieve it. Erasing Messages one by one You can erase unnecessary messages only. When a message is erased, the remaining messages will advance and be renumbered so that there will be no space between messages. Erase Message 3 Before erasing Message 1 Message 2 Message 3 Message 4 Message 5 After erasing Message 1 Message 2 Message 3 Message 4 Remaining messages are renumbered. 1 Press ERASE while playing back the message you want to erase or press ERASE for more than 1 second during stop mode. The message number and "ERASE" will flash while the first and last 5 seconds of the message are played back 10 times. 2 Press ERASE while the message is being played back and "ERASE" is flashing. The message is erased and the remaining messages will be renumbered. (For example, if you erase Message 3, Message 4 will be renumbered as Message 3. When erasing is completed, the unit will stop at the beginning of the following message.) To cancel erasing Press xSTOP before step 2. To erase other messages Repeat steps 1 and 2. To erase a message partially First divide the message and then proceed from step 1 to erase the unnecessary message. Erasing All Messages in a Folder You can erase all recorded messages in a folder. 1 Turn the jog lever toward FOLDER repeatedly to display the folder (A, B, C, D or E) containing the messages you want to erase. 2 While pressing xSTOP, press ERASE for more than 1 second. The message number and "ALL ERASE" will flash for 10 seconds. 3 While "ALL ERASE" is flashing, press ERASE. All the recorded messages contained in the folder are deleted. The folder itself will not be deleted. To cancel erasing Press xSTOP before step 3. Dividing a Message into Two/ Combining Messages You can divide a message, or combine messages. • You can divide a message into two while recording/ playing back messages. • You can combine messages in stop mode. Notes • Due to the recording system of an IC recorder, you may not be able to divide or combine messages in some cases. • You cannot divide or combine MP3 files. Dividing a Message You can divide a message during recording or playback, so that the message is divided into two and the new message number is added to the divided message. By dividing a message, you can easily find the point you want to play back when you make a long recording such as a meeting. You can divide a message until the total number of messages in the folder becomes 99. Notes • You need a certain amount of space in the memory to divide a message. For more information, see "On system limitations of the IC recorder". • If you divide a message with priority mark(s), priority mark(s) will be added to both parts of the divided message. While recording or playing back a message, press DIVIDE/ (bookmark) at the point you want to divide. • When you press DIVIDE/ (bookmark) during recording: The new message number is added at the point you pressed the button, and the new message number and "DIVIDE" flash for 3 seconds. The message will be divided into two; however, the messages will be recorded without a break. Message 1 Message 2 Message 3 A message is divided. Recording continues. 1 Tip You can divide a message during recording pause. • When you press DIVIDE/ (bookmark) during playback: The message is divided into two at the point you pressed the button, and "DIVIDE" flashes for 3 seconds. The message numbers of the following messages will increase by one. Message 1 Message 2 Message 3 A message is divided. Message 1 Message 2 Message 3 Message 4 The message numbers increase. To play the divided message Press the jog lever up or down (>/.) to display the message number as the divided messages have message numbers. 1 To play the divided messages continuously Select "on" for CONT in the menu as described in "Operating the Menu". Combining Messages You can combine two messages into one. Message 1 Message 2 Message 3 Message 4 Message 1 Message 2 Message 3 Messages are combined. The message numbers decrease. Notes • After combining messages, the latter message's alarm setting, priority mark(s) and bookmark will be deleted. • If you combine messages with a bookmark, the following procedures will erase the bookmark. To combine messages, redo the procedures. • You cannot combine messages of different recording modes. 1 Press xSTOP to stop the IC recorder. 2 Press the jog lever up or down (>/.) to display the number of the second of the two messages you want to combine. 3 While pressing DIVIDE/ (bookmark), press ERASE for more than 1 second. "COMBINE" will flash for 10 seconds. 4 Press ERASE while the display is flashing. The two messages are combined into one and the messages will be renumbered as in the illustration. To cancel erasing Press xSTOP before step 4. Moving Messages to a Different Folder You can move the recorded messages to another folder. When you move a message to another folder, the one in the previous folder will be deleted. Example: Moving Message 3 in Folder B to Folder C 1 Play back the message you want to move. 2 Turn the jog lever toward FOLDER repeatedly to select the folder that you want to move the message into. The destination folder and "MOVE" flash. The first and last 5 seconds of the message will be played back. 3 Press the jog lever (x•B). The message is moved to the destination folder. Messages are sorted in order of the recorded date and time or the number of the priority marks in the folder. To cancel moving the message Press xSTOP before step 3. Adding Priority Mark(s) - Priority Mark Function Usually the recorded messages are lined up in the order of recording. By adding priority marks (★) to important messages, you can renumber the messages in the order of their priority. There are four levels the most important and no priority mark. You can add priority marks both in the stop mode and in the playback mode. Adding Priority Mark(s) in the Stop Mode 1 Select the message you want to mark. 2 Press A-B (repeat)/ PRIORITY for more than 1 second. "★" and the message number indication will flash on the display window. 3 Press A-B (repeat)/ PRIORITY repeatedly to select the number of priority mark(s) (★) while indications are flashing. The setting is finished when the priority mark(s) (★) light(s) steadily in the display window and the messages are renumbered. Adding Priority Mark(s) during Playback 1 Press A-B (repeat)/ PRIORITY for more than 1 second during playback of the message you want to mark. "★" and the message number indication will flash on the display window while the first and last 5 seconds of the message is played back 10 times. 2 Press A-B (repeat)/ PRIORITY repeatedly to select the number of priority mark(s) (★). 3 Press the jog lever (x•B) to fix the setting. The setting is finished and the messages will be renumbered. Messages with e.g. When there are 3 priority mark(s) messages in a folder Messages are sorted in order of the number of priority mark(s) (★) in a folder. Messages without a priority mark Message 1 are moved behind the messages with priority mark(s). 1 Tip If there are over 2 Message 2 messages with the same number of priority marks in a folder, these messages are sorted by the recorded date and Message 3 time (The oldest one comes first). Note You can also add priority mark(s) using the supplied "Digital Voice Editor" software. But messages are not sorted in order of the number of the priority marks unless you sorted by the number of priority marks using the software. BOther Functions Selecting the Display Mode You can select the display mode for stop, recording and playback modes. 1 Turn the jog lever toward MENU. The menu mode will be displayed. 2 Press the jog lever up or down (>/.) to select "DISP". 3 Press the jog lever (x•B). The display setting window will be displayed. 4 Press the jog lever up or down (>/.) to select the COUNTER n REM N N REC TIME n REC DATE display mode. The display mode changes in the order shown. 5 Press the jog lever (x•B). 6 Turn the jog lever toward MENU. The menu mode exits and the normal mode is displayed. 1 On current time display If the unit is left unused for more than 3 seconds in the stop mode, the display will turn to the current time display mode as shown to the right, regardless of the display mode setting. You can select the display mode from the following: x COUNTER (elapse time) Elapsed playback/ recording time of one message. x REM (remaining time) In the playback mode: The remaining time of one message indication. In the stop and recording mode: The remaining recording time indication. x REC DATE (recorded date) In the playback and playback pause modes, the date the current message was recorded. In the recording mode, the current date. (If the clock has not been set, "--Y--M--D" will be displayed.) x REC TIME (recorded time) In the playback and playback pause modes, the time the current message was recorded. In the recording mode, the current time. (If the clock has not been set, "--:--" will be displayed.) Turning off the Display The unit is not equipped with the power button. The display always appears on the window, which almost will not influence the battery life. To turn off the display, slide the HOLD switch in the direction of the arrow in the stop mode. "HOLD" will flash for three seconds and then the display turns off in the window. To turn on the display, slide the HOLD switch in the opposite direction. Turning off the OPR Indicator (LED) During recording and playback, the OPR (operation) indicator lights or flashes. You can set the OPR indicator to turn off even in operation. 1 Turn the jog lever toward MENU. The menu mode will be displayed. 2 Press the jog lever up or down (>/.) to select "LED on". 3 Press the jog lever (x•B). The LED setting mode will be displayed. 4 Press the jog lever up or down (>/.) to select "oFF", and then press the jog lever (x•B). The setting is changed. 5 Press the jog lever toward MENU to exit the menu mode. The normal display appears. To turn on the OPR indicator In step 4 , select "on" and then press the jog lever (x•B). Preventing Accidental Operation - HOLD Function Slide the HOLD switch in the direction of the arrow. "HOLD" will flash for 3 seconds, indicating that all the functions of the buttons are locked. When the HOLD function is activated during stop, all the display will be turned off after "HOLD" flashes. To cancel the HOLD function Slide the HOLD switch in the opposite direction. 1 Tip Even if the HOLD function is activated, you can stop the alarm playback. To stop the alarm or playback, press xSTOP. (You cannot stop usual playback.) Using an Adding Recording At a factory setting, you cannot add a recording not to erase the message by accidental operation. If you want to add a recording to a previously recorded message or add an overwrite recording, change the REC-OP setting in the procedures below. 1 Turn the jog lever toward MENU. The menu mode will be displayed in the display window. 2 Press the jog lever up or down (>/ .) to select "REC-OP", then press the jog lever (x•B). The adding recording window will be displayed. 3 Press the jog lever up or down (>/ .) to select "on", then press the jog lever (x•B). The setting is changed. 4 Press the jog lever up or down (>/ .) to select "ADD" or "OVER", then press the jog lever (x•B). • ADD: adds a recording to a previously recorded message • OVER: adds an overwrite recording 5 Press the jog lever toward MENU to exit the menu mode. The normal display appears. To prohibit to add a recording In step 3 , select "oFF" and then press the jog lever (x•B). Using the "Digital Voice Editor" Software By connecting the IC recorder to your computer with the supplied USB cable, you can use the "Digital Voice Editor" software to do the following: • Add files in MP3 format without converting. • Save the IC recorder messages on your computer's hard disk. • Transfer the PC messages back to the IC recorder. • Play or edit the messages on your computer. • Send a voice e-mail message using MAPI e-mail software. • Transcribe your IC recorder message using Dragon NaturallySpeaking® speech-recognition software (not supplied). For the details, see the supplied "Digital Voice Editor 2" software operating instructions. Connection To USB connector To USB of IC recorder connector of your computer Connecting cable (supplied) Notes on adding files in MP3 format to the IC recorder • When you want to play back an MP3 file of more than 192kbps, set the DPC switch to "OFF", or if the switch is set to "ON", adjust the speed of the playback to slower than 10% (toward -). If the speed is set to faster than 10% (toward +), "NO FAST" will appear and the playback becomes normal. • When an MP3 file made at VBR (variable bit rate) is being played, time may not be displayed correctly. • If MP3 files made at a high bit rate are played continuously, the buttons on the IC recorder may not work momentarily. • "MP3" is not displayed in the window even when an MP3 file is played back. • Some edit functions can not be used. Maximum playback time of an MP3 file Maximum playback time when an MP3 file of 128kbps is played back is as follows. ICD-SX46: 2 hours 10 minutes ICD-SX56: 4 hours 25 minutes ICD-SX66: 9 hours System requirements Your computer and system software must meet the following minimum requirements. • IBM PC/AT or compatible - CPU: 266MHz Pentium® II processor or higher - RAM: 64MB or more - Hard disk space: 70MB or more depending on the size and number of sound files you store - CD-ROM drive - USB port - Sound board: Sound Blaster 16 compatible - Display: High color (16 bits) or more and 800 x 480 dots or more • OS: Microsoft® Windows® XP Media Center Edition 2004/Windows® XP Media Center Edition/Windows® XP Professional/Windows® XP Home Edition/ Windows® 2000 Professional/Windows® Millennium Edition*/Windows® 98 Second Edition* standard installation (You cannot use this software with Windows® 98, Windows® 95 or Windows® NT.) * Excluding the People's Republic of China model Notes • You cannot use the software with a Macintosh machine. • A handmade computer, a computer whose operating system is installed or upgraded by the user, or a computer with multi-boot operating environment are not supported. BOther Information Precautions On power • Operate the unit only on 3 V DC. Use two LR03 (size AAA) alkaline batteries. On safety • Do not operate the unit while driving, cycling or operating any motorized vehicle. On handling • Do not leave the unit in a location near heat sources, or in a place subject to direct sunlight, excessive dust or mechanical shock. • Should any solid object or liquid fall into the unit, remove the batteries and have the unit checked by qualified personnel before operating it any further. On noise • Noise may be heard when the unit is placed near an AC power source, a fluorescent lamp or a mobile phone during recording or playback. • Noise may be recorded when an object, such as your finger, etc., rubs or scratches the unit during recording. On maintenance • To clean the exterior, use a soft cloth slightly moistened in water. Do not use alcohol, benzine or thinner. If you place a magnetic card near the speaker of the unit, the card may be affected by the magnet of the speaker and may become unusable. Please keep a magnetic card away from the unit. If you have any questions or problems concerning your unit, please consult your nearest Sony dealer. Backup recommendations To avoid potential risk of data loss caused by accidental operation or malfunction of the IC recorder, we recommend that you save a backup copy of your recorded messages on a tape recorder or to a computer, etc. On system limitations of the IC recorder There are some system limitations of the unit. Troubles as mentioned below are not malfunctions of the unit. You cannot record messages up to the maximum recording time. • If you record messages in a mixture of ST, STLP, SP and LP modes, the recordable time varies from the maximum ST mode recording time to the maximum LP mode recording time. • Due to the limitation of the IC recording system mentioned above, the sum of the total recorded time in the counter (elapsed time) and the remaining time becomes shorter than the maximum recording time of the IC recorder. You cannot divide a message. • You cannot divide a message in a folder which has 99 messages. • If you divide messages frequently, the unit may become unable to divide a message. • You cannot divide an MP3 file. "NO EDIT" appears in the display window. You cannot combine messages. • You cannot combine different recording mode (ST/ STLP/SP/LP) messages. • If you divide or combine messages frequently, the unit may become unable to combine messages. • You cannot combine MP3 files. "NO EDIT" appears in the display window. You cannot add additional recording. • You cannot record an MP3 file. "NO EDIT" appears in the display window. You cannot overwrite a recording. • You cannot overwirte an MP3 file. "NO EDIT" appears in the display window. You cannot display the remaining time in the REM (remaining time) mode. • When recording with the VOR function in LP mode, the time display may not be correct (ICD-SX 66 only). DPC function does not work. • You cannot set the playback speed to more than +10% with an MP3 file with a speed of more than 192kbps. If you try to do so, "NO FAST" will appear in the display window and the playback becomes normal. You cannot add a bookmark. • You cannot add a bookmark to an MP3 file. "NO EDIT" appears in the display window. If an Error Message is displayed If the following error messages are displayed, do the remedies described here. Should any problem persist after you have made these checks, consult your nearest Sony dealer. BACK-D • You set the alarm when the time is already past. Check it and set the appropriate date and time. Err ACCESS • The IC recorder failed in memory access. Remove and then insert the batteries. ERR DATA • The file is not supported by the "Digital Voice Editor" software, or the file itself is corrupted. FULL • The remaining memory of the IC recorder is too small. Erase some messages before recording. • When there are already 99 messages in the selected folder or the remaining memory of the IC recorder is short, you cannot divide a message. Erase some messages before dividing a message. LO DC-IN • An AC power adaptor that is not compatible with the IC recorder is connected. Make sure to use the AC power adaptor for the IC recorder (excluding the Korean and the People's Republic of China models). LOW BATT • Batteries are weak. Replace batteries with new ones. NO DATA • The selected folder does not have any messages. You cannot set the alarm, etc. because of this. NO CMB • You cannot combine messages of different modes. PRE SET • You set the alarm to play back a message at a date and time previously set on another message. Change the alarm setting. REC-OP OFF • REC-OP in the menu is se to "oFF" and you cannot add or overwrite a recording. SET DATE • If you do not set date and time, you cannot make alarm setting. To set date and time, see "Step 2: Setting the Clock". ERR 01 • The IC recorder cannot access the memory or cannot format the memory. ERR 02 • The IC recorder cannot write (record or erase) the data in the memory. ERR 03 • The IC recorder cannot read the memory. ERR 04 • The IC recorder cannot load or write the settings. ERR 05 • An error other than the above occurs. For the error messages of the "Digital Voice Editor", please refer to the online Help files. Specifications Recording media Built-in flash memory 128 MB (ICD-SX46) / 256 MB (ICD-SX56) / 512 MB (ICD-SX66), Stereo/Monaural recording Recording time See "Recording Messages". Frequency range • ST: 60 Hz - 13,500 Hz • STLP: 60 Hz - 6,900 Hz • SP: 60 Hz - 7,000 Hz • LP: 80 Hz - 3,500 Hz Speaker Approx. 16 mm (21/32 in.) dia. Power output 150 mW Input/Output • Microphone jack (minijack, stereo) - input for plug in power, minimum input level: 0.6 mV, 3 kilohms or lower impedance microphone • Headphones jack (minijack, stereo) - output for 8 - 300 ohms headphones • USB connector • DC IN 3V jack (For Korean and the People's Republic of China models, this jack does not exist.) Playback speed control +100% to -50% (DPC) Power requirements Two LR03 (size AAA) alkaline batteries: 3 V DC Dimensions (w/h/d) (not incl. projecting parts and controls) 28.0 × 120.0 × 13.8 mm (1 1/8 × 4 3/4 × 9/16 in.) Mass (incl. batteries) 64 g (2.26 oz) Supplied accessories Stereo headphones × 1 USB connecting cable × 1 Application Software (CD-ROM) × 1 LR03 (size AAA) alkaline batteries x 2 Carrying pouch x 1 Optional accessories Stereo headphones MDR-EX71SL, MDRE931LP/Active speaker SRS-T88, SRS-T80/ Electret condenser microphone ECM-CS10, ECM-TL1, ECM-DS70* (* for Tourist model only)/Audio connecting cable RK-G134HG, RK-G135HG, RK-G136HG, RK-G139HG (excluding Europe)/AC power adaptor ACE30HG (excluding the models for Korea, the People's Republic of China, Australia, and New Zealand) Your dealer may not handle some of the above listed optional accessories. Please ask the dealer for detailed information. Design and specifications are subject to change without notice.
-
 1
1 -
 2
2
 |
 |