Sony KDL-47W802A Operating Instructions (Setup Guide) - Page 21
Using a Wall-Mount Bracket
 |
View all Sony KDL-47W802A manuals
Add to My Manuals
Save this manual to your list of manuals |
Page 21 highlights
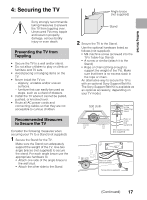
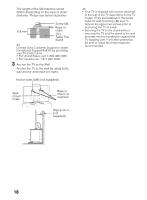
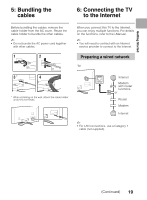
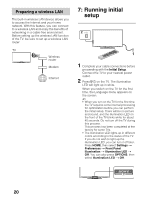
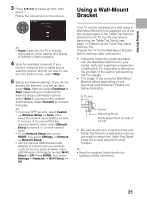
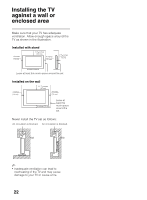
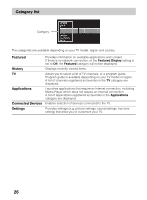
Getting Started 3 Press V/v/B/b to select an item, then press . Follow the instructions on the screen. Using a Wall-Mount Bracket ~ • Home mode sets the TV to settings optimized for home viewing (this setting is ENERGY STAR compliant). 4 Scan for available channels. If you receive channels from a cable box or satellite receiver and do not wish to use the TV's built-in tuner, select Skip. 5 Set up the Internet settings. If you do not access the Internet, or to set up later, select Skip. After you select Continue or Start (depending on model) at the Internet setup confirmation screen, select Auto to connect to the network automatically. Select Custom to connect manually. ~ • If you use WEP security, select Custom t Wireless Setup t Scan. Then, select the network name (SSID) you want to connect. If you cannot find the required network name, select [Manual Entry] and press to enter network name. • To set Network Setup later, press HOME, then select Settings t Network t Network Setup. • Use the optional USB Wireless LAN Adapter to connect with your wireless router (or access point) at 5GHz. Insert USB Wireless LAN Adapter and set Wi-Fi Direct to Off. Press HOME, then select Settings t Network t Wi-Fi Direct t Off. Your TV can be mounted on a wall using a Wall-Mount Bracket (not supplied) out of the box as packaged. If the Table-Top Stand is attached to the TV, the TV may require detaching the Table-Top Stand; see page 11 (Detaching the Table-Top Stand from the TV). Prepare the TV for the Wall-Mount Bracket before making cable connections. • Follow the instruction guide provided with the Wall-Mount Bracket for your model. Sufficient expertise is required in installing this TV, especially to determine the strength of the wall for withstanding the TV's weight. • The length of the screw for Wall-Mount Bracket differs depending on the mounting hook thickness. Please see below illustration. 8-12 mm Screw Mounting Hook Hook attachment on rear of TV set • Be sure to store the unused screws and Table-Top Stand in a safe place until you are ready to attach the Table-Top Stand. Keep the screws away from small children. ~ • Read the supplied Safety Booklet for additional safety information. 21
-
 1
1 -
2
-
3
-
4
-
5
-
6
-
7
-
8
-
9
-
10
-
11
-
12
-
13
-
14
-
15
-
 16
16 -
 17
17 -
 18
18 -
 19
19 -
 20
20 -
 21
21 -
 22
22 -
 23
23 -
 24
24 -
 25
25 -
 26
26 -
27
-
28
-
29
-
30
-
31
-
32
-
33
-
34
-
35
-
36
 |
 |