Sony KLV-S19A10 Instructions on installing the Wall Mount Bracket (SU-WL31) - Page 6
Step 6: Install the display on the, Plate Unit, of the display. - power cord
 |
View all Sony KLV-S19A10 manuals
Add to My Manuals
Save this manual to your list of manuals |
Page 6 highlights
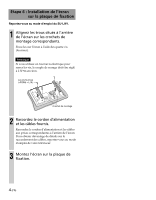
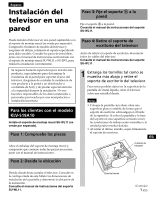
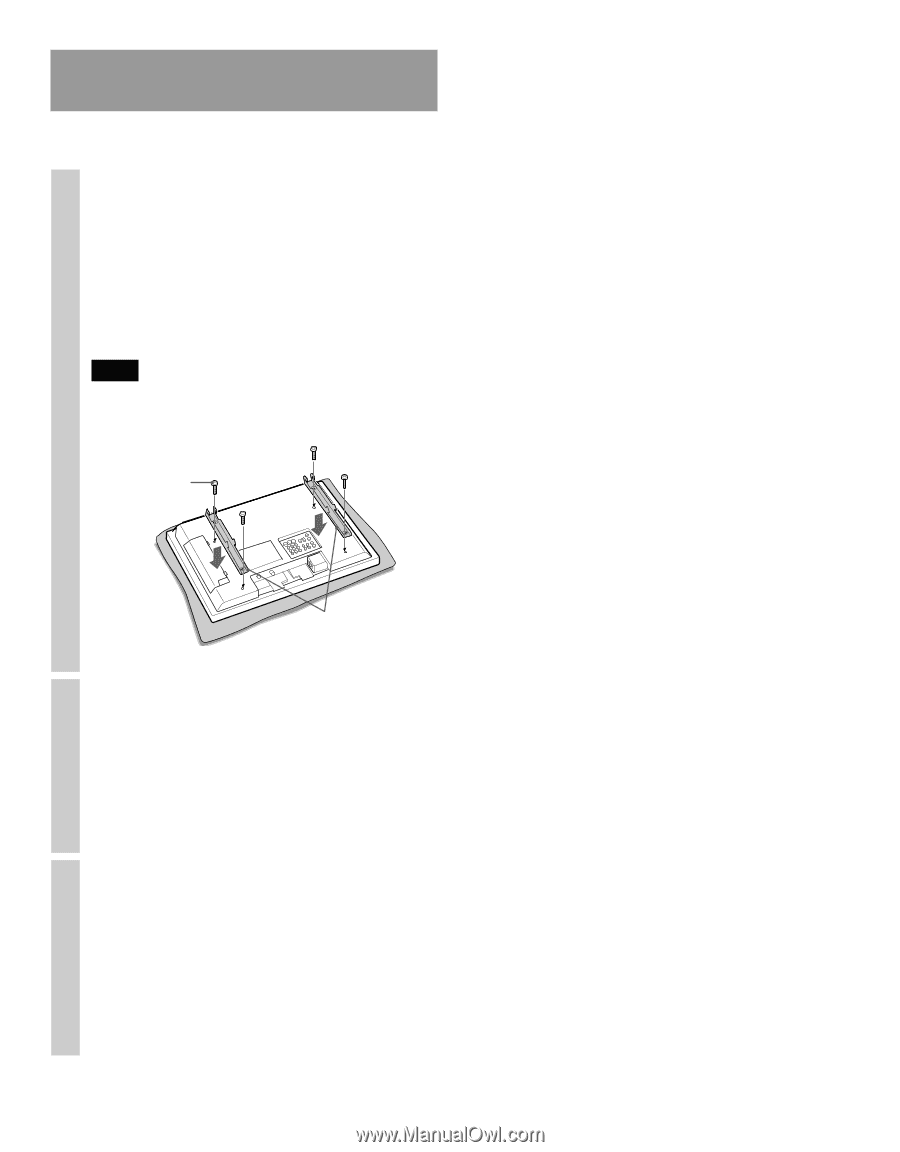
Step 6: Install the display on the Plate Unit Refer to the Instructions for the SU-LW1. 1 Align the holes on the Mounting Hook Units with the corresponding holes on the rear of the display. Secure them to the display using four screws (supplied). Note When using an electric screwdriver to tighten the screws, the torque must be approx. 2 N•m. The supplied screws (+PSW5 × L16) Mounting Hook Units 2 Connect the supplied power cord and cables. Connect the power cord and cables to the corresponding jacks on the rear of the display. For details on the cable connection, refer to the Operating Instructions for your TV. 3 Mount the display on the Plate Unit. 4 (US)
-
 1
1 -
 2
2 -
 3
3 -
 4
4 -
 5
5 -
 6
6 -
 7
7 -
 8
8 -
 9
9 -
 10
10 -
 11
11 -
 12
12 -
13
-
14
-
15
-
16
 |
 |
4
(US)
Step 6: Install the display on the
Plate Unit
Refer to the Instructions for the SU-LW1.
1
Align the holes on the Mounting
Hook Units with the
corresponding holes on the rear
of the display.
Secure them to the display using four screws
(supplied).
Note
When using an electric screwdriver to tighten
the screws, the torque must be approx. 2 N•m.
2
Connect the supplied power cord
and cables.
Connect the power cord and cables to the
corresponding jacks on the rear of the display.
For details on the cable connection, refer to the
Operating Instructions for your TV.
3
Mount the display on the Plate
Unit.
The supplied screws
(+PSW5
×
L16)
Mounting Hook Units