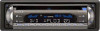
Sony MEX-R5 Operating Instructions - Page 41
Switching the front/rear output, - Zone ° Zone
 |
View all Sony MEX-R5 manuals
Add to My Manuals
Save this manual to your list of manuals |
Page 41 highlights
Auxiliary audio equipment You can connect optional Sony portable devices to the BUS AUDIO IN/AUX IN terminal on the unit. If the changer or other device is not connected to the terminal, the unit allows you to listen to the portable device on your car speakers. Note When connecting a portable device, be sure BUS CONTROL IN is not connected. If a device is connected to BUS CONTROL IN, "AUX" cannot be selected with (SRC) (SOURCE). Tip When connecting both a portable device and a changer, use the optional AUX-IN selector. Selecting auxiliary equipment Press (SRC) (SOURCE) repeatedly until "AUX" appears. Operate by the portable device itself. To adjust the volume level of auxiliary equipment, see "AUX LVL" on page 38. Switching the front/rear output - Zone × Zone You can set to have DVD audio/video output to the rear monitor, and output another source to the front. This function is convenient when you want to enjoy radio, music playback, etc, in the front, and DVD playback in the rear. Z × Z ATT DVD OFF SRC MODE TOP MENU + SOUND SETUP SYSTEM LIST ENTER - MENU PICTURE Z × Z EQ DSO AUDIO SUBTITLE ANGLE MENU EQ7 AF 1 Press (ZxZ). 2 Press (SOURCE) on the main unit to switch the source of the front. Operate the front with the main unit, and the rear (DVD) with the card remote commander. To return to normal status Press (ZxZ). Notes • While Zone × Zone is activated, the following buttons on the card remote commander become inactive: (ATT), (SRC) (SOURCE), (MODE), (VOL) +/-, (SYSTEM MENU), (LIST), (SOUND), (DSO), (EQ7). • Zone × Zone is not cancelled even if the disc is ejected, and it will be activated when a disc is inserted again. 41
-
 1
1 -
2
-
3
-
4
-
5
-
6
-
7
-
8
-
9
-
10
-
11
-
12
-
13
-
14
-
15
-
16
-
17
-
18
-
19
-
20
-
21
-
22
-
23
-
24
-
25
-
26
-
27
-
28
-
29
-
30
-
31
-
32
-
33
-
34
-
35
-
 36
36 -
 37
37 -
 38
38 -
 39
39 -
 40
40 -
 41
41 -
 42
42 -
 43
43 -
 44
44 -
 45
45 -
 46
46 -
47
-
48
-
49
-
50
-
51
-
52
-
53
-
54
-
55
-
56
-
57
-
58
-
59
-
60
-
61
-
62
-
63
-
64
-
65
-
66
-
67
-
68
-
69
-
70
-
71
-
72
-
73
-
74
-
75
-
76
-
77
-
78
-
79
-
80
-
81
-
82
-
83
-
84
-
85
-
86
-
87
-
88
-
89
-
90
-
91
-
92
-
93
-
94
-
95
-
96
-
97
-
98
-
99
-
100
-
101
-
102
-
103
-
104
-
105
-
106
-
107
-
108
-
109
-
110
-
111
-
112
-
113
-
114
-
115
-
116
-
117
-
118
-
119
-
120
-
121
-
122
-
123
-
124
-
125
-
126
-
127
-
128
-
129
-
130
-
131
-
132
-
133
-
134
-
135
-
136
-
137
-
138
-
139
-
140
-
141
-
142
-
143
-
144
-
145
-
146
-
147
-
148
-
149
-
150
-
151
-
152
-
153
-
154
-
155
-
156
-
157
-
158
-
159
-
160
-
161
-
162
-
163
-
164
-
165
-
166
-
167
-
168
-
169
-
170
-
171
-
172
-
173
-
174
-
175
-
176
-
177
-
178
-
179
-
180
-
181
-
182
-
183
-
184
-
185
-
186
-
187
-
188
-
189
-
190
-
191
-
192
-
193
-
194
-
195
-
196
-
197
-
198
-
199
-
200
-
201
-
202
-
203
-
204
-
205
-
206
-
207
-
208
-
209
-
210
-
211
-
212
-
213
-
214
-
215
-
216
-
217
-
218
-
219
-
220
-
221
-
222
-
223
-
224
-
225
-
226
-
227
-
228
-
229
-
230
-
231
-
232
-
233
-
234
-
235
-
236
-
237
-
238
-
239
-
240
-
241
-
242
-
243
-
244
-
245
-
246
-
247
-
248
-
249
-
250
-
251
-
252
-
253
-
254
-
255
-
256
-
257
-
258
-
259
-
260
-
261
-
262
-
263
-
264
-
265
-
266
-
267
-
268
-
269
-
270
-
271
-
272
-
273
-
274
-
275
-
276
-
277
-
278
-
279
-
280
-
281
-
282
-
283
-
284
-
285
-
286
-
287
-
288
 |
 |
