Sony MV-101 Installation/Connection Instructions - Page 1
Sony MV-101 - Mobile Dvd Manual
 |
View all Sony MV-101 manuals
Add to My Manuals
Save this manual to your list of manuals |
Page 1 highlights
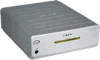
3-255-987-12 (1) DVD Player Installation/Connections Installation/Connexions Instalación/Conexiones MV-101 ©2003 Sony Corporation Printed in Korea Mounting example Exemple de montage Ejemplo de montaje Headrest monitor XVM-H65 (not supplied) Moniteur appuie-tête XVM-H65 (non fourni) Overhead monitor XVM-R70 (not supplied) Moniteur suspendu XVM-R70 (non fourni) Monitor para reposacabezas XVM-H65 (no suministrado) Monitor suspendido XVM-R70 (no suministrado) The player MV-101 Lecteur MV-101 Reproductor MV-101 1 1 2 3 4 × 2 × 4 × 4 5 6 7 5.3 m (17.4 ft) 5,3 m (17,4 pi) 5,3 m 3 m (9.8 ft) 3 m (9,8 pi) 3 m Equipment used in illustrations (not supplied) There is an R (audio right )/L (audio left)/V (video) output on MV-101, so you can connect either XVM-R70 or XVM-H65. Appareils utilisés dans les illustrations (non fournis) Le MV-101 est doté d'une sortie R (audio droite), d'une sortie L (audio gauche) et d'une sortie V (vidéo). Vous pouvez donc le raccorder soit au XVM-R70 ou au XVM-H65. Equipos utilizados en las ilustraciones (no suministrados) El modelo MV-101 dispone de una salida R (audio derecho)/L (audio izquierdo)/V (vídeo) que permite conectar los monitores XVM-R70 y XVM-H65. Overhead monitor XVM-R70 Moniteur suspendu XVM-R70 Monitor suspendido XVM-R70 Headrest monitor XVM-H65 Moniteur appuie-tête XVM-H65 Monitor para reposacabezas XVM-H65 Caution • This unit is designed for negative ground 12 V DC operation only. • Before making connections, turn the car ignition off to avoid short circuits. • Connect the yellow and red power input leads only after all other leads have been connected. • Be sure to connect the red power input lead to the positive 12 V power terminal which is powered when the ignition switch is in the accessory position. • Run all ground wires to a common ground point. • The use of optical instruments with this product will increase eye hazard. • Use of controls adjustments or performance of procedures of other than those specified herein may result in hazardous radiation exposure. Notes on the power supply cord (yellow) • When connecting the player in combination with other stereo components, the connected car circuit's rating must be higher than the sum of each component's fuse. • When no car circuits are rated high enough, connect the unit directly to the battery. Notes on installation • Before installation, be sure to turn the ignition switch to the OFF position or take the key out. Installing the player and the monitor (not supplied) with the ignition on may cause battery drain or a short circuit. • Do not damage any pipes, tubes, the fuel tank or electric wiring when installing the player and the monitor (not supplied). This can cause a fire. If you drill a hole in car panels, make sure that any hidden car parts will not be damaged. • Do not use any nuts or bolts for safety devices such as steering linkage, fuel supply or braking systems. This can cause a fire or an accident. • Take care to prevent cords and wires from getting tangled or crimped in the moving portion of a seat rail. Parts list (1) The numbers in the list are keyed to those in the instructions. Cautions • The screws attached to both sides of the player are necessary only when transporting the player. Before installing the player, be sure to take out all of the screws (left side: 2 and right side: 2, so total 4 screws). • The 4 screws work to mechanically support the player during transportation, so keep the screws for future transportation, such as relocation, etc. Connection diagram (2) 1 to a metal surface on the car First connect the black ground lead, then connect the yellow and red power input leads. 2 to the +12 V power terminal which is energized at all times Be sure to connect the black ground lead to a metal surface of the car first. 3 to the +12 V power terminal which is energized when the ignition switch is in the accessory position Be sure to connect the black ground lead to a metal surface of the car first.
-
 1
1 -
 2
2 -
 3
3 -
 4
4
 |
 |
