Sony NAS-SV20i Operating Instructions - Page 40
When using a computer, equipped with Windows Vista, Windows XP, Go to [Start] - [All Programs].
 |
UPC - 027242786233
View all Sony NAS-SV20i manuals
Add to My Manuals
Save this manual to your list of manuals |
Page 40 highlights
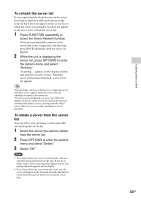
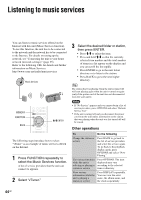
11 Select [OK] to close the window. 12 Connect the unit to the server. After you finish setting up Windows Media Player 12, refresh the server list of the unit and select this server from the server list. For details on selecting a server, see "To refresh the server list" (page 43). x When using a computer equipped with Windows Vista/ Windows XP This section explains how to set up Windows Media Player 11 installed on Windows Vista/ Windows XP*, as a server to connect with this unit. For details on how to operate Windows Media Player 11, refer to the help of Windows Media Player 11. * Windows Media Player 11 is not manufacturerinstalled on Windows XP. Access the Microsoft web site, download the installer, and then install Windows Media Player 11 on your computer. 1 Go to [Start] - [All Programs]. The [Network and Sharing Center] window appears. 5 Select [Customize]. The [Set Network Location] window appears. 6 Add a check mark to [Private] and select [Next]. 2 Select [Windows Media Player]. Windows Media Player 11 starts up. 3 Select [Media Sharing...] from the [Library] menu. If you are using Windows XP, go to step 9. 4 When is displayed, select [Networking...]. 7 Confirm that the [Location type] has been changed to [Private] and select [Close]. 8 Confirm that [(Private network)] is displayed in the [Network and Sharing Center] window and close the window. 9 If a check is not added next to [Share my media] in the [Media Sharing] window that is displayed in step 3, add a check mark to [Share my media], then select [OK]. A list of connectable devices is displayed. 40GB
-
 1
1 -
2
-
3
-
4
-
5
-
6
-
7
-
8
-
9
-
10
-
11
-
12
-
13
-
14
-
15
-
16
-
17
-
18
-
19
-
20
-
21
-
22
-
23
-
24
-
25
-
26
-
27
-
28
-
29
-
30
-
31
-
32
-
33
-
34
-
 35
35 -
 36
36 -
 37
37 -
 38
38 -
 39
39 -
 40
40 -
 41
41 -
 42
42 -
 43
43 -
 44
44 -
 45
45 -
46
-
47
-
48
-
49
-
50
-
51
-
52
-
53
-
54
-
55
-
56
-
57
-
58
-
59
-
60
-
61
-
62
-
63
-
64
-
65
-
66
-
67
-
68
-
69
-
70
-
71
-
72
-
73
-
74
-
75
-
76
-
77
-
78
-
79
-
80
-
81
-
82
-
83
-
84
-
85
-
86
-
87
-
88
-
89
-
90
-
91
-
92
-
93
-
94
-
95
 |
 |
