Sony NEX-5R Instruction Manual - Page 72
Click [Install]., USB Connection, Image Data Converter, Memory, Display
 |
View all Sony NEX-5R manuals
Add to My Manuals
Save this manual to your list of manuals |
Page 72 highlights
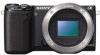
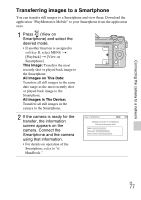
1 Turn on your computer, and insert the CD-ROM (supplied) into the CD-ROM drive. The installation menu screen appears. • If the installation menu does not appear, double-click [Computer] (For Windows XP: [My Computer]) t (PMHOME) t [Install.exe]. • If the AutoPlay screen appears, select "Run Install.exe" and follow the instructions that appear on the screen to proceed with the installation. 2 Connect the camera to the computer. 3 Click [Install]. • Make sure that both "Image Data Converter" and "PlayMemories Home" are checked and follow the instructions on the screen. • When the restarting confirmation message appears, restart the computer following the instructions on the screen. • DirectX may be installed depending on the system environment of your computer. 4 Remove the CD-ROM after the installation is complete. The following software is installed and shortcut icons appear on the desktop. "Image Data Converter" "PlayMemories Home" "PlayMemories Home Help Guide" x Mac The following computer environment is recommended when using the supplied software and importing images via a USB connection. OS (pre-installed) "Image Data Converter Ver.4" USB Connection: Mac OS X v10.3 to v10.8 "Image Data Converter": Mac OS X v10.5 to v10.8 CPU: Intel processor, such as Intel Core Solo/Core Duo/ Core 2 Duo Memory: 1 GB or more is recommended. Display: 1024 × 768 dots or more GB 72
-
 1
1 -
2
-
3
-
4
-
5
-
6
-
7
-
8
-
9
-
10
-
11
-
12
-
13
-
14
-
15
-
16
-
17
-
18
-
19
-
20
-
21
-
22
-
23
-
24
-
25
-
26
-
27
-
28
-
29
-
30
-
31
-
32
-
33
-
34
-
35
-
36
-
37
-
38
-
39
-
40
-
41
-
42
-
43
-
44
-
45
-
46
-
47
-
48
-
49
-
50
-
51
-
52
-
53
-
54
-
55
-
56
-
57
-
58
-
59
-
60
-
61
-
62
-
63
-
64
-
65
-
66
-
 67
67 -
 68
68 -
 69
69 -
 70
70 -
 71
71 -
 72
72 -
 73
73 -
 74
74 -
 75
75 -
 76
76 -
 77
77 -
78
-
79
-
80
-
81
-
82
-
83
-
84
-
85
-
86
-
87
-
88
-
89
-
90
-
91
-
92
-
93
-
94
-
95
-
96
-
97
-
98
-
99
-
100
-
101
-
102
-
103
-
104
-
105
-
106
-
107
 |
 |
