Sony NWZ-W262 Quick Start Guide - Page 1
Sony NWZ-W262 Manual
 |
View all Sony NWZ-W262 manuals
Add to My Manuals
Save this manual to your list of manuals |
Page 1 highlights
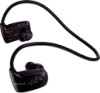
Quick Start Guide How to Install the Bundled Software How to Use your "WALKMAN" ©2011 Sony Corporation Printed in Malaysia NWZ-W262/W263 About the manuals In addition to this Quick Start Guide, this model is accompanied by a User Guide (HTML document) which you can view from the WALKMAN Guide. For details, refer to "How to Install the Bundled Software (User Guide included)." Contents Please check the items in the package. "WALKMAN" (1) Holder (1) USB cable (1) Earbuds (Size S, L) (Supplied in pairs) At purchase, M size earbuds are installed. Quick Start Guide (this manual) (1) Notes on Water Resistant Specifications (1) Software The software is stored in the built-in flash memory of your "WALKMAN," and it includes the following items: Content Transfer WALKMAN Guide User Guide, etc. For details on how to install software, refer to "How to Install the Bundled Software (User Guide included)." About Windows Operating System and Windows Media Player Make sure that the OS is Windows XP (Service Pack 3 or later), Windows Vista*1 (Service Pack 1 or later) or Windows 7*1, and that the installed Windows Media Player version on your computer is 11 (Windows XP/Windows Vista) or 12 (Windows 7). For details about usage or support on Windows Media Player, refer to Windows Media Player information from the following web site: http://support.microsoft.com/ *1 [Compatibility mode] for Windows XP is not supported. Three Ways to Transfer Music From CDs, etc., using Windows Media Player From iTunes*1, etc., using Content Transfer *1 Content Transfer supports data transfer from iTunes 9.0 to your "WALKMAN." By drag-and-drop using Windows Explorer For details on transferring music, refer to the User Guide. The User Guide can be readily viewed from the WALKMAN Guide. How to Install the Bundled Software (User Guide included) 1 Connect your "WALKMAN" to your computer. USB cable (supplied) 2 Select the following with the computer. Select [start] - [My Computer] or [Computer] - [WALKMAN] [Storage Media]. 3 Double-click [Setup.exe]. The install wizard appears. When you execute [Setup.exe], the [Setup.exe] file and [Install] folder stored in the [Storage Media] folder of your "WALKMAN" are copied to your computer for backup, and WALKMAN Guide and Content Transfer are installed to your computer. 4 Follow the on-screen instructions. After executing [Setup.exe], the WALKMAN Guide shortcut appears on the desktop of your computer. With your "WALKMAN" connected to your computer, Content Transfer starts automatically when installation of bundled software is completed. 5 Double-click (WALKMAN Guide) on the desktop to start the WALKMAN Guide. For details on transferring music, etc., refer to the User Guide included in the WALKMAN Guide. Hint You can start the WALKMAN Guide and Content Transfer from the [start] menu (displayed by clicking [start]). If you delete the [Setup.exe] file in your "WALKMAN" by formatting the built-in flash memory of your "WALKMAN," copy the [Setup.exe] file and the [Install] folder to your "WALKMAN" from the [Backup] folder on the computer. Connect your "WALKMAN" to the computer on which you want to install software, and follow the above procedure from step 1 to install it. After installing the software, delete the [Setup.exe] file and [Install] folder from your "WALKMAN." The backup data is preserved in the following location on the [C] drive on your computer by the default install setting. C:\Program Files\Sony\WALKMAN Guide\NWZ-W260\Backup What can you do with the WALKMAN Guide ? The WALKMAN Guide includes the following items: User Guide The following contents can be viewed in your web browser. Details on how to use your "WALKMAN" How to use software to transfer music to your "WALKMAN" Troubleshooting Customer Registration Link Customer Support Link Other useful Links Includes link information, etc., on the download site. The bundled items differ depending on the country/region of purchase. Hint After executing [Setup.exe], you can use the free space in the [Storage Media] folder more effectively by formatting the built-in flash memory of your "WALKMAN." To format the built-in flash memory of your "WALKMAN," see "To initialize (format) your "WALKMAN" on the backside. Charging the Battery 1 Connect your "WALKMAN" to an operating computer using the USB cable (supplied.) If a screen appears presenting a choice of actions, click "Cancel." Charging starts. OPR lamp Notes on charging by using the computer While charging, the OPR lamp indicates the charging status of your "WALKMAN." Lights up in red: Being charged Turns off: Charged fully or not charging Charging time is approx. 1.5 hours. When your "WALKMAN" has been fully charged, disconnect it from the computer. If the computer enters a power saving mode such as the Sleep or Hibernation mode while your "WALKMAN" is connected via the USB cable, your "WALKMAN" continues to draw power from the battery, discharging it. When you use your "WALKMAN" for the first time, or if you have not used your "WALKMAN" for a long time, it may take a few minutes to be recognized by the computer, even if charging has already started (the OPR lamp lights up in red). Check that the computer recognizes your "WALKMAN" after you have connected it to the computer for about 5 minutes. Checking the remaining battery power Remaining battery power is indicated by the OPR lamp. When the OPR lamp color changes to red, recharge the battery. Green* Orange* Red* Quick red blinking When the battery is depleted, the OPR lamp blinks red quickly and a long beep is heard. After that, you cannot operate your "WALKMAN." * Blinks at about 5 second intervals during playback and pause. Parts and Controls Neckband POWER switch Earbud OPR (Operation) lamp Headphone section USB jack cover SHUF (Shuffle)/PLAYLISTS button VOL +*1/- button button*1 button RESET button *1 There are tactile dots. Use them to help with button operations. How to install the earbuds At the time of purchase, M size earbuds are installed (S and L sizes are also supplied). To enjoy better sound quality, change the size of the earbuds or adjust the earbud position to fit in your ears comfortably and snugly. When you replace the earbuds, twist them so they attach firmly on your "WALKMAN" to prevent the earbuds from detaching and remaining in your ear. If an earbud becomes damaged, optional earbuds (EP-EX1) are available for purchase. Turning the power on and place your "WALKMAN" on your ear. 1 Check the left () and right () parts of your "WALKMAN." 2 Slide the POWER switch located on the right () part to the ON position to turn on your "WALKMAN." 3 Hang the neckband over the back of your ears. 4 Place the headphone sections into your ears. 5 Adjust your "WALKMAN" so it feels comfortable. Note If your "WALKMAN" does not feel comfortable, replace the earbuds. Refer to "How to install the earbuds." How to store your "WALKMAN" in the holder Whenever carrying or when not using your "WALKMAN," store your "WALKMAN" in the supplied holder. 1 Turn off your "WALKMAN." 2 Attach your "WALKMAN" to the holder firmly.
-
 1
1 -
 2
2
 |
 |
