Sony PCV-MXS20 System Reference Manual - Page 60
Removing the Power Supply, Rotate the power supply upside down and rest it on top of the chassis
 |
View all Sony PCV-MXS20 manuals
Add to My Manuals
Save this manual to your list of manuals |
Page 60 highlights
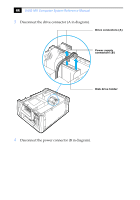
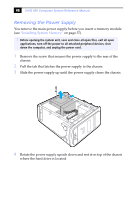
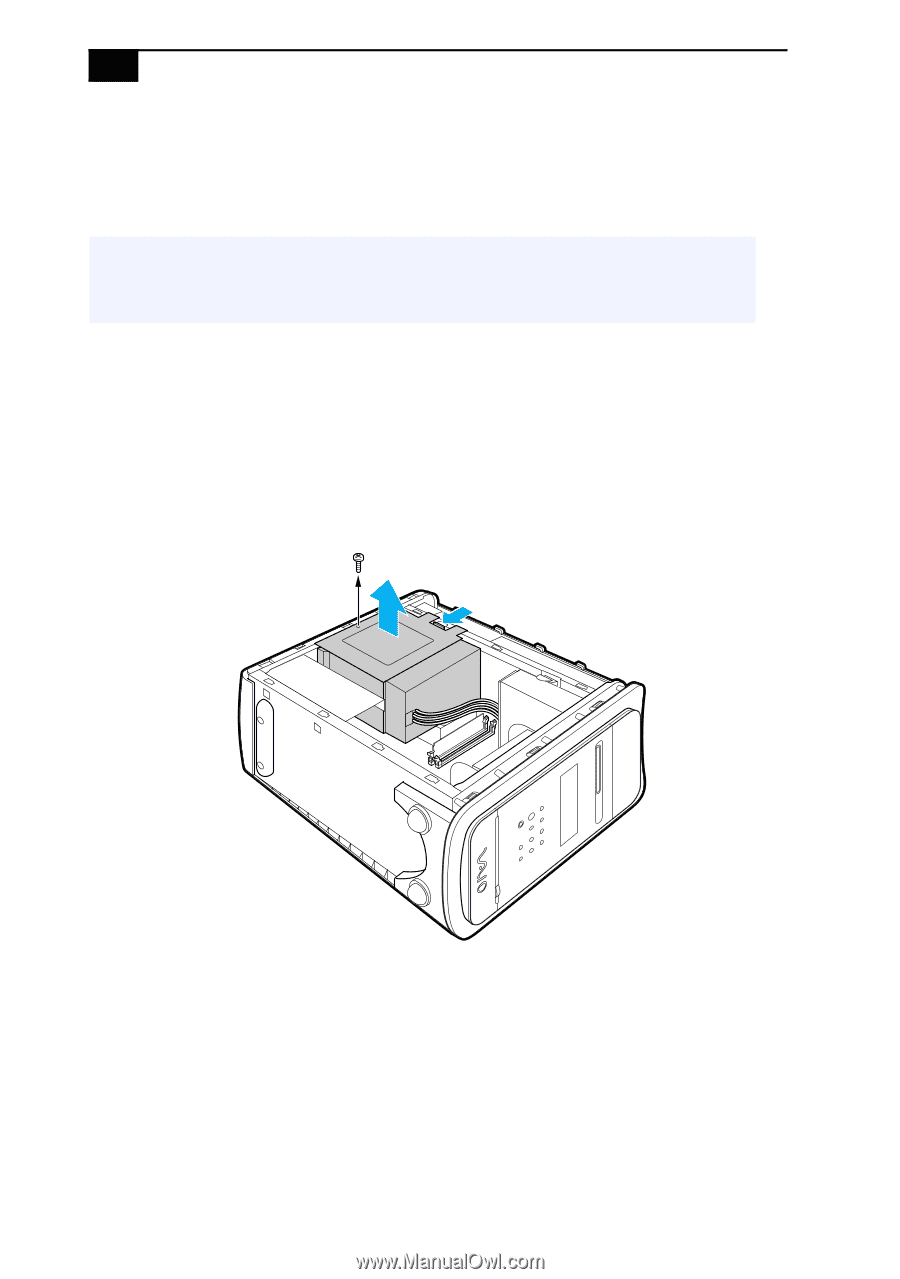
48 VAIO MX Computer System Reference Manual Removing the Power Supply You remove the main power supply before you insert a memory module (see "Installing System Memory" on page 37). ! Before opening the system unit, save and close all open files, exit all open applications, turn off the power to all attached peripheral devices, shut down the computer, and unplug the power cord. 1 Remove the screw that secures the power supply to the rear of the chassis. 2 Pull the tab that latches the power supply to the chassis. 3 Slide the power supply up until the power supply clears the chassis. 4 Rotate the power supply upside down and rest it on top of the chassis where the hard drive is located.
-
 1
1 -
2
-
3
-
4
-
5
-
6
-
7
-
8
-
9
-
10
-
11
-
12
-
13
-
14
-
15
-
16
-
17
-
18
-
19
-
20
-
21
-
22
-
23
-
24
-
25
-
26
-
27
-
28
-
29
-
30
-
31
-
32
-
33
-
34
-
35
-
36
-
37
-
38
-
39
-
40
-
41
-
42
-
43
-
44
-
45
-
46
-
47
-
48
-
49
-
50
-
51
-
52
-
53
-
54
-
 55
55 -
 56
56 -
 57
57 -
 58
58 -
 59
59 -
 60
60 -
 61
61 -
 62
62 -
 63
63 -
 64
64 -
 65
65 -
66
-
67
-
68
-
69
-
70
-
71
-
72
-
73
-
74
-
75
-
76
-
77
-
78
-
79
-
80
-
81
-
82
-
83
-
84
-
85
-
86
-
87
-
88
-
89
-
90
-
91
-
92
-
93
-
94
-
95
-
96
-
97
-
98
-
99
-
100
 |
 |
VAIO MX Computer System Reference Manual
48
Removing the Power Supply
You remove the main power supply before you insert a memory module
(see
“Installing System Memory”
on page 37).
1
Remove the screw that secures the power supply to the rear of the
chassis.
2
Pull the tab that latches the power supply to the chassis.
3
Slide the power supply up until the power supply clears the chassis.
4
Rotate the power supply upside down and rest it on top of the chassis
where the hard drive is located.
!
Before opening the system unit, save and close all open files, exit all open
applications, turn off the power to all attached peripheral devices, shut
down the computer, and unplug the power cord.