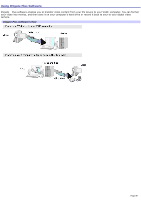
Sony PCV-RS312 VAIO User Guide - Page 82
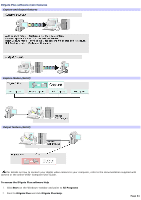
Starting DVgate Plus software, Go to Output Mode
 |
View all Sony PCV-RS312 manuals
Add to My Manuals
Save this manual to your list of manuals |
Page 82 highlights
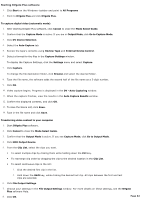
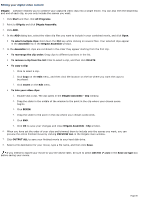
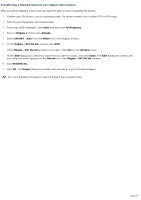
Starting DVgate Plus software 1. Click Start on the Windows® taskbar and point to All Programs 2. Point to DVgate Plus and click DVgate Plus. To capture digital video (automatic mode) 1. After starting DVgate Plus software, click Cancel to close the Mode Select Guide. 2. Confirm that the Capture Mode is active. If you are in Output Mode, click Go to Capture Mode. 3. Click DV Device Selection. 4. Select the Auto Capture tab. 5. Review the tape's contents using Review Tape and External Device Control. 6. Select a format for the files in the Capture Settings window. To display the Capture Settings, click the Settings menu and select Capture. 7. Click Capture. To change the file destination folder, click Browse and select the desired folder. 8. Type the file name, the software adds the second half of the file name as a 3-digit number. 9. Click OK. 10. Video capture begins. Progress is displayed in the DV - Auto Capturing window. 11. When the capture finishes, view the results in the Auto Capture Results window. 12. Confirm the displayed contents, and click OK. 13. To save the Scene List, click Save. 14. Type in the file name and click Save. Transferring video content to your computer 1. Start DVgate Plus software. 2. Click Cancel to close the Mode Select Guide. 3. Confirm that the Output Mode is active. If you see Capture Mode, click Go to Output Mode. 4. Click HDD Output Device. 5. From the Clip List, select the clips you want. To select multiple clips by clicking them while holding down the Ctrl key. To rearrange clip order by dragging the clip to the desired location in the Clip List. To select continuous clips in the list: 1. Click the desired first clip in the list. 2. Hold down the Shift key, while clicking the desired last clip. All clips between the first and last clips are selected. 6. Click File Output Settings. 7. Choose your settings in the File Output Settings window. For more details on these settings, see the DVgate Plus software Help. 8. Click OK. Page 82
-
 1
1 -
2
-
3
-
4
-
5
-
6
-
7
-
8
-
9
-
10
-
11
-
12
-
13
-
14
-
15
-
16
-
17
-
18
-
19
-
20
-
21
-
22
-
23
-
24
-
25
-
26
-
27
-
28
-
29
-
30
-
31
-
32
-
33
-
34
-
35
-
36
-
37
-
38
-
39
-
40
-
41
-
42
-
43
-
44
-
45
-
46
-
47
-
48
-
49
-
50
-
51
-
52
-
53
-
54
-
55
-
56
-
57
-
58
-
59
-
60
-
61
-
62
-
63
-
64
-
65
-
66
-
67
-
68
-
69
-
70
-
71
-
72
-
73
-
74
-
75
-
76
-
 77
77 -
 78
78 -
 79
79 -
 80
80 -
 81
81 -
 82
82 -
 83
83 -
 84
84 -
 85
85 -
 86
86 -
 87
87 -
88
-
89
-
90
-
91
-
92
-
93
-
94
-
95
-
96
-
97
-
98
-
99
-
100
-
101
-
102
-
103
-
104
-
105
-
106
-
107
-
108
-
109
-
110
-
111
-
112
-
113
-
114
-
115
-
116
-
117
-
118
-
119
-
120
-
121
-
122
-
123
-
124
-
125
-
126
-
127
-
128
-
129
-
130
-
131
-
132
-
133
-
134
-
135
-
136
-
137
-
138
-
139
-
140
-
141
-
142
-
143
-
144
-
145
-
146
-
147
-
148
-
149
-
150
-
151
-
152
-
153
-
154
-
155
-
156
-
157
-
158
-
159
-
160
-
161
 |
 |
