Sony PCV-RX690G Computer User Guide (primary manual)
Sony PCV-RX690G - Vaio Desktop Computer Manual
 |
View all Sony PCV-RX690G manuals
Add to My Manuals
Save this manual to your list of manuals |
Sony PCV-RX690G manual content summary:
- Sony PCV-RX690G | Computer User Guide (primary manual) - Page 1
VAIO Digital Studio™ Computer User Guide - Sony PCV-RX690G | Computer User Guide (primary manual) - Page 2
- Sony PCV-RX690G | Computer User Guide (primary manual) - Page 3
Contents Welcome 5 Locating Controls And Connectors...........7 Front Panel Overview 7 Back Panel Overview 10 VAIO Action Setup 13 Shortcut Keys 13 To Change the Sony Software Window Design........15 VAIO AV Applications 17 Overview of Preinstalled Software 18 DigitalPrint Software 21 DVgate - Sony PCV-RX690G | Computer User Guide (primary manual) - Page 4
User Guide Configuring Your VAIO Computer...........61 Hard Disk Drive Partition 61 i.LINK (IEEE1394) Compatibility 62 System, Application, And Driver Recovery CD(s 65 To Use the System Recovery CD(s 66 To Use the Application Recovery CD(s 68 To Use the Driver Recovery CD 69 Troubleshooting - Sony PCV-RX690G | Computer User Guide (primary manual) - Page 5
Welcome Thank you for purchasing your Sony VAIO® computer! Your new computer is a superb blend of high technology and easy-to-use functionality. The information provided here is designed to help you to become familiar with the hardware and software applications included with your system. 5 - Sony PCV-RX690G | Computer User Guide (primary manual) - Page 6
VAIO Digital Studio Computer User Guide 6 - Sony PCV-RX690G | Computer User Guide (primary manual) - Page 7
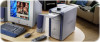
Panel Overview The front panel of your VAIO Digital Studio™ Computer enables access to the optical and floppy disk drives. On certain models, the front panel also provides access to Giga Pocket Personal Video as an optical or hard disk drive, confirm their operating system compatibility and required - Sony PCV-RX690G | Computer User Guide (primary manual) - Page 8
VAIO Digital Studio Computer User Guide Front panel (Model equipped with Giga Pocket features) 1 Optical drive 1 See the Specifications sheet for optical drive information. 2 Optical drive 2 See the Specifications sheet for optical drive information. 3 Floppy disk drive Reads and writes - Sony PCV-RX690G | Computer User Guide (primary manual) - Page 9
In jack Connection for a video cable (supplied). Audio L In jack/Audio R In jack Connection for an audio cable (supplied). 9 Optical drive 1 eject button Ejects a disc from Optical drive 1. 10 Optical drive 2 eject button Ejects a disc from Optical drive 2. 11 Memory Stick media slot Reads - Sony PCV-RX690G | Computer User Guide (primary manual) - Page 10
VAIO Digital Studio Computer User Guide Back Panel Overview The back panel of your computer contains the ports for supplied and optional accessories. The icons on the back panel locate and identify the ports on your computer. Back panel (Model equipped with Giga Pocket features) KEYBOARD MOUSE USB - Sony PCV-RX690G | Computer User Guide (primary manual) - Page 11
Back Panel Overview 5 Printer port Connection for a parallel device, such as a printer or scanner. 6 S/P DIF optical out port Connection for a digital audio or optical device. 7 i.LINK 6-pin port (IEEE1394) Connection for a compatible digital device such as a Sony Digital Handycam® camcorder. 8 - Sony PCV-RX690G | Computer User Guide (primary manual) - Page 12
VAIO Digital Studio Computer User Guide 12 - Sony PCV-RX690G | Computer User Guide (primary manual) - Page 13
Action Setup VAIO Action Setup manages the settings for your computer's Shortcut keys (S Explorer ❑ S3 - SonicStage™ ❑ S4 - PictureGear™ ❑ S5 - MovieShaker™ ❑ S5 - Giga Pocket™ Personal Video Recorder (For models equipped with Giga Pocket) ❑ S6 - Help/Demo You can reprogram the S keys to launch - Sony PCV-RX690G | Computer User Guide (primary manual) - Page 14
Studio Computer User Guide Changing the settings of the S keys 1 Click Start in the Windows taskbar and select All Programs. 2 Select VAIO Action Setup, then click VAIO Action Setup. ✍ You can also double-click the VAIO Action Setup icon, located in the Windows taskbar, to launch VAIO Action Setup - Sony PCV-RX690G | Computer User Guide (primary manual) - Page 15
You can select from different window designs for your Sony software and create your own personal computing environment. Changing the window design 1 Click Start in the Windows taskbar and select the Control Panel. 2 Click Other Control Panel Options. 3 Click UI Design Selector. 4 Click > and - Sony PCV-RX690G | Computer User Guide (primary manual) - Page 16
VAIO Digital Studio Computer User Guide 16 - Sony PCV-RX690G | Computer User Guide (primary manual) - Page 17
of audio and video (AV) applications that make it easy to use advanced multimedia technology. This section describes the VAIO AV applications. the system configuration you purchased. Your computer's visual presentation of the VAIO AV applications may not appear exactly as shown in this section, - Sony PCV-RX690G | Computer User Guide (primary manual) - Page 18
, and text. Just import your video clips and "shake" with a click of the mouse. Your personal movies are easy to create and fun to share with family and friends. PictureGear™ Sony Electronics Inc. This image management software displays images from your hard drive, a Sony digital still camera, or - Sony PCV-RX690G | Computer User Guide (primary manual) - Page 19
Sony Digital Handycam® Camcorder that supports the i.LINK interface. It allows you to capture compressed video or still images and save them to your hard disk drive ™ Sony Electronics Inc. VisualFlow software is a state-of-the-art Sony multimedia browser designed specifically for Memory Stick - Sony PCV-RX690G | Computer User Guide (primary manual) - Page 20
VAIO Digital Studio Computer User Guide 20 - Sony PCV-RX690G | Computer User Guide (primary manual) - Page 21
. You can select your favorite pictures and place them in handy folders for future use. 1 Click (Import) to open the PhotoCapture window. Your connected digital camera, camcorder, or Memory Stick® media is indicated in the window. ✍ Properly connect your digital camera, camcorder, or insert your - Sony PCV-RX690G | Computer User Guide (primary manual) - Page 22
VAIO Digital Studio Computer User Guide PhotoCapture window 2 Click the camera icon to open the Enter Photo Folder Name dialog box. You can enter a name for a new folder or click Select Photo Folder to import your pictures to an existing folder. Click OK. Enter Photo Folder Name dialog box 22 - Sony PCV-RX690G | Computer User Guide (primary manual) - Page 23
Click Capture to capture still images. You can preview a thumbnail version of your pictures in the selection view window. Capture Pictures from Video window 4 Select the desired pictures, and click Get Pictures. The PhotoCapture picture editor window appears. 5 Click View to see an enlarged version - Sony PCV-RX690G | Computer User Guide (primary manual) - Page 24
VAIO Digital Studio Computer User Guide Using PhotoCollection You can select and print your favorite digital pictures, using your computer and home printer. 1 Click (Photo) to open the PhotoCollection window. A list of folders is displayed on the left side of the window, with the folder contents - Sony PCV-RX690G | Computer User Guide (primary manual) - Page 25
. Add, remove, and change your designs to create your own unique photo art. 1 Click (Edit) to open the PhotoDecor - New PhotoDecor window. A list of folders is displayed on the left side of the window, with the folder contents displayed as thumbnail pictures on the right. PhotoDecor-New PhotoDecor - Sony PCV-RX690G | Computer User Guide (primary manual) - Page 26
VAIO Digital Studio Computer User Guide 2 Select the desired folder. From the thumbnail view, click to select the pictures you want to decorate. The PhotoDecor editing window appears. 3 Use the decoration features on the right side family. 1 Click (Album) to open the PhotoAlbum - New Album window. - Sony PCV-RX690G | Computer User Guide (primary manual) - Page 27
, click Stitch Album. See the online Help file for more details. Using LabelMaker Use LabelMaker to design original labels to personalize your media, such as Memory Stick® media, CDs, or video cassettes. 1 Click (Label) to open the Label - New Label window. Label - New Label window 27 - Sony PCV-RX690G | Computer User Guide (primary manual) - Page 28
VAIO Digital Studio Computer User Guide 2 Click an icon to select a media type. A new window opens. 3 Click the paper layout window appears, enabling you to list the contents of your audio or video media. You can create a song or video list, depending on the type of media label being created. Design - Sony PCV-RX690G | Computer User Guide (primary manual) - Page 29
each audio mode you wish to use. ❑ DVgate software does not support hard disk compression. Do not use disk compression if you are planning to work with DVgate software. ❑ Title data is saved in the flash memory of a digital video camera and is not transferred to tape by DVgate software. ❑ Disable - Sony PCV-RX690G | Computer User Guide (primary manual) - Page 30
4 MB. ❑ The DVgate software does not support hard disk compression. ❑ To maximize recording capabilities, video and audio data are not available while you are recording. ❑ If the DVgate software indicates that frames are dropped, try closing all open applications or defragmenting your hard drive. 30 - Sony PCV-RX690G | Computer User Guide (primary manual) - Page 31
be made from still images with added special effects and music. You can save your personal video creation in a format that is compatible with most computers. MovieShaker main window Import clip tray Shake tab/tray Edit tab/tray Capture tab/tray Working panel Effect tray Story Board tray 31 - Sony PCV-RX690G | Computer User Guide (primary manual) - Page 32
Computer User Guide Creating movies with MovieShaker software Using your imported clips, you can create a short movie using the Shake feature. The Shake feature selects clips from the Story Board tray, adds effects, and combines them randomly into a 30-second movie. After you "Shake" your video, you - Sony PCV-RX690G | Computer User Guide (primary manual) - Page 33
quality produced by the Shake feature (at the cost of longer Shake times) by turning off the "Shorten the Shake time" feature in the General panel of the Setting dialog box. See the "Menu reference" section of the online Help file for details. 33 - Sony PCV-RX690G | Computer User Guide (primary manual) - Page 34
VAIO Digital Studio Computer User Guide Adding effects to a scene or a clip 1 Double-click or drag the desired clip or scene to move it to the Story Board tray. 2 Click the - Sony PCV-RX690G | Computer User Guide (primary manual) - Page 35
MovieShaker Software Adding text effects to a scene or clip 1 Double-click or drag the clip or scene to move it to the Story Board tray. 2 Click the Text button on the Editing tray. Effects Tray (Text button selected) 3 Click the Text Setting button to create customized text. The Text Setting dialog - Sony PCV-RX690G | Computer User Guide (primary manual) - Page 36
VAIO Digital Studio Computer User Guide Saving a movie 1 Verify that the movie or clips you want to save are located on the Story Board tray. 2 Click the Export button on the - Sony PCV-RX690G | Computer User Guide (primary manual) - Page 37
or video files that you want to upload to the ImageStation service, and import them to the Import Clip tray. 2 Drag the desired clips or video files registration wizard appears and guides you through the initial registration process. Follow the on-screen instructions. ImageStation Login window 37 - Sony PCV-RX690G | Computer User Guide (primary manual) - Page 38
VAIO Digital Studio Computer User Guide 6 When the ImageStation application on your computer connects to http://www.imagestation.com to view your uploaded pictures or movies. Follow the on-screen instructions to access your ImageStation account. ✍ The ImageStation Web site may ask you to complete a - Sony PCV-RX690G | Computer User Guide (primary manual) - Page 39
PictureGear Software PictureGear Software PictureGear™ software is a digital image management application that allows you to view all the images stored in any directory on your computer. Thumbnail views provide quick reminders of your pictures. Use PictureGear software to brighten, add contrast, - Sony PCV-RX690G | Computer User Guide (primary manual) - Page 40
VAIO Digital Studio Computer User Guide Creating a photo album 1 Click the Folder tab in the main window and browse to locate your pictures. 2 Select the pictures you want to include in - Sony PCV-RX690G | Computer User Guide (primary manual) - Page 41
PictureGear Software 6 Click the "Customize the design" button to add pictures, frames, text, and effects. Custom Album window ✍ If you select the Custom Album process, the final album is created when you click the Finish button in the last dialog box. Custom album "Completed" window 7 Click Save to - Sony PCV-RX690G | Computer User Guide (primary manual) - Page 42
VAIO Digital Studio Computer User Guide Smart Capture Smart Capture is a Sony application that manages the i.LINK® connection between your computer and a compatible i.LINK digital camera or camcorder. You can capture and enhance video an optical disc drive or hard disk drive, confirm their operating - Sony PCV-RX690G | Computer User Guide (primary manual) - Page 43
effects that you can apply to your pictures or video clips. The Smart Capture main window opens with a blue screen image, indicating that there is an image can be displayed in the Smart Capture window. Consult the manual supplied with your digital camera or camcorder for more information. Using - Sony PCV-RX690G | Computer User Guide (primary manual) - Page 44
VAIO Digital Studio Computer User Guide 5 Click the Options button to view the available options for your still image capture. The Still Image Options window appears. Still Image Options window The - Sony PCV-RX690G | Computer User Guide (primary manual) - Page 45
Viewer window. ❑ Upload - Send your still images online to the ImageStation Web site to share with your family and friends. The ImageStation service stores your still images online when you become a registered user. See "Using ImageStation with Smart Capture software." ❑ Mail - E-mail your still - Sony PCV-RX690G | Computer User Guide (primary manual) - Page 46
VAIO Digital Studio Computer User Guide ✍ You must be connected to the Internet before attempting to upload or e-mail your still images or videos. Using Net Movie Mode 1 From the Start button in the Windows taskbar, select All Programs, select Smart Capture, and then click Smart Capture. The Smart - Sony PCV-RX690G | Computer User Guide (primary manual) - Page 47
Smart Capture ❑ Destination - Select a file destination for your movies when recording video clips. ❑ Capture Button - Set the characteristics of the software's on-screen Capture button. You can start and stop recording by clicking the Capture button (this - Sony PCV-RX690G | Computer User Guide (primary manual) - Page 48
VAIO Digital Studio Computer User Guide 3 You can review your movie from the Movie Player movies online to the ImageStation Web site to share with your family and friends. The ImageStation service stores your movies online when you become a registered user. See "Using ImageStation with Smart Capture - Sony PCV-RX690G | Computer User Guide (primary manual) - Page 49
ImageStation Login window appears. ImageStation Login window 2 For first-time users, the ImageStation registration wizard guides you through the initial registration process. Follow the on-screen instructions. If you are already a registered member, provide your login name and password. The Image - Sony PCV-RX690G | Computer User Guide (primary manual) - Page 50
VAIO Digital Studio Computer User Guide view your uploaded pictures or movies. Follow the on-screen instructions to access your ImageStation account. The ImageStation Web site may full login again, if your current session is not active. ✍ Sony recommends that your movie file size not exceed 254 MB if - Sony PCV-RX690G | Computer User Guide (primary manual) - Page 51
Provider (ISP) and configure your computer for Internet access before using EMD services. ❑ An EMD service provider. Consult the provider for service information. ✍ To protect your personal data, Sony uses Secure Sockets Layer (SSL), an encryption protocol for communication between your browser - Sony PCV-RX690G | Computer User Guide (primary manual) - Page 52
VAIO Digital Studio Computer User Guide SonicStage feature tabs (Main window) ❑ CD tab - The contents of your inserted audio CD are displayed, enabling functions such as recording to the computer's hard disk drive and use EMD services. SonicStage main window 1 Playlist view 2 3 4 52 56 7 - Sony PCV-RX690G | Computer User Guide (primary manual) - Page 53
Changes the screen view according to the selected feature. Click to open or close the Tutorial feature. 2 Player control buttons 6 Internet your optical disc drive for the first time, the "CD Drive Optimization" dialog box appears. Click Start to verify your optical disc drive. After the - Sony PCV-RX690G | Computer User Guide (primary manual) - Page 54
VAIO Digital Studio Computer User Guide . CD Info button to ✍ The CD Info button feature is not supported for all audio CDs. 5 Click (Rec to Jukebox) to begin recording external devices or media, see the instructions supplied with the device or media. These instructions are for using the Check-In - Sony PCV-RX690G | Computer User Guide (primary manual) - Page 55
to display the Transfer window. Your computer automatically recognizes the connected external device or media and lists the content information in a new panel on the right side of the Transfer window. Transfer window 3 Select the Playlist that contains the song that you want to check out. The songs - Sony PCV-RX690G | Computer User Guide (primary manual) - Page 56
VAIO Digital Studio Computer User Guide Check In ✍ The songs that you transfer to external devices or media can only be checked in to the hard drive of the device or media and lists the content information in a new panel on the right side of the Transfer window. 3 Select the song to be checked - Sony PCV-RX690G | Computer User Guide (primary manual) - Page 57
SonicStage Software Additional features ❑ SonicStage Tutorial - SonicStage features are described in the Tutorial. The user-friendly interface instructs you on how to use all SonicStage features. ❑ SonicStage Backup Tool - You can back up and restore music, graphics, and information data managed by - Sony PCV-RX690G | Computer User Guide (primary manual) - Page 58
VAIO Digital Studio Computer User Guide VisualFlow Software VisualFlow™ software is a Sony state-of-the-art multimedia browser designed specifically for Memory Stick® media. It displays any still picture, movie or sound files stored in a Memory Stick media in a visually pleasing, artistic manner. - Sony PCV-RX690G | Computer User Guide (primary manual) - Page 59
Sort section on the main toolbar to select a sorting method. 5 Placing your cursor on the left end of the main toolbar activates the current Memory Stick properties. 6 Placing your cursor on the right end of the main toolbar activates a secondary toolbar with more functions. 7 Click an image to show - Sony PCV-RX690G | Computer User Guide (primary manual) - Page 60
1 Insert the Driver Recovery CD into your optical drive. 2 Click Start from the Windows® taskbar, select My Computer, and click your optical drive. 3 Select Support, and click VEC. 4 Double-click Setup. The VAIO Edit Components installation wizard starts. 5 Follow the on-screen instructions in the - Sony PCV-RX690G | Computer User Guide (primary manual) - Page 61
the available space on your C partition. Defragmenting your hard disk drive If you encounter frame dropping while recording digital video onto your hard disk drive, defragmentation may be necessary. 1 Deactivate your screen saver and close other open applications, if applicable. 2 Click Start in the - Sony PCV-RX690G | Computer User Guide (primary manual) - Page 62
Guide i.LINK (IEEE1394) Compatibility Your VAIO computer may include either 4-pin or 6-pin, or both types, of i.LINK ports. ✍ i.LINK is a trademark of Sony peripherals to your system, such as an optical or hard disk drive, confirm their operating system compatibility and required operating conditions - Sony PCV-RX690G | Computer User Guide (primary manual) - Page 63
i.LINK cable connector into this port. 2 Plug the other end of the cable into the corresponding 4- or 6-pin i.LINK port on your computer. ✍ See the instructions that came with your i.LINK device for more information on installation and use. 63 - Sony PCV-RX690G | Computer User Guide (primary manual) - Page 64
VAIO Digital Studio Computer User Guide 64 - Sony PCV-RX690G | Computer User Guide (primary manual) - Page 65
, And Driver Recovery CD(s) System Recovery CD(s) Sony Electronics Inc. The System Recovery CD utility enables you to restore the operating system and software that shipped with your computer if they become corrupted or are erased. It can be used only to restore the hard disk of the Sony computer - Sony PCV-RX690G | Computer User Guide (primary manual) - Page 66
with the computer when you purchased it. If you experience a problem with your computer, reinstalling an individual application or device driver may correct the problem. You may not need to recover the entire contents of your hard drive. ✍ Use the Application Recovery CD(s) to reinstall individual - Sony PCV-RX690G | Computer User Guide (primary manual) - Page 67
drive. The System Recovery utility starts from the optical drive. The first CD must be in the drive VAIO Recovery Utility." 4 The VAIO System Recovery Utility dialog box appears. Click Next. 5 At the pop-up prompt, select Yes to begin the system recovery process. Follow the on-screen instructions - Sony PCV-RX690G | Computer User Guide (primary manual) - Page 68
, or contact Sony Customer Support at 1-888-4-SONY-PC. Using the Application Recovery CD(s) 1 Turn on your computer. If your computer is already on, save and close all open applications. 2 When the Windows desktop appears, insert the Application Recovery CD into your computer's optical drive. The - Sony PCV-RX690G | Computer User Guide (primary manual) - Page 69
. You can reinstall an individual driver to correct a problem that you are experiencing with your drive. ✍ If your system is equipped with two optical drives, insert the Driver Recovery CD into the upper optical drive. 3 Click Start in the Windows taskbar and click Control Panel. The Control Panel - Sony PCV-RX690G | Computer User Guide (primary manual) - Page 70
VAIO Digital Studio Computer User Guide 70 - Sony PCV-RX690G | Computer User Guide (primary manual) - Page 71
Troubleshooting This section describes how to solve common problems you may encounter when using your computer. Many problems have simple solutions, so try these suggestions before you call Sony Customer Support. Topics My computer does not start. ❑ Check that the computer is plugged into a power - Sony PCV-RX690G | Computer User Guide (primary manual) - Page 72
Driver Recovery CD" in the online User Guide, for more information. You can access the online User Guide as follows: 1 Click Start in the Windows taskbar, then click VAIO Help and Support. 2 From the VAIO Help and Support menu, click VAIO User Guide steps: 1 Save any open files, if possible. 2 - Sony PCV-RX690G | Computer User Guide (primary manual) - Page 73
Support. The VAIO Help and Support dialog box appears. 2 Select Fixing a Problem and then select Startup and Shut Down problems. A list of specific problem topics appears on the right side of the dialog box. 3 Select Startup and Shutdown Troubleshooter. Follow the on-screen instructions Sony screen - Sony PCV-RX690G | Computer User Guide (primary manual) - Page 74
VAIO Digital Studio Computer User Guide My optical drive tray does not open. There are two methods for opening your optical drive tray: ❑ Use the Eject button 1 Make sure the computer is turned on. 2 Press the Eject button on the drive. ❑ Use the My Computer icon 1 Click Start in the Windows taskbar - Sony PCV-RX690G | Computer User Guide (primary manual) - Page 75
video resolution, see the Troubleshooting topic, "How do I change the video resolution of my display?" ✍ If your video card utilizes system memory, you may improve video that drivers are installed properly, by following these steps: 1 Click Start in the Windows taskbar, then select Control Panel. 2 - Sony PCV-RX690G | Computer User Guide (primary manual) - Page 76
VAIO Digital Studio Computer User Guide When I click an application icon, a message such as "You must insert the application CD into your drive the label side facing up. Why doesn't my optical drive (DVD video resolution of my display? 1 Click Start in the Windows taskbar and then select Control Panel - Sony PCV-RX690G | Computer User Guide (primary manual) - Page 77
Troubleshooting Why is there no sound system using these steps: 1 Click Start in the Windows taskbar, then select Control Panel. 2 Select Sounds, Speech, and Audio Devices, then click "Adjust the system volume reinstall the sound drivers. See "To Use the Driver Recovery CD" for more information. 77 - Sony PCV-RX690G | Computer User Guide (primary manual) - Page 78
VAIO Digital Studio Computer User Guide My modem connection is slow. Many factors influence modem connection speed: ❑ Telephone line noise ❑ Incompatibility with other telephone equipment such as fax machines or other modems. ❑ Internet Service problem is fax-related, check that there are no problems - Sony PCV-RX690G | Computer User Guide (primary manual) - Page 79
Troubleshoot button. The VAIO Help and Support Center window appears. 6 Follow the on-screen instructions to resolve the problem. ✍ You may need to reinstall the modem drivers. See "To Use the Driver Start in the Windows taskbar, then click Control Panel. 2 Click Sounds, Speech, and Audio Devices, - Sony PCV-RX690G | Computer User Guide (primary manual) - Page 80
VAIO Digital Studio Computer User Guide 4 Select the Options menu mouse is plugged securely into the Mouse port. ❑ Save and close all open applications. Turn off your computer, wait approximately 10 seconds, and then restart mouse drivers. See "To Use the Driver Recovery CD" for more information. 80 - Sony PCV-RX690G | Computer User Guide (primary manual) - Page 81
slowly? ❑ The system responsiveness varies depending with the number of applications that are open and running. Close any applications that you are not currently using. ❑ Increasing the system memory may also help. For information on installing memory, please see the online VAIO User Guide. 81 - Sony PCV-RX690G | Computer User Guide (primary manual) - Page 82
VAIO Digital Studio Computer User Guide -screen instructions to driver that your printer may emulate. Refer to the manual that came with your printer for specific emulation information. My connected printer doesn't function after the computer resumes from a power saving mode. Clear the printer memory - Sony PCV-RX690G | Computer User Guide (primary manual) - Page 83
Troubleshooting To contact Sony for technical support For further technical assistance, call 1-888-4-SONY-PC (1-888-476-6972) or access the Sony Computing Support Web site at: http://www.sony.com/pcsupport. 83 - Sony PCV-RX690G | Computer User Guide (primary manual) - Page 84
VAIO Digital Studio Computer User Guide 84 - Sony PCV-RX690G | Computer User Guide (primary manual) - Page 85
brief period of power loss. ❑ The power control button on the front panel does not turn off the system AC power. To remove power from the system sink will not be hot. ❑ Do not attempt to open the power supply. There are no user-serviceable parts in the power supply. To avoid personal injury or - Sony PCV-RX690G | Computer User Guide (primary manual) - Page 86
VAIO Digital Studio Computer User Guide Disposal of the lithium battery Dispose of the lithium battery properly. In some areas, the disposal of lithium batteries in household or business trash may be prohibited. You can return your unwanted lithium batteries to your nearest Sony Service back panel of - Sony PCV-RX690G | Computer User Guide (primary manual) - Page 87
the problem. Moisture condensation If your computer is brought directly from a cold location to a warm one, moisture may condense inside your computer. In this case, allow at least an hour before turning on your computer. If any problem occurs, unplug your computer, and contact your Sony Service - Sony PCV-RX690G | Computer User Guide (primary manual) - Page 88
VAIO Digital Studio Computer User Guide Upgrading the computer system ❑ The upgrading procedures described in the online manual open the system or follow any of the upgrading procedures described in the online manual software may not function correctly. Sony recommends that you keep your display - Sony PCV-RX690G | Computer User Guide (primary manual) - Page 89
the computer to sudden changes in temperature. ❑ Do not turn off the power while the computer is accessing the hard disk drive. Handling floppy disks ❑ Do not open the shutter manually and touch the surface of the floppy disk. ❑ Keep floppy disks away from magnets. ❑ Keep floppy disks away from - Sony PCV-RX690G | Computer User Guide (primary manual) - Page 90
common problems. (Note: The User Guide is not available in hard copy for all models.) Online (Electronic) Documentation The User Guide is available electronically on your hard drive. Two additional guides, Upgrading and Maintaining Your VAIO Digital Studio Computer and the Troubleshooting Help - Sony PCV-RX690G | Computer User Guide (primary manual) - Page 91
you want to view. To contact the Sony fax-on-demand service, call 1-888-4-SONY-PC (1-888-476-6972). (Requires a Sony computer by selecting Software Updates on the Sony Computing Support Web site at http://www.sony.com/pcsupport. VAIO Computer System Reference Manual This advanced reference manual - Sony PCV-RX690G | Computer User Guide (primary manual) - Page 92
VAIO Digital Studio Computer User Guide 92 - Sony PCV-RX690G | Computer User Guide (primary manual) - Page 93
settings 85 changing parallel port type 73 condensation 87 disposing of lithium battery 86 hard disk drive 89 proper handling 86 removing side cover 85 shutting down 85 startup problems 71 system response problem 72 upgrading 88 connecting cables 87 peripheral equipment 87 power cord 85 printers 82 - Sony PCV-RX690G | Computer User Guide (primary manual) - Page 94
User Guide DVD-RW recording problems 76 DVgate software 29 AVI files 30 using a digital video device 29 E electronic equipment 86 Electronic Music Distribution service 51 electrostatic discharge 88 EMD service 51 encryption 51 ethernet port location 10 F floppy disk drive location 8 Front Panel - Sony PCV-RX690G | Computer User Guide (primary manual) - Page 95
partitioning your hard disk drive 61 party drivers 72 Recovery CDs 65 region codes 75 removing side Sony online service 37 Sony software window design changing 15 speakers caution 86 surge protectors 85 S-video In port 9, 11 S-video Out port 11 System Recovery CD(s) SRCDs 66 system response problem - Sony PCV-RX690G | Computer User Guide (primary manual) - Page 96
VAIO Digital Studio Computer User Guide T telephone service 87 Troubleshooting 72 CD playback problems 76 CD/DVD playback problems 74 CD-RW recording 76 changing parallel port type 73 computer stopped responding 72 DVD playback problems 75 DVD-RW recording 76 keyboard 81 microphone 79 modem 78 - Sony PCV-RX690G | Computer User Guide (primary manual) - Page 97
- Sony PCV-RX690G | Computer User Guide (primary manual) - Page 98
- Sony PCV-RX690G | Computer User Guide (primary manual) - Page 99
- Sony PCV-RX690G | Computer User Guide (primary manual) - Page 100
-
 1
1 -
 2
2 -
 3
3 -
 4
4 -
 5
5 -
 6
6 -
 7
7 -
8
-
9
-
10
-
11
-
12
-
13
-
14
-
15
-
16
-
17
-
18
-
19
-
20
-
21
-
22
-
23
-
24
-
25
-
26
-
27
-
28
-
29
-
30
-
31
-
32
-
33
-
34
-
35
-
36
-
37
-
38
-
39
-
40
-
41
-
42
-
43
-
44
-
45
-
46
-
47
-
48
-
49
-
50
-
51
-
52
-
53
-
54
-
55
-
56
-
57
-
58
-
59
-
60
-
61
-
62
-
63
-
64
-
65
-
66
-
67
-
68
-
69
-
70
-
71
-
72
-
73
-
74
-
75
-
76
-
77
-
78
-
79
-
80
-
81
-
82
-
83
-
84
-
85
-
86
-
87
-
88
-
89
-
90
-
91
-
92
-
93
-
94
-
95
-
96
-
97
-
98
-
99
-
100
 |
 |
VAIO Digital Studio™
Computer User Guide