Sony RDR-GX7 Quick Start Guide - Page 1
Sony RDR-GX7 Manual
 |
View all Sony RDR-GX7 manuals
Add to My Manuals
Save this manual to your list of manuals |
Page 1 highlights
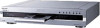
3-085-512-11(1) ©2003 Sony Corporation Quick Start Guide Step 1 Getting Connected Step 2 Guided Setup Step 3 Basic Operations Printed in Japan Step 1 Getting Connected Select one of the following three types of common connections: TV + Antenna or Cable without a Cable Box TV + Satellite Receiver or Digital Cable Box TV + Cable Box The following are just a few examples For further explanations, see "Basic Hookups and Settings" in the Operating Instructions. TV + Antenna or Cable without a Cable Box AV Amplifier (receiver) DIGITAL IN DVD COAXIAL ASSIGNABLE DVD R-AUDIO-L S VIDEO VIDEO LINE IN VCR LINE OUT S VIDEO R-AUDIO-L VIDEO VHF/UHF IN OUT CONTROL S IN DIGITAL OUT PCM/DTS/DOLBY DIGITAL LINE IN COAXIAL R-AUDIO-L 1 VIDEO S VIDEO LINE OUT R-AUDIO-L VIDEO 1 S VIDEO OPTICAL 3 2 Y PB PR COMPONENT VIDEO OUT DVD Recorder ~ AC IN LINE IN S VIDEO VIDEO L AUDIO R Television VHF/UHF IN Connect the signal source to the recorder. Use a coaxial cable (not supplied) to connect the signal source coming from your wall to the VHF/UHF IN jack on the recorder. If you have a VCR To playback video tapes, connect the LINE OUT jacks on your VCR to the LINE IN 3 jacks on the recorder using an audio/video cord (not supplied). If your VCR has an S-video jack, you can use an S-video cord (not supplied) instead of the yellow video jack on the audio/video cord. Connect the recorder to your TV. Use the supplied antenna cable to connect the VHF/UHF OUT jack on the recorder to the VHF/UHF IN jack on your TV. Then use the supplied audio/video cord to connect the LINE OUT jacks on the recorder to the LINE IN jacks on your TV. If your TV has an S-video jack, you can use an S-video cord (not supplied) instead of the yellow video jack on the audio/video cord. If you have an AV amplifier (receiver) Connect either an audio cord (not supplied) from the LINE OUT jacks on the recorder to the LINE IN jacks on your AV amplifier (receiver), or a digital cord (not supplied) from the DIGITAL OUT (COAXIAL or OPTICAL) jack on the recorder to the DIGITAL IN jack on your AV amplifier (receiver). Connect all power cords last. Now you're ready to go to "Step 2 Guided Setup." TV + Satellite Receiver or Digital Cable Box Satellite Receiver or Digital Cable Box RF IN LINE OUT S VIDEO OUT R-AUDIO-L VIDEO AV Amplifier (receiver) DIGITAL IN DVD COAXIAL ASSIGNABLE DVD R-AUDIO-L S VIDEO VIDEO LINE IN VCR LINE OUT S VIDEO R-AUDIO-L VIDEO LINE IN R-AUDIO-L VIDEO 1 S VIDEO 3 VHF/UHF IN OUT CONTROL S IN DIGITAL OUT PCM/DTS/DOLBY DIGITAL LINE IN COAXIAL R-AUDIO-L 1 VIDEO S VIDEO LINE OUT R-AUDIO-L VIDEO 1 S VIDEO OPTICAL 3 2 Y PB PR COMPONENT VIDEO OUT DVD Recorder ~ AC IN LINE IN S VIDEO VIDEO L AUDIO R Television Connect the signal source to your satellite receiver or digital cable box. Use a coaxial cable (not supplied) to connect the signal source coming from your wall to the RF IN jack on the satellite receiver or digital cable box. Connect your satellite receiver or digital cable box to the recorder. Use an audio/video cord (not supplied) to connect the LINE OUT jacks on your satellite receiver or digital cable box to the LINE IN 1 jacks on the recorder. If your satellite receiver or digital cable box has an S-video jack, you can use an S-video cord (not supplied) instead of the yellow video jack on the audio/video cord. If you have a VCR To playback video tapes, connect the LINE OUT jacks on your VCR to the LINE IN 3 jacks on the recorder using an audio/video cord (not supplied). If your VCR has an S-video jack, you can use an S-video cord (not supplied) instead of the yellow video jack on the audio/video cord. Connect the recorder to your TV. Use the supplied audio/video cord to connect the LINE OUT jacks on the recorder to the LINE IN jacks on you TV. If your TV has an S-video jack, you can use an S-video cord (not supplied) instead of the yellow video jack on the audio/video cord. If you have an AV amplifier (receiver) Connect either an audio cord (not supplied) from the LINE OUT jacks on the recorder to the LINE IN jacks on your AV amplifier (receiver), or a digital cord (not supplied) from the DIGITAL OUT (COAXIAL or OPTICAL) jack on the recorder to the DIGITAL IN jack on your AV amplifier (receiver). Connect all power cords last. Now you're ready to go to "Step 2 Guided Setup." TV + Cable Box Cable Box RF IN OUT AV Amplifier (receiver) DIGITAL IN DVD COAXIAL ASSIGNABLE DVD R-AUDIO-L S VIDEO VIDEO LINE IN VCR LINE OUT S VIDEO R-AUDIO-L VIDEO VHF/UHF IN OUT CONTROL S IN DIGITAL OUT PCM/DTS/DOLBY DIGITAL LINE IN COAXIAL R-AUDIO-L 1 VIDEO S VIDEO LINE OUT R-AUDIO-L VIDEO 1 S VIDEO OPTICAL 3 2 Y PB PR COMPONENT VIDEO OUT DVD Recorder ~ AC IN LINE IN S VIDEO VIDEO L AUDIO R Television VHF/UHF IN Connect the signal source to your cable box. Use a coaxial cable (not supplied) to connect the signal source coming from your wall to the RF IN jack on your cable box. Connect your cable box to the recorder. Use a coaxial cable (not supplied) to connect the RF OUT jack on your cable box to the VHF/UHF IN jack on the recorder. If you have a VCR To playback video tapes, connect the LINE OUT jacks on your VCR to the LINE IN 3 jacks on the recorder using an audio/video cord (not supplied). If your VCR has an Svideo jack, you can use an S-video cord (not supplied) instead of the yellow video jack on the audio/video cord. Connect the recorder to your TV. Use the supplied antenna cable to connect the VHF/UHF OUT jack on the recorder to the VHF/UHF IN jack on your TV. Then use the supplied audio/video cord to connect the LINE OUT jacks on the recorder to the LINE IN jacks on your TV. If your TV has an S-video jack, you can use an S-video cord (not supplied) instead of the yellow video jack on the audio/video cord. If you have an AV amplifier (receiver) Connect either an audio cord (not supplied) from the LINE OUT jacks on the recorder to the LINE IN jacks on your AV amplifier (receiver), or a digital cord (not supplied) from the DIGITAL OUT (COAXIAL or OPTICAL) jack on the recorder to the DIGITAL IN jack on your AV amplifier (receiver). Connect all power cords last. Now you're ready to go to "Step 2 Guided Setup."
-
 1
1 -
 2
2
 |
 |
