Sony RDR-VX515 Operating Instructions - Page 15
Step 3: Connecting to Your TV, When playing wide screen images - recorder
 |
View all Sony RDR-VX515 manuals
Add to My Manuals
Save this manual to your list of manuals |
Page 15 highlights
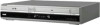
Hookups and Settings Step 3: Connecting to Your TV Connect the supplied audio/video cord to the LINE OUT (AUDIO L/R/VIDEO) jacks of the recorder. To enjoy higher quality images, connect an S video cord (not supplied) instead of the yellow (video) plug. When using this connection, be sure to connect the audio cord to the LINE OUT (AUDIO L/R) jacks. INPUT S VIDEO TV or projector INPUT AUDIO R L (red) (white) VIDEO (yellow) S video cord (not supplied) S VIDEO OUT LINE 1 IN LINE OUT VIDEO VIDEO (yellow) Audio/video cord (supplied) to S VIDEO OUT VCR-DVD recorder L R AUDIO AUDIO (white) (red) to LINE OUT (VIDEO/AUDIO L/R) AUDIO OUT COMPONENT VIDEO OUT S VIDEO OUT LINE 1 IN LINE OUT VIDEO VIDEO VHF/UHF L Y IN R PB DIGITAL AUDIO OUT PR OPTICAL COAXIAL L R OUT AUDIO AUDIO : Signal flow When playing "wide screen" images Some recorded images may not fit your TV screen. To change the picture size, see page 95. Notes • Do not connect more than one type of video cord between the recorder and your TV at the same time. • During DVD recording, you cannot watch VHS pictures by pressing VIDEO, as the S VIDEO OUT jack will output DVD video signals only. • Do not connect your TV's audio output jacks to the LINE IN (AUDIO L/R) jacks at the same time. This will cause unwanted noise to come from your TV's speakers. ,continued 15
-
 1
1 -
2
-
3
-
4
-
5
-
6
-
7
-
8
-
9
-
 10
10 -
 11
11 -
 12
12 -
 13
13 -
 14
14 -
 15
15 -
 16
16 -
 17
17 -
 18
18 -
 19
19 -
 20
20 -
21
-
22
-
23
-
24
-
25
-
26
-
27
-
28
-
29
-
30
-
31
-
32
-
33
-
34
-
35
-
36
-
37
-
38
-
39
-
40
-
41
-
42
-
43
-
44
-
45
-
46
-
47
-
48
-
49
-
50
-
51
-
52
-
53
-
54
-
55
-
56
-
57
-
58
-
59
-
60
-
61
-
62
-
63
-
64
-
65
-
66
-
67
-
68
-
69
-
70
-
71
-
72
-
73
-
74
-
75
-
76
-
77
-
78
-
79
-
80
-
81
-
82
-
83
-
84
-
85
-
86
-
87
-
88
-
89
-
90
-
91
-
92
-
93
-
94
-
95
-
96
-
97
-
98
-
99
-
100
-
101
-
102
-
103
-
104
-
105
-
106
-
107
-
108
-
109
-
110
-
111
-
112
-
113
-
114
-
115
-
116
-
117
-
118
-
119
-
120
-
121
-
122
-
123
-
124
 |
 |
