Sony SDM-M51 Operating Instructions - Page 9
Step 5: Turn on the monitor and computer, Using the stereo speaker - monitor power supply
 |
View all Sony SDM-M51 manuals
Add to My Manuals
Save this manual to your list of manuals |
Page 9 highlights
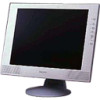
Step 5: Turn on the monitor and computer 1 Press the 1 (power) switch. The indicator of the monitor lights up in green. 2 Turn on the computer. The installation of your monitor is complete. If necessary, use the monitor's controls to adjust the picture. If no picture appears on your screen • Check that the monitor is correctly connected to the computer. • If NO INPUT SIGNAL appears on the screen, the computer is in the power saving mode. Try pressing any key on the keyboard or moving the mouse. • If CABLE DISCONNECTED appears on the screen, check that the video input cable is properly connected. • If OUT OF SCAN RANGE appears on the screen, reconnect the old monitor. Then adjust the computer's graphic board so that the horizontal frequency is between 28 - 64 kHz, and the vertical frequency is between 48 - 75 Hz. For more information about the on-screen messages, see "Trouble symptoms and remedies" on page 19. For customers using Windows 95/98/2000 To maximize the potential of your monitor, install the new model information file from the supplied Windows Monitor Information Disk onto your PC. This monitor complies with the "VESA DDC" Plug & Play standard. If your PC/graphics board complies with DDC, select "Plug & Play Monitor (VESA DDC)" or this monitor's model name as the monitor type in the "Control Panel" of Windows 95/98/2000. If your PC/graphics board has difficulty communicating with this monitor, load the Windows Monitor Information Disk and select this monitor's model name as the monitor type. For customers using Windows NT4.0 Monitor setup in Windows NT4.0 is different from Windows 95/98/2000 and does not involve the selection of monitor type. Refer to the Windows NT4.0 instruction manual for further details on adjusting the resolution, refresh rate, and number of colors. Adjusting the monitor's resolution and color number Adjust the monitor's resolution and color number by referring to your computer's instruction manual. The color number may vary according to your computer or video board. The color palette setting and the actual number of colors are as follows: • High Color (16 bit) t 65,536 colors • True Color (24 bit) t about 16.77 million colors In true color mode (24 bit), speed may be slower. Using the stereo speaker You can listen to music, sounds, and other audio files using the stereo speaker of your monitor. Adjusting the volume Volume adjustments are made using a separate VOLUME menu from the main menu (page 11). 1 Press the 2 +/- buttons. The VOLUME menu appears on the screen. VOL UME 40 GB 2 Press the 2 +/- button to adjust the volume. The menu automatically disappears after about 5 seconds. Using the headphones jack You can listen to the audio signals from your computer or other audio equipment using headphones. Connect your headphones to the headphones jack. The speaker turns off when headphones are connected to the headphones jack. Adjust the volume of the headphones using the VOLUME menu. Notes • You cannot adjust the volume when displaying the main menu on the screen. • When your monitor is in power saving mode, no sound comes from the speaker. 9
-
 1
1 -
2
-
3
-
 4
4 -
 5
5 -
 6
6 -
 7
7 -
 8
8 -
 9
9 -
 10
10 -
 11
11 -
 12
12 -
 13
13 -
 14
14 -
15
-
16
-
17
-
18
-
19
-
20
-
21
-
22
-
23
-
24
-
25
-
26
-
27
-
28
-
29
-
30
-
31
-
32
-
33
-
34
-
35
-
36
-
37
-
38
-
39
-
40
-
41
-
42
-
43
-
44
-
45
-
46
-
47
-
48
-
49
-
50
-
51
-
52
-
53
-
54
-
55
-
56
-
57
-
58
-
59
-
60
-
61
-
62
-
63
-
64
-
65
-
66
-
67
-
68
-
69
-
70
-
71
-
72
-
73
-
74
-
75
-
76
-
77
-
78
-
79
-
80
-
81
-
82
-
83
-
84
-
85
-
86
-
87
-
88
-
89
-
90
-
91
-
92
-
93
-
94
-
95
-
96
-
97
-
98
-
99
-
100
-
101
-
102
-
103
-
104
 |
 |
