Sony SDM-S93 Quick Setup Guide - Page 3
Setup - monitor stand
 |
View all Sony SDM-S93 manuals
Add to My Manuals
Save this manual to your list of manuals |
Page 3 highlights
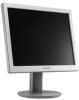
Setup Unpacking Make sure your carton contains everything listed below. • LCD display • Power cord • HD15-HD15 video signal cable • CD-ROM (utility software for Windows/Macintosh, Operating Instructions, etc.) • Warranty card • This Quick Setup Guide Connecting your monitor Connect your monitor to a computer or other equipment. • Turn off the monitor, computer, and any other equipment before connecting them. • Do not touch the pins of the video signal cable plug. 1 Slide up the back cover. 2 Tilt the display forward. 3 Connect your monitor to a computer. Connecting a Macintosh computer Connect the supplied video signal cable to a video output connector on the computer. If necessary, use an adapter (not supplied). Connect the adapter to the computer before connecting the video signal cable. 4 Connect the supplied power cord securely to the monitor's AC IN connector. 5 Connect the other end securely to a power outlet. back cover 1 2 HD-15 3 HD15-HD15 video signal cable (analog RGB) (supplied) 4 to AC IN 5 to power outlet power cord (supplied) Illustrations of monitor rear are the SDM-S53. The same applies for the SDM-S73 model. SDM-S93 has the AC IN connector on the left of the stand. US Note For bundling the cords and cables, refer to the Operating Instructions on the supplied CD-ROM. Turning on the monitor and computer Turn on your monitor first, then a computer. 1 Press the MAIN POWER switch on the right side of the monitor in the direction of the [, if it is not already pressed. Make sure the 1 ( power) indicator is lit in red. Note The default setting of the MAIN POWER switch is in the direction of the [. 2 Press the 1 (power) switch on the front right of the monitor. The 1 (power) indicator lights up in green. 3 (US)
-
 1
1 -
 2
2 -
 3
3 -
 4
4 -
 5
5 -
 6
6 -
 7
7 -
 8
8 -
 9
9 -
10
-
11
-
12
-
13
-
14
-
15
-
16
-
17
-
18
-
19
-
20
-
21
-
22
-
23
-
24
-
25
-
26
-
27
-
28
 |
 |
