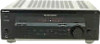
Sony STR-DE435 Operating Instructions (Receiver Component) - Page 9
AC Hookups, Before You Use Your Receiver - remote
 |
View all Sony STR-DE435 manuals
Add to My Manuals
Save this manual to your list of manuals |
Page 9 highlights
Getting Started AC Hookups Before You Use Your Receiver Connecting the AC power cord Connect the AC power cord from this receiver and from your audio/video components to a wall outlet. If you connect other audio components to the SWITCHED AC OUTLET on the receiver, the receiver can supply power to the connected components so you can turn on/off the whole system when you turn on/ off the receiver. SWITCHED AC OUTLET / to a wall outlet Caution Make sure that the power consumption of the component connected to the receiver's AC outlet does not exceed 120 watts. Do not connect high-wattage electrical home appliances such as electric irons, fans, or TVs to this outlet. Where do I go next? Before you use the receiver, go to the next section to make sure that all the controls are set to the appropriate positions. Before turning on the receiver Make sure that you have: • Turned MASTER VOLUME to the leftmost position (0). • Selected the appropriate front speakers (see "Front Panel Parts Description" on page 12). • Set BALANCE to the center position. Clearing the receiver's memory Before you use your receiver for the first time or when you want to clear the receiver's memory, do the procedure below: 1/u (power) DIMMER 1 Turn off the receiver. MUTING 2 Press 1/u (power) for more than 4 seconds. "ALL CLEAR" appears in the display and the items including the following are reset or cleared: • All preset stations are reset to their factory settings. • All sound field parameters are reset to their factory settings. • All index names (of preset stations and program sources) are cleared. • All adjustments made with the SET UP button are reset to their factory settings. • The sound field memorized for each program source and preset station is cleared. After turning on the receiver Check the following indicator: • Press MUTING or MUTING on the remote if the MUTING indicator turns on. • Press DIMMER to set the display at any of four levels of brightness. 9
-
 1
1 -
2
-
3
-
 4
4 -
 5
5 -
 6
6 -
 7
7 -
 8
8 -
 9
9 -
 10
10 -
 11
11 -
 12
12 -
 13
13 -
 14
14 -
15
-
16
-
17
-
18
-
19
-
20
-
21
-
22
-
23
-
24
-
25
-
26
-
27
-
28
-
29
-
30
 |
 |
