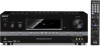
Sony STR-DH810 Operating Instructions - Page 16
Inserting batteries into the, remote, CEK only Remote Commander. - remote codes
 |
UPC - 027242779969
View all Sony STR-DH810 manuals
Add to My Manuals
Save this manual to your list of manuals |
Page 16 highlights
a)The following buttons have tactile dots. Use the tactile dots as references when operating the receiver. - number 5, VIDEO 1 -N - PRESET +, TV CH + (RM-AAP049 only), PROG + (RM-AAP050 only), c (RM-AAP050 only) b)If you press ?/1 (A) and AV ?/1 (B) simultaneously, the receiver and connected components will turn off (SYSTEM STANDBY). The function of AV ?/1 (B) changes automatically each time you press the input buttons (D). c)Press SHIFT (V) then only press this button. d)CD player, MD deck and tape deck only. e)CD player and MD deck only. f) CD player, MD deck and DAT deck only. g)LD player only. h)VCD player only. i) RM-AAP049 only. j) RM-AAP050 only. k)This button is also available for DIGITAL MEDIA PORT adapter operation. For details on the function of the button, refer to the operating instructions supplied with the DIGITAL MEDIA PORT adapter. Notes • Some functions explained in this section may not work depending on the model. • The above explanation is intended to serve as an example only. Therefore, depending on the component, the above operation may not be possible or may operate differently than described. Inserting batteries into the remote Insert two R6 (size-AA) batteries in the RM-AAP049 (Models of area code U2 only) or RM-AAP050 (Models of area code CEL, CEK only) Remote Commander. Observe the correct polarity when installing batteries. Notes • Do not leave the remote in an extremely hot or humid place. • Do not use a new battery with old ones. • Do not mix manganese batteries and other kinds of batteries. • Do not expose the remote sensor to direct sunlight or lighting apparatuses. Doing so may cause a malfunction. • If you do not intend to use the remote for an extended period of time, remove the batteries to avoid possible damage from battery leakage and corrosion. • When you replace the batteries, the programmed remote codes may be cleared. If this happens, program the remote codes again (page 85). • When the remote no longer operates the receiver, replace all the batteries with new ones. 16GB
-
 1
1 -
2
-
3
-
4
-
5
-
6
-
7
-
8
-
9
-
10
-
 11
11 -
 12
12 -
 13
13 -
 14
14 -
 15
15 -
 16
16 -
 17
17 -
 18
18 -
 19
19 -
 20
20 -
 21
21 -
22
-
23
-
24
-
25
-
26
-
27
-
28
-
29
-
30
-
31
-
32
-
33
-
34
-
35
-
36
-
37
-
38
-
39
-
40
-
41
-
42
-
43
-
44
-
45
-
46
-
47
-
48
-
49
-
50
-
51
-
52
-
53
-
54
-
55
-
56
-
57
-
58
-
59
-
60
-
61
-
62
-
63
-
64
-
65
-
66
-
67
-
68
-
69
-
70
-
71
-
72
-
73
-
74
-
75
-
76
-
77
-
78
-
79
-
80
-
81
-
82
-
83
-
84
-
85
-
86
-
87
-
88
-
89
-
90
-
91
-
92
-
93
-
94
-
95
-
96
-
97
-
98
-
99
-
100
-
101
-
102
-
103
-
104
 |
 |
