Sony STR-K750P Operating Instructions - Page 29
Automatic tuning, Preset tuning - remote code
 |
View all Sony STR-K750P manuals
Add to My Manuals
Save this manual to your list of manuals |
Page 29 highlights
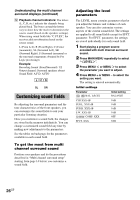
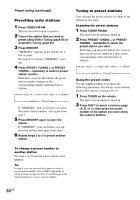
Receiving Broadcasts 4 If you've tuned in an AM station, adjust the direction of the AM loop antenna for optimum reception. 5 Repeat steps 1 to 4 to receive another station. Tips • If you do not remember the precise frequency, press TUNING + or TUNING - after entering the value close to the frequency you want. The receiver automatically tunes in the station you want. If the frequency seems to be higher than the entered value, press TUNING +, and if the frequency seems to be lower than the entered value, press TUNING -. • If "STEREO" flashes in the display and the FM stereo reception is poor, press FM MODE to change to monaural (MONO). You will not be able to enjoy the stereo effect, but the sound will be less distorted. To return to stereo mode, press FM MODE again. The tuning scale differs depending on the area code as shown in the following table. For details on area codes, see page 4. Area code U, CA CEL, CEK, SP, AU E2/E3 MX FM 100 kHz 50 kHz 50 kHz 50 kHz AM 10 kHz* 9 kHz 9 kHz* 10 kHz * The AM tuning scale can be changed (page 48). Automatic tuning If you don't know the frequency of the station you want, you can let the receiver scan all available stations in your area. 1 Press TUNER FM/AM repeatedly to select the FM or AM band. The last received station is tuned in. 2 Press TUNING + or TUNING -. Press TUNING + to scan from low to high; press TUNING - to scan from high to low. The receiver stops scanning whenever a station is received. When the receiver reaches either end of the band Scanning is repeated in the same direction. 3 To continue scanning, press TUNING + or TUNING - again. Preset tuning After you have tuned in stations using Direct Tuning or Automatic Tuning, you can preset them to the receiver. Then you can tune in any of the stations directly by entering its 2-character preset code using the supplied remote. Up to 30 FM or AM stations can be preset. The receiver will also scan all the stations that you have preset. Before tuning to preset stations, be sure to preset them by performing steps on "Presetting radio stations" (page 30). continued 29GB
-
 1
1 -
2
-
3
-
4
-
5
-
6
-
7
-
8
-
9
-
10
-
11
-
12
-
13
-
14
-
15
-
16
-
17
-
18
-
19
-
20
-
21
-
22
-
23
-
 24
24 -
 25
25 -
 26
26 -
 27
27 -
 28
28 -
 29
29 -
 30
30 -
 31
31 -
 32
32 -
 33
33 -
 34
34 -
35
-
36
-
37
-
38
-
39
-
40
-
41
-
42
-
43
-
44
-
45
-
46
-
47
-
48
-
49
-
50
-
51
-
52
 |
 |