Sony STR-ZA5000ES Help Guide Printable PDF
Sony STR-ZA5000ES Manual
 |
View all Sony STR-ZA5000ES manuals
Add to My Manuals
Save this manual to your list of manuals |
Sony STR-ZA5000ES manual content summary:
- Sony STR-ZA5000ES | Help Guide Printable PDF - Page 1
MULTI CHANNEL AV RECEIVER STR-ZA5000ES Parts and Controls Receiver Front panel (with the front cover attached) [1] Front panel ( ) [28] Connecting another amplifier in Zone 2/3 [29] Digital audio formats supported by the receiver [30] Notes on connecting cables [31] About HDMI connections [32] 5. - Sony STR-ZA5000ES | Help Guide Printable PDF - Page 2
results [43] Enjoying Video and Sound Playing AV devices Using the menu on the TV screen Enjoying sound of an ARC compatible TV (Audio Return Channel) [46] If you use a TV compatible with Dolby for "BRAVIA" Sync [71] Turning off the receiver and connected devices simultaneously with the TV (System - Sony STR-ZA5000ES | Help Guide Printable PDF - Page 3
digital and analog audio (Input Mode) [81] Using other video/audio input jacks (Input Assign) [82] Saving and recalling various settings for the receiver (Custom Preset) About Custom Preset [83] Saving the settings to a preset [84] Recalling the settings saved to the scene [85] Items for which - Sony STR-ZA5000ES | Help Guide Printable PDF - Page 4
an ARC compatible TV (Audio Return Channel) [134] Enjoying content of a connected device without turning on the receiver (Pass Through) [135] Setting Version) [155] Updating the software via the network (Network Update) [156] Updating the software using the USB flash drive (USB Update) [157] Setting - Sony STR-ZA5000ES | Help Guide Printable PDF - Page 5
Troubleshooting Error messages PROTECTOR [166] UPDATE FAILED [167] FAN STOPPED [168] List of messages after Auto Calibration measurements [169] Network features message list [170] General The receiver -channel sound is not reproduced. [191] No sound is heard from specific speakers when the receiver - Sony STR-ZA5000ES | Help Guide Printable PDF - Page 6
from the speakers connected to the receiver. [205] Remote control The remote control does not function. [206] If the problem is not solved Reverting to the factory default settings [207] Resetting sound fields to the default settings [208] Customer support - Sony STR-ZA5000ES | Help Guide Printable PDF - Page 7
maintenance and service. 9. ZONE for the receiver. 12. receiver to operate the receiver Receiver Power indicator Green: The receiver is turned on. Amber: The receiver indicator turns off when the receiver is in standby mode and receiver is(are) still turned on, and is not a - Sony STR-ZA5000ES | Help Guide Printable PDF - Page 8
(s) is (are) connected and the audio signal is output from the PRE OUT SUBWOOFER jack(s). 3. Playback channel indicator Indicates the speaker that is designated to output sound. Shows how the receiver downmixes or up-mixes the source sound, based on the speaker settings. L Front Left R Front Right - Sony STR-ZA5000ES | Help Guide Printable PDF - Page 9
TV input is selected and Audio Return Channel (ARC) signals are detected. 22. BI-AMP Lights up when [SB Speaker Assign] in the [Speaker Setup] menu is set to [Bi-Amp] to use a bi-amplifier connection. [5] Parts and Controls Receiver Rear panel 1. FM ANTENNA terminal 2. AM ANTENNA terminal 3. Giga- - Sony STR-ZA5000ES | Help Guide Printable PDF - Page 10
items. Then press to enter the selection. 7. OPTIONS Displays the options menus on the TV screen for item selection. 8. ZONE2 (power), ZONE3 (power) Turns the receiver in Zone 2 or Zone 3 on or sets it to the standby mode. 9. HDMI OUTPUT Switches the output for two monitors connected to the HDMI OUT - Sony STR-ZA5000ES | Help Guide Printable PDF - Page 11
Press the button again to restore the sound. * The + button has tactile dot. Use the tactile dot as a reference when operating the receiver. Note The above explanations are intended to serve as examples. [8] Preparation 1. Installing speakers Locations and names of speakers Location of each speaker - Sony STR-ZA5000ES | Help Guide Printable PDF - Page 12
using top front and top rear speakers This speaker installation is configured by adding top front speakers and top rear speakers to standard 5.1-channel speaker system placed on the listener-level. 1 Place the speakers on the listener-level at the angles shown below. 30° 100° - 120° 2 Install - Sony STR-ZA5000ES | Help Guide Printable PDF - Page 13
As the subwoofer does not emit highly directional signals, you can place it wherever you want. [11] Preparation 1. Installing speakers Installing 7.1.2-channel speaker system using front Dolby Atmos enabled speakers This speaker installation is configured by adding front Dolby Atmos enabled speakers - Sony STR-ZA5000ES | Help Guide Printable PDF - Page 14
As the subwoofer does not emit highly directional signals, you can place it wherever you want. [12] Preparation 1. Installing speakers Installing 7.1.4-channel speaker system using an additional stereo power amplifier This speaker installation is configured by adding top front speakers and top rear - Sony STR-ZA5000ES | Help Guide Printable PDF - Page 15
channel speaker system consisting of standard 5.1-channel [Speaker Pattern] 5.1.4-channel speaker system using top channel speaker system Not using top middle speakers used [Off] [Off] [7.1.2 (TM)] 7.1.2-channel 7.1-channel speaker system with 2- [Off] Zone 2 connection channel channel - Sony STR-ZA5000ES | Help Guide Printable PDF - Page 16
Setup] menu. [16] Preparation 2. Connecting speakers Connecting 7.1.2-channel speaker system using top middle speakers Connect each speaker as illustrated mains lead). For details on how to connect speaker cables to the receiver, see "How to connect speaker cables." Monaural audio cable (not supplied - Sony STR-ZA5000ES | Help Guide Printable PDF - Page 17
(mains lead). For details on how to connect speaker cables to the receiver, see "How to connect speaker cables." Monaural audio cable (not supplied Setup] menu. [19] Preparation 2. Connecting speakers Connecting 7.1-channel speaker system with Zone 2 connection Connect each speaker as illustrated - Sony STR-ZA5000ES | Help Guide Printable PDF - Page 18
speakers Speaker patterns and terminals to be connected When you connect speakers to the receiver, refer to the following table. You can use the following table to confirm the speaker patterns supported by the receiver as well as the speaker terminals to which the speakers of each speaker pattern - Sony STR-ZA5000ES | Help Guide Printable PDF - Page 19
2.1.2 (FD) ○ - - - - ○ (FD) - ○ 3.0 ♦ ○ ○ - - - - - - 3.0.2 (TM) ○ ○ - - - ○ (TM) - - 3.0.2 (FD) ○ ○ - - - ○ (FD) - - 3.1 ♦ ○ ○ - - - - - ○ 3.1.2 (TM) ○ ○ - - - ○ (TM) - ○ 3.1.2 (FD) ○ ○ - - - ○ (FD) - ○ SB SB SB SB or H1 SB SB SB SB - Sony STR-ZA5000ES | Help Guide Printable PDF - Page 20
(FH+TR) ○ - ○ - - ○ (FH) (*2) ○ 4.1.4 (FH+RH) ○ - ○ - - ○ (FH) ○ (RH) (*2) ○ ♦ 4.1.4 (TF+TM) ○ - ○ - - ○ (TF) ○ (TM) (*2) ○ 4.1.4 (TF+TR) ○ - ○ - - ○ (TF) ○ (TR) (*2) ○ 4.1.4 (TF+RH) ○ - ○ - - ○ (TF) ○ (RH) (*2) ○ 4.1.4 (TM+TR) ○ - ○ - - ○ (TM) ○ ( - Sony STR-ZA5000ES | Help Guide Printable PDF - Page 21
♦ 5.1.2 (TM) ○ ○ ○ - - ○ (TM) - ○ 5.1.2 (FD) ○ ○ ○ - - ○ (FD) - ○ 5.1.2 (SRD) ○ ○ ○ - - ○ (SRD) - ○ 5.1.4 (FH+TM) ○ ○ ○ - - ○ (FH) ○ (TM) (*2) ○ 5.1.4 (FH+TR) ○ ○ ○ - - ○ (FH) ○ (TR) (*2) ○ ♦ 5.1.4 (FH+RH) ○ ○ ○ - - ○ (FH) ○ (RH) (*2) ○ ♦ 5.1.4 (TF - Sony STR-ZA5000ES | Help Guide Printable PDF - Page 22
height speakers. In this case, use the PRE OUT HEIGHT 2 jacks instead. SPEAKERS terminals/PRE OUT jacks Speaker pattern FRONT A CENTER SURROUND SURROUND BACK (FRONT B/BI- AMP/ZONE 2) (single) SURROUND BACK (FRONT B/BI- AMP/ZONE 2) (L/R) HEIGHT 1 (ZONE 2) HEIGHT 2 SUBWOOFER Zone 2 - Sony STR-ZA5000ES | Help Guide Printable PDF - Page 23
6.0.4 (SB+TM+RH) ○ ○ ○ ○ - 6.0.4 (SB+FD+SRD) ○ ○ ○ ○ - ○ (TM) △ (RH) - ○ (FD) △ - (SRD) Only PRE OUT Only PRE OUT Not available Not available Not available Not available *1 If you are connecting speakers to SPEAKERS SURROUND BACK (FRONT B/BI-AMP/ZONE 2) terminals, select one of - Sony STR-ZA5000ES | Help Guide Printable PDF - Page 24
6.0.4 (FH+RH) ○ - ○ - 6.0.4 (TF+TM) ○ - ○ - 6.0.4 (TF+TR) ○ - ○ - 6.0.4 (TF+RH) ○ - ○ - 6.0.4 (TM+TR) ○ - ○ - 6.0.4 (TM+RH) ○ - ○ - 6.0.4 (FD+SBD) ○ - ○ - ○ ○ (FH) △ (RH) - ○ ○ (TF) △ (TM) - ○ ○ (TF) △ (TR) - ○ ○ (TF) △ (RH) - ○ ○ (TM) △ (TR) - ○ ○ (TM) - Sony STR-ZA5000ES | Help Guide Printable PDF - Page 25
7.0.2 (TM) ○ ○ ○ - 7.0.2 (FD) ○ ○ ○ - 7.0.2 (SRD) ○ ○ ○ - 7.0.2 (SBD) ○ ○ ○ - 7.0.4 (FH+TM) ○ ○ ○ - 7.0.4 (FH+TR) ○ ○ ○ - ♦ 7.0.4 (FH+RH) ○ ○ ○ - ♦ 7.0.4 (TF+TM) ○ ○ ○ - 7.0.4 (TF+TR) ○ ○ ○ - ♦ 7.0.4 (TF+RH) ○ ○ ○ - ♦ 7.0.4 (TM+TR) ○ ○ ○ - - Sony STR-ZA5000ES | Help Guide Printable PDF - Page 26
You can operate this receiver using the menu on Sony. Be sure to use a High Speed HDMI Cable with Ethernet. Premium High Speed HDMI Cable with Ethernet that supports 18 Gbps is required for 4K/60p 4:4:4, 4:2:2, and 4K/60p 4:2:0 10 bit, etc. Connecting a TV compatible with the Audio Return Channel - Sony STR-ZA5000ES | Help Guide Printable PDF - Page 27
farther away from the receiver. Hint When connecting a TV to the receiver via the TV IN jacks of the receiver, set the sound support HDCP 2.2 on the TV and AV device. For details on whether the TV and AV device are equipped with HDCP 2.2-compatible HDMI jack, refer to the operating instructions - Sony STR-ZA5000ES | Help Guide Printable PDF - Page 28
Return Channel) function sends digital sound from a TV to the receiver using only an HDMI cable. Note Sony recommends that you use an HDMI-authorized cable or HDMI cable made by Sony. Be sure to use a High Speed HDMI Cable with Ethernet. Premium High Speed HDMI Cable with Ethernet that supports 18 - Sony STR-ZA5000ES | Help Guide Printable PDF - Page 29
4:2:0 10 bit, etc. All HDMI jacks on the receiver support High-bandwidth Digital Content Protection System Revision 2.2 (HDCP 2.2). Connect these HDMI jacks to jacks that support HDCP 2.2 on the TV and AV device. Refer to the operating instructions of the connected device for details. The HDMI IN - Sony STR-ZA5000ES | Help Guide Printable PDF - Page 30
jacks on the receiver support High-bandwidth Digital Content Protection System Revision 2.2 (HDCP 2.2). To watch content protected by HDCP 2.2, such as 4K content, connect these HDMI jacks to jacks that support HDCP 2.2 on the TV and AV device. Refer to the operating instructions of the connected - Sony STR-ZA5000ES | Help Guide Printable PDF - Page 31
video/audio input jacks (Input Assign)." Hint You can rename each input so that the name can be displayed on the display panel of the receiver. For details, see "Changing the name for each input (Name)." The image quality depends on the connecting jack. We recommend that you connect your devices - Sony STR-ZA5000ES | Help Guide Printable PDF - Page 32
audio output jacks of the connected device. This receiver supports the following audio formats. The words in brackets are those indicated on the display panel. Digital audio format Dolby Digital [DOLBY DIGITAL] Maximum number of Connection with the channels receiver 5.1 COAXIAL/OPTICAL, HDMI - Sony STR-ZA5000ES | Help Guide Printable PDF - Page 33
details, refer to the operating instructions of the playback device. *2 Dolby Atmos . Sony recommends that you use an HDMI authorized cable or HDMI cable made by Sony. receiver. This signal supports Dolby Audio, DTS, DSD, and Linear PCM. The receiver can receive Multi Channel Linear PCM (up to 8 channels - Sony STR-ZA5000ES | Help Guide Printable PDF - Page 34
receiver support High-bandwidth Digital Content Protection System Revision 2.2 (HDCP 2.2). Connect these HDMI jacks to jacks that support HDCP 2.2 on the TV and AV device. Refer to the operating instructions -through. The HDMI OUT A jack supports Audio Return Channel (ARC). HDCP 2.2 is newly enhanced - Sony STR-ZA5000ES | Help Guide Printable PDF - Page 35
the receiver is needed to release heat. When placing the receiver in a rack, leave more than 44.45 mm (1.75 in) space above the receiver, and receiver and the wall. Make sure to use a "WS-RE1" dedicated rack mount kit for this receiver when mounting the receiver on a rack mount. Place the receiver - Sony STR-ZA5000ES | Help Guide Printable PDF - Page 36
. You can set up the following settings for the receiver by following the instructions on the Easy Setup screen. Auto Calibration Check your speaker balance for your room. However, you can adjust the speaker levels manually according to your preference using [Test Tone]. [39] Preparation Performing - Sony STR-ZA5000ES | Help Guide Printable PDF - Page 37
. Be sure to use the buttons on the receiver to perform this operation. 1 Press SPEAKERS on the receiver repeatedly to select the front speaker system you want from the home menu. 2 Select [Auto Calibration]. 3 Follow the instructions on the TV screen, then press to select [Start]. The measurement - Sony STR-ZA5000ES | Help Guide Printable PDF - Page 38
received in [Auto Calibration], proceed with the following steps: If an error code appears Check the error and perform Auto Calibration again. 1 Select [Retry]. 2 Follow the instructions use the receiver with that value does not cause problems. [44] Enjoying Video and Sound Playing AV devices Using - Sony STR-ZA5000ES | Help Guide Printable PDF - Page 39
to display the home menu, then press HOME again. [45] Enjoying Video and Sound Playing AV devices Enjoying video/sound from the connected device 1 Switch the input of the TV to the input to which the receiver is connected. 2 Press HOME. The home menu is displayed on the TV screen. Depending on - Sony STR-ZA5000ES | Help Guide Printable PDF - Page 40
slowly. Press one of the buttons and release it immediately. [46] Enjoying Video and Sound Playing AV devices Enjoying sound of an ARC compatible TV (Audio Return Channel) If your TV supports the Audio Return Channel (ARC) function, set the receiver by the following procedure to output the sound - Sony STR-ZA5000ES | Help Guide Printable PDF - Page 41
details on setting the TV, refer to the operating instructions of the TV. 8 Switch the input of the receiver to [TV]. Note The ARC function only works AV devices Watching HDCP 2.2 copyright-protected content To watch HDCP 2.2 copyright-protected content such as 4K content, connect the receiver and - Sony STR-ZA5000ES | Help Guide Printable PDF - Page 42
Auto Tuning). Press to scan from lower to higher frequency stations or press to scan from higher to lower stations. The receiver stops scanning whenever a station is received. 3. Preset station list You can tune to a station by selecting the preset number from the list. [50] Enjoying Video and Sound - Sony STR-ZA5000ES | Help Guide Printable PDF - Page 43
. For details on each sound field, see the following topics. 2-channel/Direct sound mode Auto Format Decoding (A.F.D.) Movie mode Multi Stereo Note The 2CH/DIRECT, A.F.D., MOVIE or MULTI ST. on the remote control or the receiver to select a sound field. [54] Enjoying Video and Sound Enjoying sound - Sony STR-ZA5000ES | Help Guide Printable PDF - Page 44
function does not work in the following cases: [Direct] is being used and an analog input is selected. [Pure Direct] is set to [On]. The receiver may play signals at a lower sampling frequency than the actual sampling frequency of the input signals, depending on the audio format. Hint You can also - Sony STR-ZA5000ES | Help Guide Printable PDF - Page 45
are used. Dolby Atmos is being decoded. [Pure Direct] is set to [On]. This function may not work depending on the audio format. The receiver may play signals at a lower sampling frequency than the actual sampling frequency of the input signals depending on the audio format. Hint You can also - Sony STR-ZA5000ES | Help Guide Printable PDF - Page 46
In this case, you cannot use the surround back speakers. Hint Connect one more receiver or amplifier in Zone 2 to the ZONE 2 AUDIO OUT jacks to enjoy room by connecting a receiver or amplifier located in the third room to the ZONE 3 AUDIO OUT jacks. For example, audio from an AV device placed in a - Sony STR-ZA5000ES | Help Guide Printable PDF - Page 47
connection - Zone 2 You can enjoy movies and music in another room by connecting a TV or different AV receiver located in another room to the HDMI OUT B (ZONE 2) jack. For example, movies or music from an AV device located in the living room can be played at high quality in a bedroom. Note There - Sony STR-ZA5000ES | Help Guide Printable PDF - Page 48
Dolby Digital are not output to Zone 2. Multi-channel stream signals are automatically converted to 2 channels signals, and then output to Zone 2 if the the receiver are not output to Zone 2, set the audio output to 2ch PCM on the connected device. For details, refer to the operating instructions of - Sony STR-ZA5000ES | Help Guide Printable PDF - Page 49
Dolby Digital are not output to Zone 2. Multi-channel stream signals are automatically converted to 2 channels signals, and then output to Zone 2 if the the receiver are not output to Zone 2, set the audio output to 2ch PCM on the connected device. For details, refer to the operating instructions of - Sony STR-ZA5000ES | Help Guide Printable PDF - Page 50
[64] Using the Multi-Zone Features Enjoying sound from speakers located in other rooms Enjoying sound in Zone 2 You can enjoy sound from the receiver in Zone 2 by the following procedure. 1 Select [Zone Controls] - [Zone2 Power] from the home menu. 2 Select [On]. Zone 2 is activated. 3 Select [Zone - Sony STR-ZA5000ES | Help Guide Printable PDF - Page 51
the display panel. You can also adjust volume level using MASTER VOLUME on the receiver while [ZONE2 INPUT xxxx (input name)] is shown on the display panel. To on the connected device. For details, refer to the operating instructions of the connected device. Connecting another amplifier or TV in - Sony STR-ZA5000ES | Help Guide Printable PDF - Page 52
the setting you want. Variable: Select when you cannot adjust the volume level on the amplifier in Zone 2 or Zone 3. The volume level of the receiver output in Zone 2 or Zone 3 will become adjustable. Fixed: Select to adjust the volume on the amplifier in Zone 2 or Zone 3. The volume level of - Sony STR-ZA5000ES | Help Guide Printable PDF - Page 53
(projector, etc.) is connected to the HDMI OUT B (ZONE 2) jack, sound may not be output from the receiver. In this case, set [Zone2 Audio Out] to [AMP]. When a TV which does not support audio content protection is connected to the HDMI OUT B (ZONE 2) jack, specific audio may not be output from the - Sony STR-ZA5000ES | Help Guide Printable PDF - Page 54
speakers connected to the receiver (System Audio Control function) Enjoying sound of an ARC compatible TV (Audio Return Channel) Enjoying an input source manufactured by Sony that support the Control for HDMI function. However, compatibility with other devices than those manufactured by Sony is not - Sony STR-ZA5000ES | Help Guide Printable PDF - Page 55
For details, refer to the operating instructions of the TV. Note Depending on the TV, the number of the receiver volume level is displayed on the TV front panel display of the receiver. System Audio Control function may work with other devices than those manufactured by Sony, but operation is not - Sony STR-ZA5000ES | Help Guide Printable PDF - Page 56
supports the SYNC MENU. For details, refer to the operating instructions of the TV. Note The receiver is recognized as [Tuner] by the TV. Some of the operations may not be available depending on the type of TV. Remote Easy Control function may work with other devices than those manufactured by Sony - Sony STR-ZA5000ES | Help Guide Printable PDF - Page 57
TV supports the Social Viewing functions. For details, refer to the operating instructions of Sony. [79] Using Other Features Interlocking with BRAVIA TV and other devices ("BRAVIA" Sync) About Language Follow function While the receiver is turned on, the on-screen display language of the receiver - Sony STR-ZA5000ES | Help Guide Printable PDF - Page 58
is output from the assigned jacks, also check the Input Mode settings. [83] Using Other Features Saving and recalling various settings for the receiver (Custom Preset) About Custom Preset You can save various settings with the player, monitor, etc., according to your listening and viewing style. You - Sony STR-ZA5000ES | Help Guide Printable PDF - Page 59
want from the options menu. Edit: Allows you to customize and save the settings to suit your preferences. Import: Loads the present settings of the receiver and saves those settings with the preset. [Input] and [Volume] are not changed. Note Settings for which the box is unchecked are not changed - Sony STR-ZA5000ES | Help Guide Printable PDF - Page 60
: No change Height2 Treble: No change [87] Using Other Features Using the sleep timer Using the sleep timer (Sleep) You can set the receiver to turn off automatically after a specified period of time. 1 Select [Setup] - [System Setup] from the home menu. 2 Select [Sleep]. 3 Set specified time. 2:00 - Sony STR-ZA5000ES | Help Guide Printable PDF - Page 61
following: Update the software of the receiver. Turn the receiver on or off. [88] Using Other Features Checking information on the receiver Viewing information You can set up the following settings for the receiver by following the instructions on the Easy Setup screen. Auto Calibration Check your - Sony STR-ZA5000ES | Help Guide Printable PDF - Page 62
Name You can change the name displayed on the Watch/Listen menu. Watch/Listen You can set whether an input is displayed on the Watch menu or the Listen menu. Watch: Displays an input to the Watch menu. Listen: Displays an input to the Listen menu. Watch/Listen: Displays an input to both the Watch - Sony STR-ZA5000ES | Help Guide Printable PDF - Page 63
calibration as follows. Check the connection between each speaker and the receiver. Adjust the speaker level. Measure the distance of each speaker balance for your room. However, you can adjust the speaker levels manually according to your preference using [Test Tone]. [93] Adjusting Settings - Sony STR-ZA5000ES | Help Guide Printable PDF - Page 64
. Be sure to use the buttons on the receiver to perform this operation. 1 Press SPEAKERS on the receiver repeatedly to select the front speaker system you want from the home menu. 2 Select [Auto Calibration]. 3 Follow the instructions on the TV screen, then press to select [Start]. The measurement - Sony STR-ZA5000ES | Help Guide Printable PDF - Page 65
received in [Auto Calibration], proceed with the following steps: If an error code appears Check the error and perform Auto Calibration again. 1 Select [Retry]. 2 Follow the instructions However, continuing to use the receiver with that value does not cause problems. [98] Adjusting Settings Speaker - Sony STR-ZA5000ES | Help Guide Printable PDF - Page 66
frequency from each speaker flat. Engineer: Sets to "the Sony listening room standard" frequency characteristics. Front Reference: Adjusts the the screen The position of the speaker and the corresponding terminals on the receiver to which the speaker should be connected are shown on the screen. - Sony STR-ZA5000ES | Help Guide Printable PDF - Page 67
effectively reproduce bass frequencies, select [Large]. Select [Large] usually. Small: If the sound is distorted, or you hear a lack of surround effects when using multi channel surround sound, select [Small]. You can activate the bass redirection circuitry and output the bass frequencies of each - Sony STR-ZA5000ES | Help Guide Printable PDF - Page 68
display panel for the operation. To adjust the level of all speakers at the same time, press +/-. You can also use MASTER VOLUME on the receiver. The adjusted value is shown on the TV screen during adjustment. - Sony STR-ZA5000ES | Help Guide Printable PDF - Page 69
analog input is selected. [Pure Direct] is set to [On]. Frequencies for [Bass] and [Treble] are fixed. Depending on the audio format, the receiver may play signals at a lower sampling frequency than the original sampling frequency of the input signals. Hint You can also select [Equalizer] in [Sound - Sony STR-ZA5000ES | Help Guide Printable PDF - Page 70
Relocation]. 3 Select the setting you want. Type A: Places surround back speakers on the back wall in addition to those speakers in Recommendation ITU-R for 5.1 channel speaker placement. Type B: Places four surround speakers at virtually identical angles, according to Recommendation ITU-R for - Sony STR-ZA5000ES | Help Guide Printable PDF - Page 71
according to the speakers you are using. 8 Ω 4 Ω Note If you are not sure of the impedances of the speakers, refer to the operating instructions supplied with your speakers. (This information is often on the back of the speaker.) When you connect speakers all with a nominal impedance of 8 ohms or - Sony STR-ZA5000ES | Help Guide Printable PDF - Page 72
on the front of the receiver. 1 Save wav files which meet the following in "/test_wav" folder on a USB flash drive. Number of channels: 2 Sample rates (bit that appear on the TV screen. If using a fixed IP address Select [Manual] in step 3. The IP address input display appears on the TV screen. - Sony STR-ZA5000ES | Help Guide Printable PDF - Page 73
the cabinet may become hot. This is because part of the circuit(s) inside the receiver is(are) still turned on, and is not a malfunction. [120] Adjusting on how to configure settings for this function, consult your nearest Sony dealer. [121] Adjusting Settings Audio Setup Playing audio signals - Sony STR-ZA5000ES | Help Guide Printable PDF - Page 74
and an analog input is selected. [Pure Direct] is set to [On]. The receiver may play signals at a lower sampling frequency than the actual sampling frequency of the input each sound field, see the following topics. 2-channel/Direct sound mode Auto Format Decoding (A.F.D.) Movie mode Multi Stereo - Sony STR-ZA5000ES | Help Guide Printable PDF - Page 75
Field] in [Sound Effects] from the home menu. You can also use 2CH/DIRECT, A.F.D., MOVIE or MULTI ST. on the remote control or the receiver to select a sound field. [124] Adjusting Settings Audio Setup Enjoying more natural sound with speakers installed in the ceiling (In-Ceiling Speaker Mode) Set - Sony STR-ZA5000ES | Help Guide Printable PDF - Page 76
will be adjusted automatically. This function is available only when the monitor supports the A/V Sync function. 0 ms - 300 ms: You can adjust the delay from 0 ms to 300 ms in 10 ms intervals. Note The receiver may play signals at a lower sampling frequency than the actual sampling frequency of - Sony STR-ZA5000ES | Help Guide Printable PDF - Page 77
-converting video signals to 4K (4K Scaling) You can up-convert video signals to 4K and output them through the HDMI OUT A jack of the receiver. 1 Select [Setup] - [HDMI Setup] from the home menu. - Sony STR-ZA5000ES | Help Guide Printable PDF - Page 78
IN jacks are being received. HDMI video input signals must be [email protected]/24 Hz. The HDMI OUT B (ZONE 2) jack does not support 4K Scaling. When you want. Auto: If either of the following inputs is selected on the receiver, the receiver will turn off when the TV is turned off: [TV] An input assigned - Sony STR-ZA5000ES | Help Guide Printable PDF - Page 79
with devices other than those manufactured by Sony, but operation is not guaranteed. [134] Adjusting Settings HDMI Setup Enjoying sound of an ARC compatible TV (Audio Return Channel) If your TV supports the Audio Return Channel (ARC) function, set the receiver by the following procedure to output - Sony STR-ZA5000ES | Help Guide Printable PDF - Page 80
from playback devices are only output to the speakers connected to the receiver. Multi-channel sound can be played back as it is. TV + AMP: may not be output from the receiver. In this case, set [Zone2 Audio Out] to [AMP]. When a TV which does not support audio content protection is connected to - Sony STR-ZA5000ES | Help Guide Printable PDF - Page 81
the level of the subwoofer to 0 dB or +10 dB when multi-channel PCM signals are input via an HDMI connection. The level for each input Zone 2 output. Recommended when you enjoy video and sound from a device connected to the receiver in a zone other than the main zone (Zone 2). Note When [Zone2] is - Sony STR-ZA5000ES | Help Guide Printable PDF - Page 82
for high bandwidth video format, check the setting on the TV menu when you select [Enhanced format] on this receiver. For details on the setting of the TV menu, refer to the operating instructions of the TV. You cannot apply the setting to the HDMI IN 6 (GAME) jack. [143] Adjusting Settings Zone - Sony STR-ZA5000ES | Help Guide Printable PDF - Page 83
Settings Zone Setup Presetting the volume in the main zone (Main Preset Volume) You can set the volume level to be used when the receiver is turned on. 1 Select [Setup] - [Zone Setup] from the home menu. 2 Select [Main Preset Volume]. 3 Adjust the volume level. [145] Adjusting Settings Zone Setup - Sony STR-ZA5000ES | Help Guide Printable PDF - Page 84
the setting you want. Variable: Select when you cannot adjust the volume level on the amplifier in Zone 2 or Zone 3. The volume level of the receiver output in Zone 2 or Zone 3 will become adjustable. Fixed: Select to adjust the volume on the amplifier in Zone 2 or Zone 3. The volume level of - Sony STR-ZA5000ES | Help Guide Printable PDF - Page 85
AM TUNER] is selected as the input. The software of the receiver is being updated. If you use the Auto Standby mode and the sleep timer at Adjusting Settings System Setup Using the sleep timer (Sleep) You can set the receiver to turn off automatically after a specified period of time. 1 Select [Setup - Sony STR-ZA5000ES | Help Guide Printable PDF - Page 86
[Setup] - [System Setup] from the home menu. 2 Select [Network Update]. 3 Follow the instructions on the TV screen. [157] Adjusting Settings System Setup Updating the software using the USB flash drive (USB Update) You can update the receiver software using the USB flash drive. 1 Copy the file for - Sony STR-ZA5000ES | Help Guide Printable PDF - Page 87
Control) You can set whether or not to control the receiver from external devices. 1 Select [Setup] - [Install Setup] from the home menu. 2 Select [External Control]. 3 Select the setting you want. On Off [160] Adjusting Settings Install - Sony STR-ZA5000ES | Help Guide Printable PDF - Page 88
are not output while the test screen is displayed. [162] Adjusting Settings Install Setup Locking settings of the receiver (Settings Lock) You can lock the receiver settings to prevent setting values from being accidentally erased. 1 Select [Setup] - [Install Setup] from the home menu. 2 Select - Sony STR-ZA5000ES | Help Guide Printable PDF - Page 89
. After checking the above items and fixing any problems, plug in the AC power cord (mains lead) and turn on the receiver. If the problem persists, consult your nearest Sony dealer. [167] Troubleshooting Error messages UPDATE FAILED While USB Update is performed, insert a USB flash drive on which - Sony STR-ZA5000ES | Help Guide Printable PDF - Page 90
function was activated. [PROTECTOR] was activated. [FAN STOPPED] was activated. [172] Troubleshooting General The receiver does not turn on after performing USB Update or Network Update. The USB Update or Network Update procedure may not have been completed. While a USB flash drive containing the - Sony STR-ZA5000ES | Help Guide Printable PDF - Page 91
problem persists, consult your nearest Sony dealer. [173] Troubleshooting General The receiver does not turn on even when the TV is turned on. Set [Control for HDMI] to [On] in the [HDMI Setup] menu. The TV must support the Control for HDMI function. For details, refer to the operating instructions - Sony STR-ZA5000ES | Help Guide Printable PDF - Page 92
operating instructions of the TV. Be sure to connect the receiver to an HDMI input jack of a TV or video device that supports 4K. You have to connect an HDMI cable to an HDMI jack that supports HDCP 2.2 when you use a playback device for 4K resolution video content, etc. [179] Troubleshooting Image - Sony STR-ZA5000ES | Help Guide Printable PDF - Page 93
playback device may need to be configured to certain settings before you can enjoy DSD and Multi Channel Linear PCM. Refer to the operating instructions of the playback device. Make sure the TV supports the System Audio Control function. If the TV does not have a System Audio Control function, set - Sony STR-ZA5000ES | Help Guide Printable PDF - Page 94
is set to [HDMI A] or [HDMI A+B]. [189] Troubleshooting Sound The Dolby Atmos-compatible sound played back on the TV is not output from the receiver. Connect the receiver to an HDMI input jack of the TV which supports the Audio Return Channel (ARC) function, and then perform the operation described - Sony STR-ZA5000ES | Help Guide Printable PDF - Page 95
Neural:X support the following speaker patterns. If other speaker patterns are set, no sound is output from specific speakers when the receiver decodes the correctly. [196] Troubleshooting Sound No sound is output from the TV when the receiver is in standby mode. When the receiver enters standby mode - Sony STR-ZA5000ES | Help Guide Printable PDF - Page 96
USB device. USB devices are only supported when formatted with the FAT16 or FAT32 file systems. The USB device does not work properly. Refer to the section on how to deal with this problem in the operating instructions of the USB device. [201] Troubleshooting USB devices A USB device cannot be - Sony STR-ZA5000ES | Help Guide Printable PDF - Page 97
instructions make sure the receiver is connected to the one supports the ARC function. Make sure your TV is connected to the HDMI OUT A jack of the receiver. Make sure Do not turn the receiver off until [MEMORY CLEARED!] appears on the display panel. [208] Troubleshooting If the problem is not solved - Sony STR-ZA5000ES | Help Guide Printable PDF - Page 98
Troubleshooting If the problem is not solved Customer support websites Refer to the following websites for the latest information on the receiver. For customers in the USA: http://esupport.sony.com/ For customers in Canada: http://esupport.sony OF SUBSTITUTE GOODS OR SERVICES; LOSS OF USE, DATA - Sony STR-ZA5000ES | Help Guide Printable PDF - Page 99
LIABLE FOR ANY DIRECT, INDIRECT, INCIDENTAL, SPECIAL, EXEMPLARY, OR CONSEQUENTIAL DAMAGES (INCLUDING, BUT NOT LIMITED TO, PROCUREMENT OF SUBSTITUTE GOODS OR SERVICES; LOSS OF USE, DATA, OR PROFITS; OR BUSINESS INTERRUPTION) HOWEVER CAUSED AND ON ANY THEORY OF LIABILITY, WHETHER IN CONTRACT, STRICT - Sony STR-ZA5000ES | Help Guide Printable PDF - Page 100
LIABLE FOR ANY DIRECT, INDIRECT, INCIDENTAL, SPECIAL, EXEMPLARY, OR CONSEQUENTIAL DAMAGES (INCLUDING, BUT NOT LIMITED TO, PROCUREMENT OF SUBSTITUTE GOODS OR SERVICES; LOSS OF USE, DATA, OR PROFITS; OR BUSINESS INTERRUPTION) HOWEVER CAUSED AND ON ANY THEORY OF LIABILITY, WHETHER IN CONTRACT, STRICT - Sony STR-ZA5000ES | Help Guide Printable PDF - Page 101
LIABLE FOR ANY DIRECT, INDIRECT, INCIDENTAL, SPECIAL, EXEMPLARY, OR CONSEQUENTIAL DAMAGES (INCLUDING, BUT NOT LIMITED TO, PROCUREMENT OF SUBSTITUTE GOODS OR SERVICES; LOSS OF USE, DATA, OR PROFITS; OR BUSINESS INTERRUPTION) HOWEVER CAUSED AND ON ANY THEORY OF LIABILITY, WHETHER IN CONTRACT, STRICT - Sony STR-ZA5000ES | Help Guide Printable PDF - Page 102
LIABLE FOR ANY DIRECT, INDIRECT, INCIDENTAL, SPECIAL, EXEMPLARY, OR CONSEQUENTIAL DAMAGES (INCLUDING, BUT NOT LIMITED TO, PROCUREMENT OF SUBSTITUTE GOODS OR SERVICES; LOSS OF USE, DATA, OR PROFITS; OR BUSINESS INTERRUPTION) HOWEVER CAUSED AND ON ANY THEORY OF LIABILITY, WHETHER IN CONTRACT, STRICT - Sony STR-ZA5000ES | Help Guide Printable PDF - Page 103
LIABLE FOR ANY DIRECT, INDIRECT, INCIDENTAL, SPECIAL, EXEMPLARY, OR CONSEQUENTIAL DAMAGES (INCLUDING, BUT NOT LIMITED TO, PROCUREMENT OF SUBSTITUTE GOODS OR SERVICES; LOSS OF USE, DATA, OR PROFITS; OR BUSINESS INTERRUPTION) HOWEVER CAUSED AND ON ANY THEORY OF LIABILITY, WHETHER IN CONTRACT, STRICT - Sony STR-ZA5000ES | Help Guide Printable PDF - Page 104
DAMAGES (INCLUDING, BUT NOT LIMITED TO, PROCUREMENT OF SUBSTITUTE GOODS OR SERVICES; LOSS OF USE, DATA, OR PROFITS; OR BUSINESS INTERRUPTION) HOWEVER Number 2, Autumn 1997, ftp://ftp.rsasecurity.com/pub/cryptobytes/crypto3n2.pdf trrsa.c Copyright (C) 1995-1998 Eric Young ([email protected]) All - Sony STR-ZA5000ES | Help Guide Printable PDF - Page 105
of DI Management Services Pty Limited SHA (FIPS 180) code updated to allow use of the problem which was discovered in the SHA or whether it's simply a bandaid which fixes the problem /fips/fips1802/fips180-2.pdf trtwofsh.c Copyright (c) your commercial product without releasing the source code, put - Sony STR-ZA5000ES | Help Guide Printable PDF - Page 106
LIABLE FOR ANY DIRECT, INDIRECT, INCIDENTAL, SPECIAL, EXEMPLARY, OR CONSEQUENTIAL DAMAGES (INCLUDING, BUT NOT LIMITED TO, PROCUREMENT OF SUBSTITUTE GOODS OR SERVICES; LOSS OF USE, DATA, OR PROFITS; OR BUSINESS INTERRUPTION) HOWEVER CAUSED AND ON ANY THEORY OF LIABILITY, WHETHER IN CONTRACT, STRICT - Sony STR-ZA5000ES | Help Guide Printable PDF - Page 107
LIABLE FOR ANY DIRECT, INDIRECT, INCIDENTAL, SPECIAL, EXEMPLARY, OR CONSEQUENTIAL DAMAGES (INCLUDING, BUT NOT LIMITED TO, PROCUREMENT OF SUBSTITUTE GOODS OR SERVICES; LOSS OF USE, DATA, OR PROFITS; OR BUSINESS INTERRUPTION) HOWEVER CAUSED AND ON ANY THEORY OF LIABILITY, WHETHER IN CONTRACT, STRICT - Sony STR-ZA5000ES | Help Guide Printable PDF - Page 108
LIABLE FOR ANY DIRECT, INDIRECT, INCIDENTAL, SPECIAL, EXEMPLARY, OR CONSEQUENTIAL DAMAGES (INCLUDING, BUT NOT LIMITED TO, PROCUREMENT OF SUBSTITUTE GOODS OR SERVICES; LOSS OF USE, DATA, OR PROFITS; OR BUSINESS INTERRUPTION) HOWEVER CAUSED AND ON ANY THEORY OF LIABILITY, WHETHER IN CONTRACT, STRICT - Sony STR-ZA5000ES | Help Guide Printable PDF - Page 109
the original software. If you use this software in a product, an acknowledgment in the product documentation would be appreciated but is not required. 2. Altered source versions must be plainly marked as such, and must not be misrepresented as being the original software. 3. This notice may not be - Sony STR-ZA5000ES | Help Guide Printable PDF - Page 110
LIABLE FOR ANY DIRECT, INDIRECT, INCIDENTAL, SPECIAL, EXEMPLARY, OR CONSEQUENTIAL DAMAGES (INCLUDING, BUT NOT LIMITED TO, PROCUREMENT OF SUBSTITUTE GOODS OR SERVICES; LOSS OF USE, DATA, OR PROFITS; OR BUSINESS INTERRUPTION) HOWEVER CAUSED AND ON ANY THEORY OF LIABILITY, WHETHER IN CONTRACT, STRICT - Sony STR-ZA5000ES | Help Guide Printable PDF - Page 111
LIABLE FOR ANY DIRECT, INDIRECT, INCIDENTAL, SPECIAL, EXEMPLARY, OR CONSEQUENTIAL DAMAGES (INCLUDING, BUT NOT LIMITED TO, PROCUREMENT OF SUBSTITUTE GOODS OR SERVICES; LOSS OF USE, DATA, OR PROFITS; OR BUSINESS INTERRUPTION) HOWEVER CAUSED AND ON ANY THEORY OF LIABILITY, WHETHER IN CONTRACT, STRICT - Sony STR-ZA5000ES | Help Guide Printable PDF - Page 112
holder shall not be used in advertising or otherwise to promote the sale, use or other dealings in this Software without prior written authorization of highly directional signals, you can place it wherever you want. 7.1-channel speaker system using surround back speakers You can enjoy high-fidelity - Sony STR-ZA5000ES | Help Guide Printable PDF - Page 113
. The angles shown by should be the same. Hint As the subwoofer does not emit highly directional signals, you can place it wherever you want. 5.1 -channel speaker system and zone 2 If you make a 5.1ch connection in the main zone, you can also enjoy the sound in another location ("Zone 2") by - Sony STR-ZA5000ES | Help Guide Printable PDF - Page 114
bypass the sound field processing and multichannel surround formats are downmixed to 2-channels. Direct (DIRECT): Presets the sound as it was recorded/encoded without adding any surround effects. However, this receiver will generate a low-frequency signal for output to the subwoofer when there - Sony STR-ZA5000ES | Help Guide Printable PDF - Page 115
Neural:X remaps stereo, 5.1, and 7.1 movies and music to match your speaker layout. Note Dolby Atmos is decoded as Dolby TrueHD or Dolby Digital Plus when [Neural:X] is being used. Naming preset stations (Name Input) 1 Select [Listen] - [FM TUNER] or [AM TUNER] from the home menu. If the Simple mode - Sony STR-ZA5000ES | Help Guide Printable PDF - Page 116
] AUTO, OFF Control for HDMI [5.2. CONTROL FOR HDMI] ON, OFF Standby Linked to TV [5.3. STANDBY LINKED TO TV] ON, AUTO Audio Return Channel [5.4. AUDIO RETURN CHANNEL] ON, OFF Pass Through [5.5. PASS THROUGH] AUTO, ON, OFF HDMI Audio Out [5.6. AUDIO OUT] AMP, TV+AMP HDMI Zone2 Audio Out [5.7. ZONE2 - Sony STR-ZA5000ES | Help Guide Printable PDF - Page 117
] x.xxx (*8) Network Update [7.8. NETWORK UPDATE] USB Update [7.9. USB UPDATE] Tuner Setup [7.10. speaker channel (FRONT, CENTER, SURROUND, HEIGHT1, HEIGHT2). *5 XXX represents a speaker channel the receiver. Setting the FM station receiving mode (FM Mode) You can set the FM station receiving mode - Sony STR-ZA5000ES | Help Guide Printable PDF - Page 118
Select the setting you want. Stereo: The FM station is received in stereo. Monaural: The FM station is received in monaural. Note You can set FM mode in the to off (deactivated). For details, refer to the operating instructions of the subwoofer. Note Depending on the characteristics of the subwoofer
-
 1
1 -
 2
2 -
 3
3 -
 4
4 -
 5
5 -
 6
6 -
 7
7 -
8
-
9
-
10
-
11
-
12
-
13
-
14
-
15
-
16
-
17
-
18
-
19
-
20
-
21
-
22
-
23
-
24
-
25
-
26
-
27
-
28
-
29
-
30
-
31
-
32
-
33
-
34
-
35
-
36
-
37
-
38
-
39
-
40
-
41
-
42
-
43
-
44
-
45
-
46
-
47
-
48
-
49
-
50
-
51
-
52
-
53
-
54
-
55
-
56
-
57
-
58
-
59
-
60
-
61
-
62
-
63
-
64
-
65
-
66
-
67
-
68
-
69
-
70
-
71
-
72
-
73
-
74
-
75
-
76
-
77
-
78
-
79
-
80
-
81
-
82
-
83
-
84
-
85
-
86
-
87
-
88
-
89
-
90
-
91
-
92
-
93
-
94
-
95
-
96
-
97
-
98
-
99
-
100
-
101
-
102
-
103
-
104
-
105
-
106
-
107
-
108
-
109
-
110
-
111
-
112
-
113
-
114
-
115
-
116
-
117
-
118
 |
 |

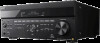
MULTI CHANNEL AV RECEIVER
STR-ZA5000ES
Parts and Controls
Receiver
Front panel (with the front cover attached) [1]
Front panel (without the front cover attached) [2]
Power indicator [3]
Indicators on the display panel [4]
Rear panel [5]
Remote control
Remote control (upper section) [6]
Remote control (lower section) [7]
Preparation
1. Installing speakers
Locations and names of speakers [8]
Installing 5.1.4-channel speaker system using top front and top rear speakers [9]
Installing 7.1.2-channel speaker system using top middle speakers [10]
Installing 7.1.2-channel speaker system using front Dolby Atmos enabled speakers
[11]
Installing 7.1.4-channel speaker system using an additional stereo power amplifier
[12]
Installing 7.1-channel speaker system with Zone 2 connection [13]
Speaker configuration and speaker pattern settings [14]
2. Connecting speakers
Connecting 5.1.4-channel speaker system using top front and top rear speakers
[15]
Connecting 7.1.2-channel speaker system using top middle speakers [16]
Connecting 7.1.2-channel speaker system using front Dolby Atmos enabled
speakers [17]
Connecting 7.1.4-channel speaker system using an additional stereo power
amplifier [18]
Connecting 7.1-channel speaker system with Zone 2 connection [19]
Speaker patterns and terminals to be connected [20]
3. Connecting a TV
Connecting a TV [21]
Connecting a 4K TV [22]
Connecting a 4K TV that supports HDCP 2.2 and a 4K streaming box using a 4K-
compatible HDMI cable [23]
Notes on connecting cables [24]
About HDMI connections [25]
4. Connecting audio-visual devices and the antennas (aerials)
Connecting devices with HDMI jacks [26]
Connecting devices with jacks other than HDMI jacks [27]
Connecting the antennas (aerials) [28]
Connecting another amplifier in Zone 2/3 [29]
Digital audio formats supported by the receiver [30]
Notes on connecting cables [31]
About HDMI connections [32]
5. Connecting to the network
Connecting the receiver to the network using LAN cables [33]
6. Turning on the receiver/preparing the remote control
Inserting batteries into the remote control [34]
Turning on the receiver [35]
Notes on installing the receiver [36]