Sony TRV950 Operating Instructions - Page 79
Adjusting recording level manually - Sound, recording level
 |
UPC - 027242607460
View all Sony TRV950 manuals
Add to My Manuals
Save this manual to your list of manuals |
Page 79 highlights
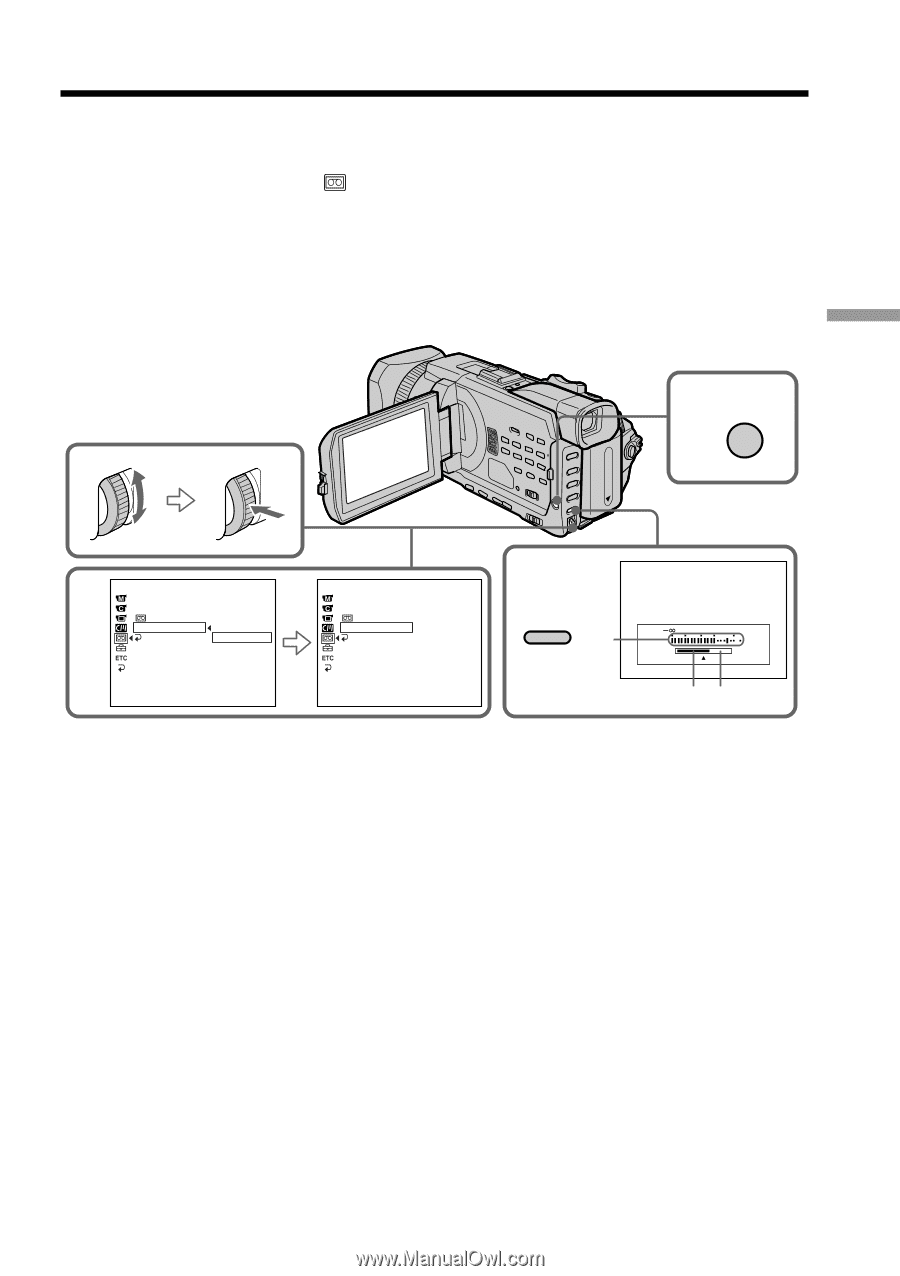
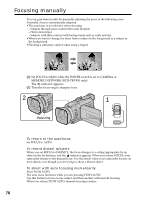
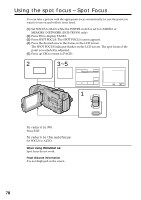
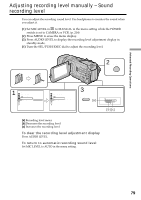
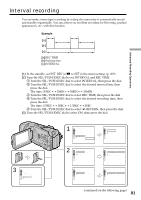
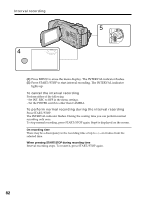
Advanced Recording Operations Adjusting recording level manually - Sound recording level You can adjust the recording sound level. Use headphones to monitor the sound when you adjust it. (1) Set MIC LEVEL in to MANUAL in the menu setting while the POWER switch is set to CAMERA or VCR. (p. 214) (2) Press MENU to erase the menu display. (3) Press AUDIO LEVEL to display the recording level adjustment display in standby mode. (4) Turn the SEL/PUSH EXEC dial to adjust the recording level. 2 MENU 1 TAPE SET REC MODE AUD I O MODE REMA I N M I C LEVEL RETURN AUTO MANUAL [MENU] : END TAPE SET REC MODE AUD I O MODE REMA I N M I C LEVEL RETURN MANUAL [MENU] : END 3 AUDIO LEVEL [a] 30 20 12 0 dB [b][c] [a] Recording level meter [b] Decreases the recording level [c] Increases the recording level To clear the recording level adjustment display Press AUDIO LEVEL. To return to automatic recording sound level Set MIC LEVEL to AUTO in the menu setting. 79
-
 1
1 -
2
-
3
-
4
-
5
-
6
-
7
-
8
-
9
-
10
-
11
-
12
-
13
-
14
-
15
-
16
-
17
-
18
-
19
-
20
-
21
-
22
-
23
-
24
-
25
-
26
-
27
-
28
-
29
-
30
-
31
-
32
-
33
-
34
-
35
-
36
-
37
-
38
-
39
-
40
-
41
-
42
-
43
-
44
-
45
-
46
-
47
-
48
-
49
-
50
-
51
-
52
-
53
-
54
-
55
-
56
-
57
-
58
-
59
-
60
-
61
-
62
-
63
-
64
-
65
-
66
-
67
-
68
-
69
-
70
-
71
-
72
-
73
-
 74
74 -
 75
75 -
 76
76 -
 77
77 -
 78
78 -
 79
79 -
 80
80 -
 81
81 -
 82
82 -
 83
83 -
 84
84 -
85
-
86
-
87
-
88
-
89
-
90
-
91
-
92
-
93
-
94
-
95
-
96
-
97
-
98
-
99
-
100
-
101
-
102
-
103
-
104
-
105
-
106
-
107
-
108
-
109
-
110
-
111
-
112
-
113
-
114
-
115
-
116
-
117
-
118
-
119
-
120
-
121
-
122
-
123
-
124
-
125
-
126
-
127
-
128
-
129
-
130
-
131
-
132
-
133
-
134
-
135
-
136
-
137
-
138
-
139
-
140
-
141
-
142
-
143
-
144
-
145
-
146
-
147
-
148
-
149
-
150
-
151
-
152
-
153
-
154
-
155
-
156
-
157
-
158
-
159
-
160
-
161
-
162
-
163
-
164
-
165
-
166
-
167
-
168
-
169
-
170
-
171
-
172
-
173
-
174
-
175
-
176
-
177
-
178
-
179
-
180
-
181
-
182
-
183
-
184
-
185
-
186
-
187
-
188
-
189
-
190
-
191
-
192
-
193
-
194
-
195
-
196
-
197
-
198
-
199
-
200
-
201
-
202
-
203
-
204
-
205
-
206
-
207
-
208
-
209
-
210
-
211
-
212
-
213
-
214
-
215
-
216
-
217
-
218
-
219
-
220
-
221
-
222
-
223
-
224
-
225
-
226
-
227
-
228
-
229
-
230
-
231
-
232
-
233
-
234
-
235
-
236
-
237
-
238
-
239
-
240
-
241
-
242
-
243
-
244
-
245
-
246
-
247
-
248
-
249
-
250
-
251
-
252
-
253
-
254
-
255
-
256
 |
 |