Sony VGC-LV140J User Guide - Page 135
Slide the drive holder into the drive bay until it clicks into place and secure it with the screws.
 |
View all Sony VGC-LV140J manuals
Add to My Manuals
Save this manual to your list of manuals |
Page 135 highlights
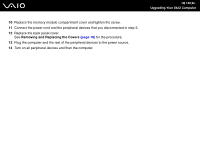
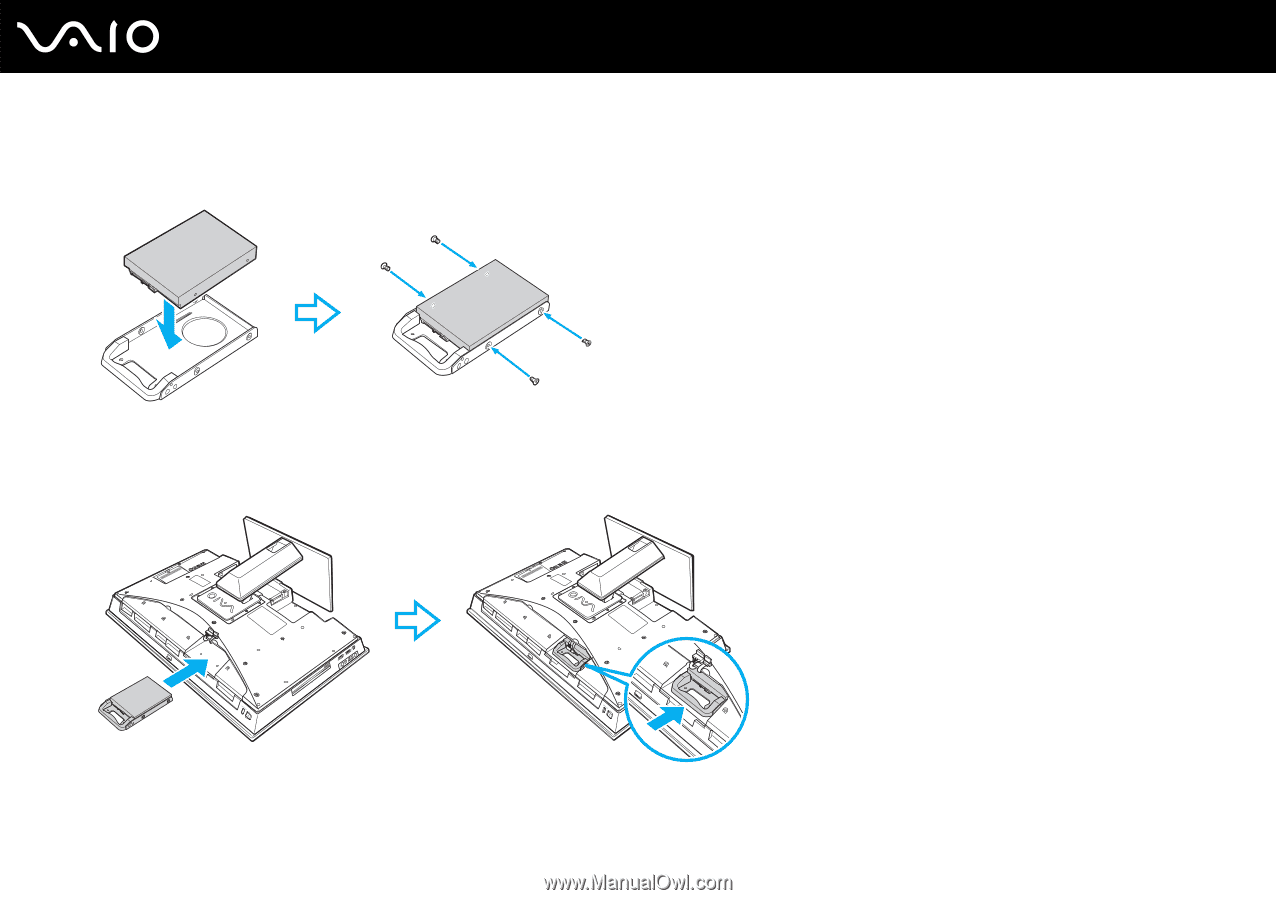
n 135 N Upgrading Your VAIO Computer 8 Place a new drive into the drive holder and align the holes on each side of the drive holder. 9 Secure the drive to the drive holder with screws, through the holes on each side of the drive holder. ! A new hard disk drive comes with the necessary screws. Do not overtighten these screws when securing the drive to the drive holder. 10 Slide the drive holder into the drive bay until it clicks into place and secure it with the screws.
-
 1
1 -
2
-
3
-
4
-
5
-
6
-
7
-
8
-
9
-
10
-
11
-
12
-
13
-
14
-
15
-
16
-
17
-
18
-
19
-
20
-
21
-
22
-
23
-
24
-
25
-
26
-
27
-
28
-
29
-
30
-
31
-
32
-
33
-
34
-
35
-
36
-
37
-
38
-
39
-
40
-
41
-
42
-
43
-
44
-
45
-
46
-
47
-
48
-
49
-
50
-
51
-
52
-
53
-
54
-
55
-
56
-
57
-
58
-
59
-
60
-
61
-
62
-
63
-
64
-
65
-
66
-
67
-
68
-
69
-
70
-
71
-
72
-
73
-
74
-
75
-
76
-
77
-
78
-
79
-
80
-
81
-
82
-
83
-
84
-
85
-
86
-
87
-
88
-
89
-
90
-
91
-
92
-
93
-
94
-
95
-
96
-
97
-
98
-
99
-
100
-
101
-
102
-
103
-
104
-
105
-
106
-
107
-
108
-
109
-
110
-
111
-
112
-
113
-
114
-
115
-
116
-
117
-
118
-
119
-
120
-
121
-
122
-
123
-
124
-
125
-
126
-
127
-
128
-
129
-
 130
130 -
 131
131 -
 132
132 -
 133
133 -
 134
134 -
 135
135 -
 136
136 -
 137
137 -
 138
138 -
 139
139 -
 140
140 -
141
-
142
-
143
-
144
-
145
-
146
-
147
-
148
-
149
-
150
-
151
-
152
-
153
-
154
-
155
-
156
-
157
-
158
-
159
-
160
-
161
-
162
-
163
-
164
-
165
-
166
-
167
-
168
-
169
-
170
-
171
-
172
-
173
-
174
-
175
-
176
-
177
-
178
-
179
-
180
-
181
-
182
-
183
-
184
-
185
-
186
-
187
-
188
-
189
-
190
-
191
-
192
-
193
-
194
-
195
-
196
-
197
-
198
-
199
-
200
-
201
-
202
-
203
-
204
-
205
-
206
-
207
-
208
 |
 |
135
n
N
Upgrading Your VAIO Computer
8
Place a new drive into the drive holder and align the holes on each side of the drive holder.
9
Secure the drive to the drive holder with screws, through the holes on each side of the drive holder.
!
A new hard disk drive comes with the necessary screws. Do not overtighten these screws when securing the drive to the drive holder.
10
Slide the drive holder into the drive bay until it clicks into place and secure it with the screws.