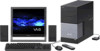
Sony VGC-RC110GX VGC-RC Series Hard Disk Drive Replacement Instructions - Page 2
VGC-RC Series Hard Disk Drive, Replacement Instructions
 |
View all Sony VGC-RC110GX manuals
Add to My Manuals
Save this manual to your list of manuals |
Page 2 highlights
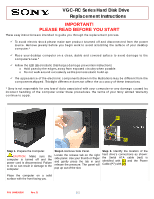
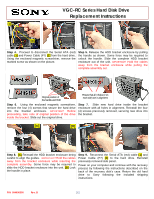
VGC-RC Series Hard Disk Drive Replacement Instructions [1] [2] Step 4. Proceed to disconnect the Serial ATA (red) cable [1] and Power Cable (P7) [2] from the hard drive. Using the enclosed magnetic screwdriver, remove the marked screw as shown on the picture. Step 5. Release the HDD bracket enclosure by pulling the handle as shown. Some force may be required to unlock the handle. Slide the complete HDD bracket enclosure out of the unit. IMPORTANT! Hold the cables away from the bracket enclosure while pulling the complete assembly out. Original position of the handle and HDD Ensure that all 4 holes (2 on each side) are in alignment Step 6. Using the enclosed magnetic screwdriver, remove the four (4) screws that secure the hard drive into the bracket enclosure. IMPORTANT! Before proceeding, take note of original position of the drive inside the bracket. Slide out the original drive. Step 7. Slide new hard drive inside the bracket enclosure with all holes in alignment. Reinstall the four (4) screws previously removed, securing new drive into the bracket. [A] [B] Step 8. [A] Reinstall the HDD bracket enclosure being careful to align the guides. IMPORTANT! Hold the cables away from the bracket enclosure while inserting the complete assembly. Some force may be required to slide the HDD bracket enclosure into the unit. [B] Lock the handle in place. Step 9. Reconnect the Serial ATA (red) cable [1] and Power Cable (P7) [2] to the hard drive. Reinstall previously removed side panel. Power on your computer and continue with the recovery process by following the instructions described on the back of the recovery disk's case. Return the old hard drive to Sony following the included shipping instructions. P/N 994636300 Rev. B 2/2
-
 1
1 -
 2
2
 |
 |
