Sony VGP-MR100U Operating Instructions - Page 14
Getting ready, Connect the Network Media Receiver to a TV
 |
View all Sony VGP-MR100U manuals
Add to My Manuals
Save this manual to your list of manuals |
Page 14 highlights
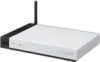
Getting ready The steps necessary to prepare the unit for use differ, depending on whether a wireless LAN or a network cable is used to connect to the computer. 1. Prepare the remote control for use The remote control is necessary for operating of the Network Media Receiver. c Page 15 2. Connect the Network Media Receiver to a TV c Page 18 Select a suitable connector and cable according to the requirements of the TV monitor. It is also possible to make the connection to the TV via a VCR. 3. Connect the Network Media Receiver to computer via a network cable c Page 21 Connect the Network Media Receiver to the computer using a network cable. When using a wireless connection, this step is not required. 4. Connect power c Page 29 Connect the supplied AC adapter to the Network Media Receiver to supply power. 5. Configure wireless LAN settings c Page 30 When the Network Media Receiver is to be connected to the computer via a wireless connection, without using a network cable, several wireless LAN settings must be configured. When using a network cable connection, this step is not required. 6. Change the settings of the Network Media Receiver to match the network connection c Page 33 Depending on the network environment, some settings of the Network Media Receiver may have to be changed, setting whether to obtain an IP address automatically or use a fixed address. The default setting is "Automatic assignment (using router)". 7. Configure settings at the computer c Page 35 The computer must be configured to share its photos, video, and music. When using a VAIO computer, the VAIO Media software must be configured. When using a different kind of computer, corresponding settings must be configured. 14
-
 1
1 -
2
-
3
-
4
-
5
-
6
-
7
-
8
-
 9
9 -
 10
10 -
 11
11 -
 12
12 -
 13
13 -
 14
14 -
 15
15 -
 16
16 -
 17
17 -
 18
18 -
 19
19 -
20
-
21
-
22
-
23
-
24
-
25
-
26
-
27
-
28
-
29
-
30
-
31
-
32
-
33
-
34
-
35
-
36
-
37
-
38
-
39
-
40
-
41
-
42
-
43
-
44
-
45
-
46
-
47
-
48
-
49
-
50
-
51
-
52
-
53
-
54
-
55
-
56
-
57
-
58
-
59
-
60
-
61
-
62
-
63
-
64
-
65
-
66
-
67
-
68
-
69
 |
 |
