Sony VPCL212FX VPCL2 Series Optical Disk Drive Replacement Instructions - Page 4
ODD Installation, Steps 14-20, Return the old Optical Drive to, Sony using the included, shipping - recovery
 |
UPC - 027242820449
View all Sony VPCL212FX manuals
Add to My Manuals
Save this manual to your list of manuals |
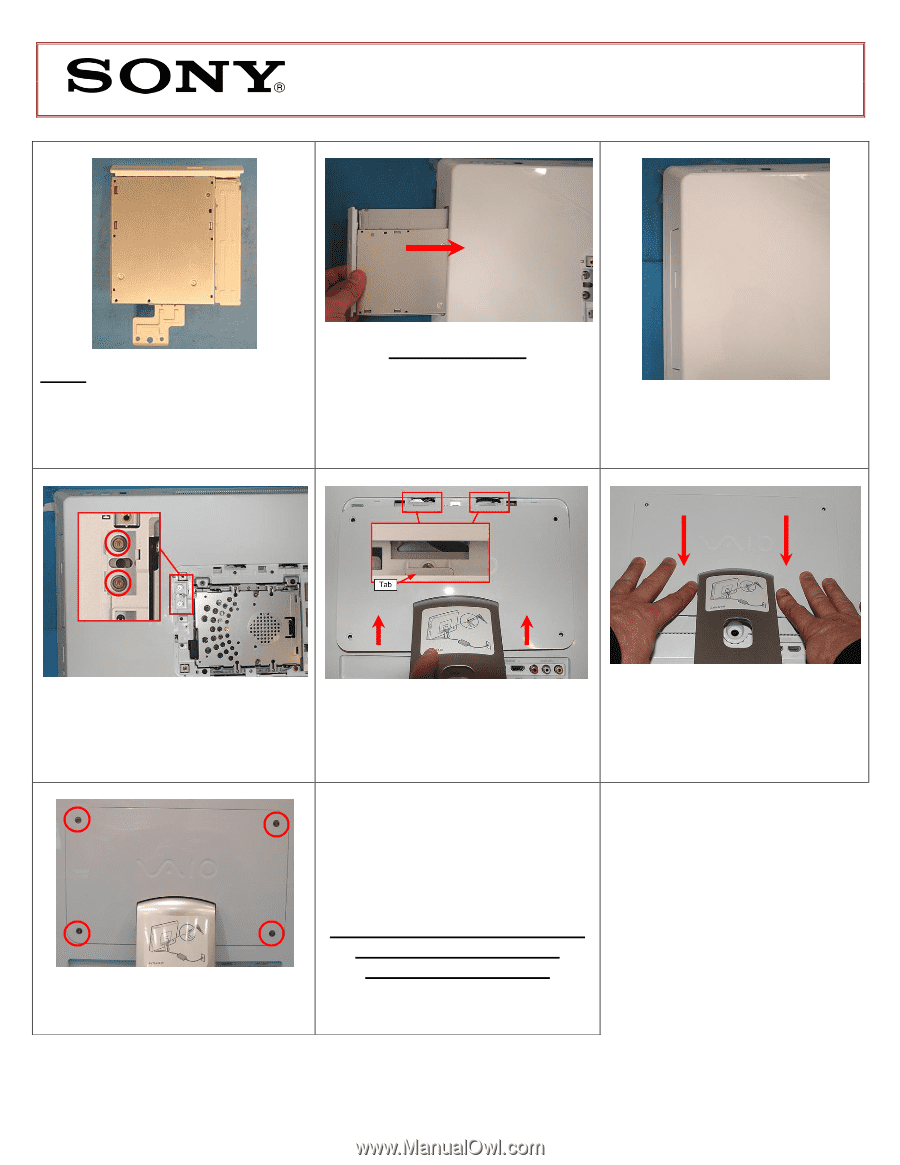
Page 4 highlights
VPCL2 Series Optical Disk Drive Replacement Instructions NOTE: After installation, all brackets should sit flush with the ODD. The stamped letters located on the brackets should all be facing the same direction. ODD Installation (Steps 14-20) Step 15. Align the ODD assembly properly (label side down) and slide into the Computer. Step 16. Make sure the new ODD is seated flush on the edge of the Computer. Step 17. Reinstall the two (2) ODD Bay screws to secure the ODD Drive Bay. Step 18. Align the Tabs on the Top of the Hard Drive Door with the Notches at the top of the Hard Drive Bay. Slide the Hard Drive Door up to secure the Tabs. Step 19. Press the Door down to seat the remaining Door Tabs. Verify that the Door sits flush with the unit. Step 21. Reconnect the AC Adaptor. Power on your computer and continue with the recovery process by following the instructions described on the back of the recovery disk's case. Step 20. Re-install the four (4) Hard Drive Door Screws to secure the Door. Return the old Optical Drive to Sony using the included shipping instructions. FOR TECHNICAL SUPPORT IN THE US CALL TOLL FREE 1-866-651-7669 FROM 9:00 AM TO 11:00 PM EST P/N 989202624 Rev. B 4/4
-
 1
1 -
 2
2 -
 3
3 -
 4
4
 |
 |