Sony XAV-A1 Installation/Connection Instructions - Page 12
Removing the bracket, together into the unit - face
 |
View all Sony XAV-A1 manuals
Add to My Manuals
Save this manual to your list of manuals |
Page 12 highlights
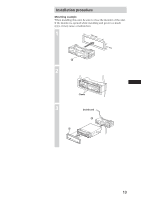
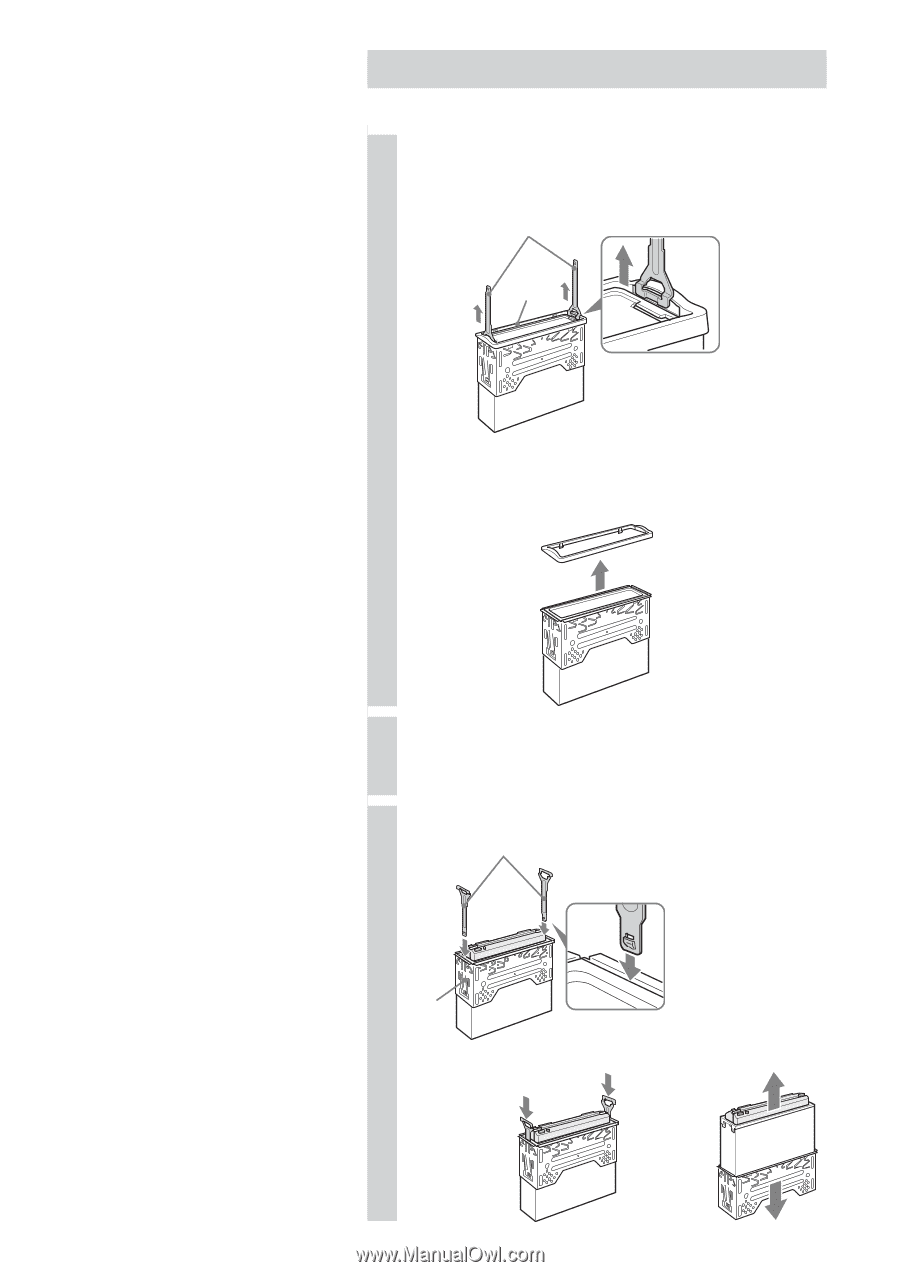
Removing the bracket Before installing the unit, remove the bracket from the unit. 1 Remove the protection collar qa. 1 Enlarge the release keys qs together with the protection collar qa. qs qa Orient the release key qs correctly. 2 Pull out the release keys qs to remove the protection collar qa. 2 Insert two release keys qs together into the unit and the bracket 0 until they click. 3 Pull down the bracket 0, then pull up the unit to separate. qs Face the hook inwards. 0 m , 12
-
 1
1 -
2
-
3
-
4
-
5
-
6
-
 7
7 -
 8
8 -
 9
9 -
 10
10 -
 11
11 -
 12
12 -
 13
13 -
 14
14 -
 15
15 -
 16
16 -
 17
17 -
18
-
19
-
20
-
21
-
22
-
23
-
24
-
25
-
26
-
27
-
28
-
29
-
30
-
31
-
32
-
33
-
34
-
35
-
36
-
37
-
38
-
39
-
40
-
41
-
42
-
43
-
44
 |
 |
12
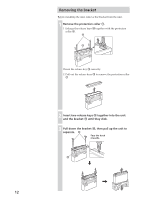
Removing the bracket
Before installing the unit, remove the bracket from the unit.
1
Remove the protection collar
qa
.
1
Enlarge the release keys
qs
together with the protection
collar
qa
.
Orient the release key
qs
correctly.
2
Pull out the release keys
qs
to remove the protection collar
qa
.
2
Insert two release keys
qs
together into the unit
and the bracket
0
until they click.
3
Pull down the bracket
0
, then pull up the unit to
separate.
m
,
0
qs
Face the hook
inwards.
qs
qa