Sony XR-CA350X Operating Instructions (primary manual) - Page 6
Getting Started - parts
 |
View all Sony XR-CA350X manuals
Add to My Manuals
Save this manual to your list of manuals |
Page 6 highlights
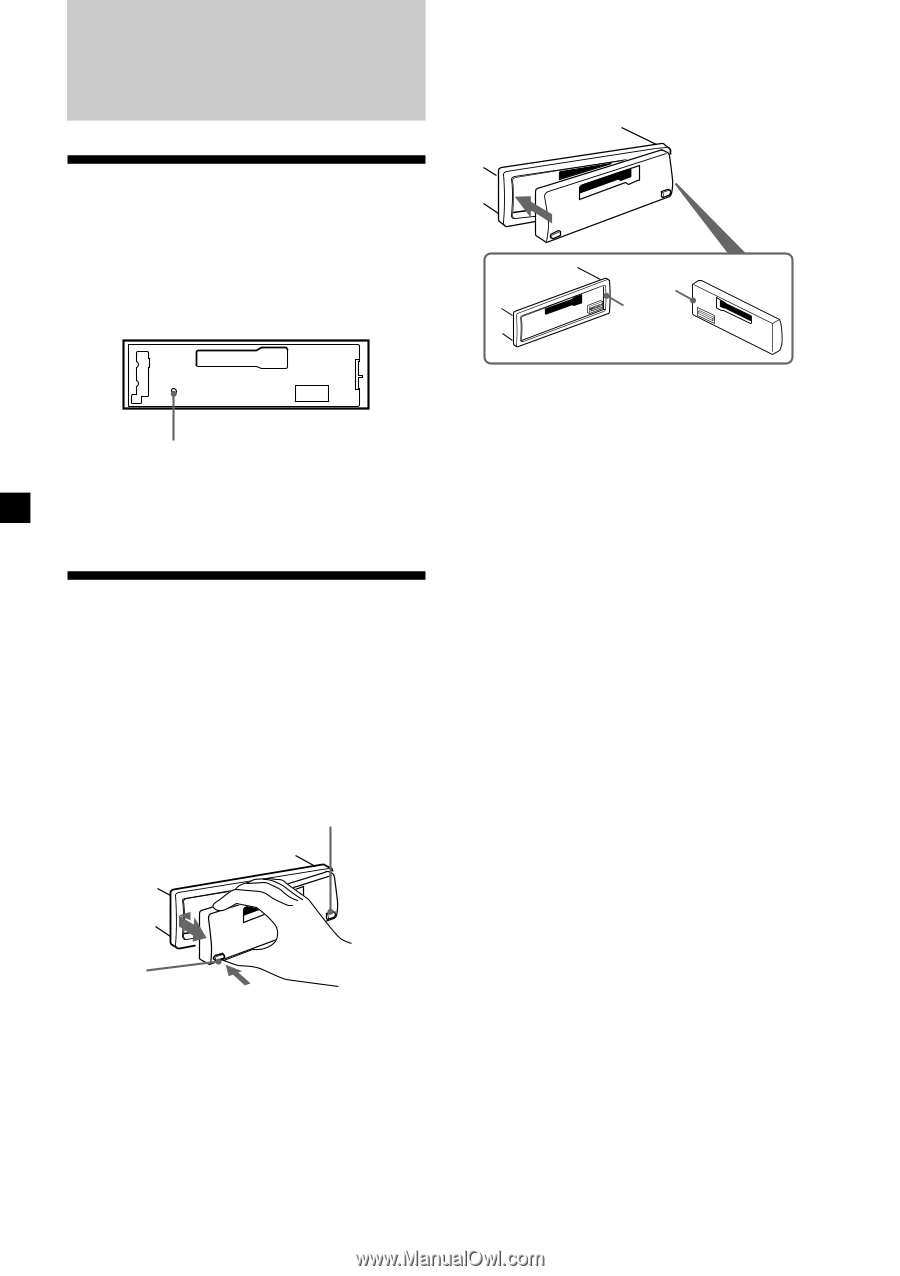
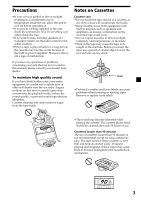
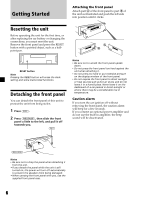
Getting Started Attaching the front panel Attach part A of the front panel to part B of the unit as illustrated and push the left side into position until it clicks. Resetting the unit Before operating the unit for the first time, or after replacing the car battery or changing the connections, you must reset the unit. Remove the front panel and press the RESET button with a pointed object, such as a ballpoint pen. A B RESET button Note Pressing the RESET button will erase the clock setting and some memorized functions. Detaching the front panel You can detach the front panel of this unit to protect the unit from being stolen. 1 Press (OFF). 2 Press (RELEASE), then slide the front panel a little to the left, and pull it off towards you. (OFF) Notes • Be sure not to attach the front panel upside down. • Do not press the front panel too hard against the unit when attaching it. • Do not press too hard or put excessive pressure on the display window of the front panel. • Do not expose the front panel to direct sunlight or heat sources such as hot air ducts, and do not leave it in a humid place. Never leave it on the dashboard of a car parked in direct sunlight or where there may be a considerable rise in temperature. Caution alarm If you turn the car ignition off without removing the front panel, the caution alarm will beep for a few seconds. If you connect an optional power amplifier and do not use the built-in amplifier, the beep sound will be deactivated. (RELEASE) Notes • Be sure not to drop the panel when detaching it from the unit. • If you detach the panel while the unit is still turned on, the power will turn off automatically to prevent the speakers from being damaged. • When carrying the front panel with you, use the supplied front panel case. 6
-
 1
1 -
 2
2 -
 3
3 -
 4
4 -
 5
5 -
 6
6 -
 7
7 -
 8
8 -
 9
9 -
 10
10 -
 11
11 -
 12
12 -
13
-
14
-
15
-
16
-
17
-
18
-
19
-
20
-
21
-
22
-
23
-
24
-
25
-
26
-
27
-
28
-
29
-
30
-
31
-
32
-
33
-
34
-
35
-
36
 |
 |