Stihl BG 55 Product Instruction Manual - Page 15
Assembling the Vacuum, Shredder - blowers
 |
View all Stihl BG 55 manuals
Add to My Manuals
Save this manual to your list of manuals |
Page 15 highlights
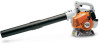
Removing the Blower Tube 6 3 Assembling the Vacuum Shredder The vacuum attachment is available as a special accessory. Fitting the Elbow 3 2 English 1 295BA007 KN 295BA005 KN N Use a suitable tool to lift the tab (6) on the fan housing stub (3). N Rotate the blower tube in the direction of the arrow and then pull it out. See "Assembling the Vacuum Shredder" for installation and removal of the vacuum attachment. 2 1 N From inside the catcher bag (2), push the elbow (1) through the intake opening and pull it outwards until it is firmly seated. N Attach the carrying strap. 295BA006 KN N Push the elbow (1) into the catcher bag (2) as far as the mark and secure it with the Velcro strip (3). 4 N Loosen the screw (4). 295BA037 KN BG 55, BG 65, BG 85, SH 55, SH 85 13
-
 1
1 -
2
-
3
-
4
-
5
-
6
-
7
-
8
-
9
-
 10
10 -
 11
11 -
 12
12 -
 13
13 -
 14
14 -
 15
15 -
 16
16 -
 17
17 -
 18
18 -
 19
19 -
 20
20 -
21
-
22
-
23
-
24
-
25
-
26
-
27
-
28
-
29
-
30
-
31
-
32
-
33
-
34
-
35
-
36
-
37
-
38
-
39
-
40
-
41
-
42
-
43
-
44
-
45
-
46
-
47
-
48
-
49
-
50
-
51
-
52
-
53
-
54
-
55
-
56
-
57
-
58
-
59
-
60
-
61
-
62
-
63
-
64
-
65
-
66
-
67
-
68
-
69
-
70
-
71
-
72
-
73
-
74
-
75
-
76
 |
 |
