Symphonic CWF803 Owner's Manual - Page 11
Loading The Batteries
 |
View all Symphonic CWF803 manuals
Add to My Manuals
Save this manual to your list of manuals |
Page 11 highlights
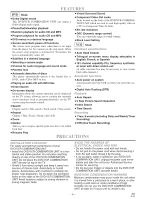
REAR VIEW 56 57 58 59 60 DVD/VCR AUDIO OUT VCR ANT-IN L R ANT-OUT VIDEO OUT AUDIO IN VIDEO IN DVD S-VIDEO COMPONENT AUDIO OUT VIDEO OUT OUT Y DIGITAL AUDIO OUT Cb L COAXIAL Cr R 66 65 64 56. ANT-IN (Antenna In) Jack Connect your antenna, Cable Box, or Satellite decoder box. 57. DVD/VCR AUDIO OUT Jacks Connect the supplied audio cables here and to the Audio In jacks of a television or other audio equipment. 58. AUDIO IN Jack Connect an audio cable coming from the audio out jack of a camcorder, another VCR, or an audio source here. 59. AC Power Cord Connect to a standard AC outlet to supply power to the DVD/VCR COMBINATION UNIT. DVD Playback only 60. COMPONENT VIDEO OUT Jacks Connect optional component video cables here and to the component Video In jacks of a television. 61. COAXIAL Jack Connect an optional coaxial digital audio cable here and to the Coaxial Digital Audio In jack of a decoder or audio receiver. 63 62 61 62. DVD ANALOG AUDIO OUT Jacks Connect the supplied audio cables here and to the Audio In jacks of a television or other audio equipment (DVD only). 63. S-VIDEO OUT Jack Connect an optional S-Video cable here and to the SVideo In jack of a television. (DVD only). 64. VIDEO IN Jack Connect a cable coming from the video out jack of a camcorder, another VCR, or an audio-visual source (laser disc player, video disc player, etc.) here. 65. DVD/VCR VIDEO OUT Jack Connect the yellow video cable (supplied) here and to the TV's Video In jack. 66. ANT-OUT (Antenna Out) Jack Use the supplied RF cable to connect this jack to the ANTENNA IN Jack on your TV. Note ¡The S-VIDEO OUT jack, COAXIAL jack, and COM PONENT VIDEO OUT jack are only useful in DVD mode. Caution: Do not touch the inner pins of the jacks on the rear panel. Electrostatic discharge may cause permanent damage to the player. LOADING THE BATTERIES 1. Open the battery compartment cover. 2. Insert two AA batteries (supplied), with each one oriented correctly. 3. Close the cover. Notes ¡Do not mix alkaline and manganese batteries. ¡Do not mix old and new batteries. - 11 - EN 1L25
-
 1
1 -
2
-
3
-
4
-
5
-
 6
6 -
 7
7 -
 8
8 -
 9
9 -
 10
10 -
 11
11 -
 12
12 -
 13
13 -
 14
14 -
 15
15 -
 16
16 -
17
-
18
-
19
-
20
-
21
-
22
-
23
-
24
-
25
-
26
-
27
-
28
-
29
-
30
-
31
-
32
-
33
-
34
-
35
-
36
 |
 |
