TEAC AI-101DA Owner's Manual (English, Français, Español) - - Page 17
Upconversion function, Basic operation, Turn the power knob to STANDBY/ON.
 |
View all TEAC AI-101DA manuals
Add to My Manuals
Save this manual to your list of manuals |
Page 17 highlights
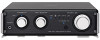
Upconversion function You can use the upconversion function with digital input (USB, OPTICAL). Press the UPCONVERT button on the remote control to enable the upconversion function. The UPCONVERT indicator will light when upconversion is enabled. Input sampling frequencies and sampling frequencies after upconversion Input sampling frequency 32 kHz 44.1 kHz 48 kHz 64 kHz 88.2 kHz 96 kHz 128 kHz 176.4 kHz 192 kHz Sampling frequency after upconversion 64 kHz 88.2 kHz 96 kHz 128 kHz 176.4 kHz 192 kHz 128 kHz 176.4 kHz 192 kHz Basic operation 1 Turn the power knob to STANDBY/ON. The indicator will light blue when the unit is turned on. 2 Turn the INPUT SELECTOR knob to select the input source. The indicator lights for the selected source. The playback source will change in the following order. USB w Bluetooth w OPT1 w OPT2 w LINE oo The input indicators blink when the input signal is a digital audio signal in a format other than PCM. If this is the case, check to see if the connected digital audio output device has a "PCM" setting for the digital output format. Refer to the operation manual for that device to make this setting. oo When using this unit with a Windows computer, before setting this unit to USB and playing back audio files on the computer, you must install the dedicated driver on that computer (page 22). Continued on the next page e 17
-
 1
1 -
2
-
3
-
4
-
5
-
6
-
7
-
8
-
9
-
10
-
11
-
 12
12 -
 13
13 -
 14
14 -
 15
15 -
 16
16 -
 17
17 -
 18
18 -
 19
19 -
 20
20 -
 21
21 -
 22
22 -
23
-
24
-
25
-
26
-
27
-
28
-
29
-
30
-
31
-
32
-
33
-
34
-
35
-
36
-
37
-
38
-
39
-
40
-
41
-
42
-
43
-
44
-
45
-
46
-
47
-
48
-
49
-
50
-
51
-
52
-
53
-
54
-
55
-
56
-
57
-
58
-
59
-
60
-
61
-
62
-
63
-
64
-
65
-
66
-
67
-
68
-
69
-
70
-
71
-
72
-
73
-
74
-
75
-
76
 |
 |
