TEAC CD-X10I Owners Manual - Page 10
Wall Mounting, Remote Control Unit, To hook on the wall, Battery Installation - subwoofer
 |
View all TEAC CD-X10I manuals
Add to My Manuals
Save this manual to your list of manuals |
Page 10 highlights
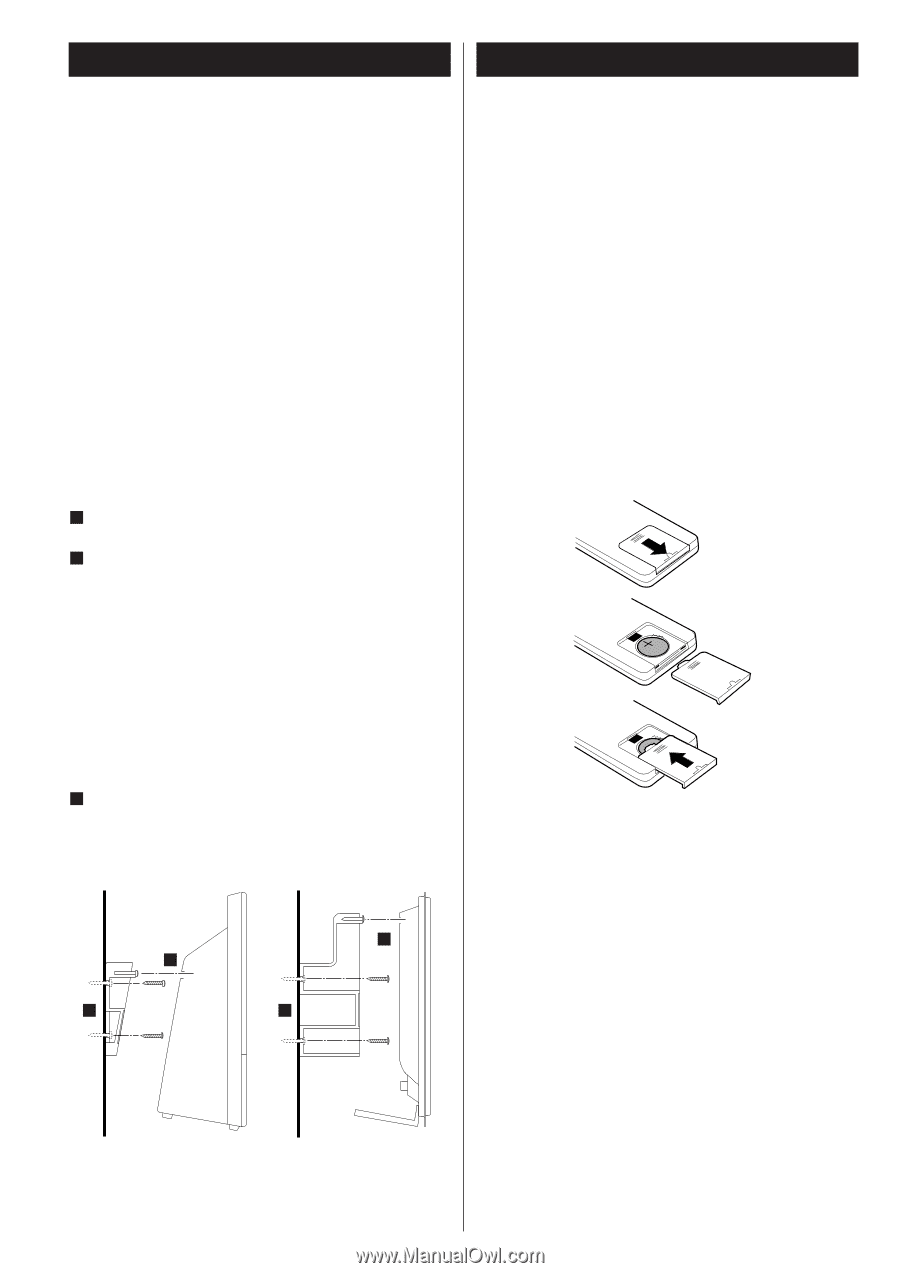
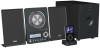
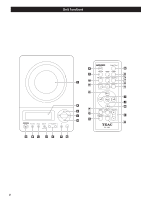
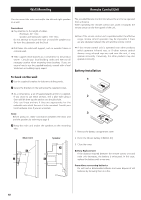
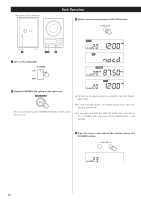
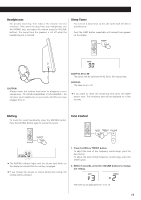
Wall Mounting Remote Control Unit You can mount the main unit and/or the left and right speakers on a wall. Precautions < Pay attention to the length of cables. iPod Dock: 39" (1m) Speaker and Subwoofer cables: 118" (3m) Do not attempt to mount the main unit and the speakers too far from the subwoofer and the Dock. < Drill holes into solid wall support, such as wooden frame or concrete wall. < TEAC supplies these brackets as a convenience to the product owner. Consult your local building codes and exercise all necessary caution when mounting these brackets. If you are unsure how to use the supplied brackets, consult with a local tradesmen or building supply expert. The provided Remote Control Unit allows the unit to be operated from a distance. When operating the remote control unit, point it towards the remote sensor on the front panel of the unit. < Even if the remote control unit is operated within the effective range, remote control operation may be impossible if there are any obstacles between the unit and the remote control. < If the remote control unit is operated near other products which generate infrared rays, or if other remote control devices using infrared rays are used near the unit, it may operate incorrectly. Conversely, the other products may also operate incorrectly. Battery Installation To hook on the wall 1 1 Use the supplied template to determine drilling points. 2 Secure the brackets on the wall using the supplied screws. < As a convenience, a set of tapered plastic anchors is supplied. If you chose to use these anchors, drill a pilot hole using a 2 6mm drill bit then tap the anchor into the pilot hole. Only use these anchors if they are appropriate for the materials onto which the unit is to be mounted. Consult your local hardware store if you are uncertain. Note: 3 Before going on, make connections between the main unit and the speakers by referring to page 9. 3 Hang the main unit and/or the speakers to the mounting tabs. 1. Remove the battery compartment cover. Main Unit Speaker 2. Put in the lithium battery (CR2032, 3V). 3 2 3. Close the cover. 3 Battery Replacement If the distance required between the remote control unit and main unit decreases, the battery is exhausted. In this case, 2 replace the battery with a new one. Precautions concerning batteries Do not heat or disassemble batteries and never dispose of old batteries by throwing them in a fire. 10
-
 1
1 -
2
-
3
-
4
-
 5
5 -
 6
6 -
 7
7 -
 8
8 -
 9
9 -
 10
10 -
 11
11 -
 12
12 -
 13
13 -
 14
14 -
 15
15 -
16
-
17
-
18
-
19
-
20
-
21
-
22
-
23
-
24
-
25
-
26
-
27
-
28
 |
 |