TEAC DM-3200 DM-3200 Owner's Manual - Page 16
Basic operational concepts, Smart keys, What’s on the screen?
 |
View all TEAC DM-3200 manuals
Add to My Manuals
Save this manual to your list of manuals |
Page 16 highlights
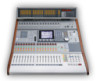
2 - Basic operational concepts NOTE Please take the time to read and understand this section, so that you understand how the basic navigation and parameter editing operations are performed. Dedicated screen mode selection keys provide access to the different screens shown on the LCD display: Figure 2.1: Control keys Press one of these keys to access the screen marked above the key in "normal" (for example, key 4 is used to select the AUX 7-8 screen). For the alternative screen available from many keys, press the ALT key so that the ALT indicator lights (see "Smart keys" on page 16 for details of the behavior of this key), and then the appropriate key to Smart keys The DM-3200 features five "smart keys": the ALT key and four "talkback" keys (DIM, MONO, TO SLATE and TO STUDIO). When the status of any of these keys is off, and the key is then pressed very briefly and released, the status of the key, as shown by the indicator, is changed to on after the key is released (latching). What's on the screen? For almost all the screens displayed by the DM-3200, there are two common areas. The first is at the top, and we explain that area here (the second is the row of labels which identify the POD functions (described in "Special controls" on page 18)). select the screen whose title is written in inverted characters above the key. For example, key 7 normally brings up the AUX 1-2 screen, but using this key with the ALT key brings up the OPTION screens. Note that some keys (e.g. the LIBRARY and ROUTING keys) are marked as "alternative" screens only, but these keys do not need the ALT key to be pressed to access their screens. Many screens accessed with these keys include subscreens or "pages". These sub-screens can be accessed using the POD keys ("The PODs" on page 18) or repeated presses of the same control key will cycle through these pages. Use the cursor keys to navigate around the screen (sometimes, the dial can also be used to navigate). Radio buttons (exclusive-or options) or checkboxes (options) are set and unset using the ENTER key when the cursor highlights the option. When a parameter is selected, the dial is usually used to change the value. For non-numerical values changed using the dial, usually ENTER should be pressed to confirm the entry. Note that while the parameter is being edited, the displayed parameter blinks on screen, and the cursor cannot be moved until the new value is confirmed with the ENTER key. For a few parameters (chiefly connected with the remote unit location facilities), the number keys can also be used when the number is selected using ENTER. Confirm the entry of a value made in this way by pressing ENTER. If the status of the key is off, and the key is pressed and held down, the status is only changed as long as the key is held down (non-latching). If the status of one of these keys is on, the length of the key press makes no difference-the key status changes to off when the key is released. These top and bottom areas are for display, and their contents are automatically determined (they cannot be edited). 16 TASCAM DM-3200 Owner's Manual
-
 1
1 -
2
-
3
-
4
-
5
-
6
-
7
-
8
-
9
-
10
-
 11
11 -
 12
12 -
 13
13 -
 14
14 -
 15
15 -
 16
16 -
 17
17 -
 18
18 -
 19
19 -
 20
20 -
 21
21 -
22
-
23
-
24
-
25
-
26
-
27
-
28
-
29
-
30
-
31
-
32
-
33
-
34
-
35
-
36
-
37
-
38
-
39
-
40
-
41
-
42
-
43
-
44
-
45
-
46
-
47
-
48
-
49
-
50
-
51
-
52
-
53
-
54
-
55
-
56
-
57
-
58
-
59
-
60
-
61
-
62
-
63
-
64
-
65
-
66
-
67
-
68
-
69
-
70
-
71
-
72
-
73
-
74
-
75
-
76
-
77
-
78
-
79
-
80
-
81
-
82
-
83
-
84
-
85
-
86
-
87
-
88
-
89
-
90
-
91
-
92
-
93
-
94
-
95
-
96
-
97
-
98
-
99
-
100
-
101
-
102
-
103
-
104
-
105
-
106
-
107
-
108
-
109
-
110
-
111
-
112
-
113
-
114
-
115
-
116
-
117
-
118
-
119
-
120
 |
 |
