TP-Link Archer T4U Archer T4U V1 Quick Install Guide - Page 1
TP-Link Archer T4U Manual
 |
View all TP-Link Archer T4U manuals
Add to My Manuals
Save this manual to your list of manuals |
Page 1 highlights
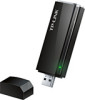
Quick Installation Guide AC1200 Wireless Dual Band USB Adapter MODEL NO. Archer T4U 7106505244 REV4.0.0 1 Connect to a Computer Option 1: Directly For more information, please visit http://www.tp-link.com. Option 2: Via the USB Extension Cable Note: In Windows XP, a Found New Hardware Wizard window will appear when the adapter is detected. Please click Cancel. 2 Install Driver and Utility You can also download the driver and utility at www.tp-link.com. A: Insert the CD. WPS WPS TP-LINK TP-LINK B: For Windows Click Run Autorun.exe on the pop-up window. Select Archer T4U and click Install Driver and Utility, then follow the InstallShield Wizard to complete the installation. Setup Wizard Archer T4U Install Driver and Utility User Guide Browse CD EXIT 3 Join a Wireless Network For Windows Option 1: Via TP-LINK Utility Select your Wi-Fi network from the pop-up utility window and click Connect. The symbol indicates a successful connection. Status WPS Network Name(SSID) TP-LINK_A 34567_TEST abcdef_0903 AAAAAA Network Profile Advanced Security Channel WPA/WPA2-Personal 6 (2.4G) Connect automatically Connect WPA/WPA2-Personal 44 (5G) None 9 (2.4G) None 5 (2.4G) Signal Network Na TP-LINK_A 34567_TEST Option 2: Via Wi-Fi Protected Setup (WPS) A: Press the WPS button on your router. B: Within 2 minutes, press and hold the WPS button on the adapter until the following screen appears. Configuring the wireless network. WPS Connecting to the network... C: When you are prompted "Successfully connected to the network by WPS", click OK. Option 3: Via Windows Wireless Utility Click (Network icon) on the system tray, select your Wi-Fi network, and click Connect. Note: In Windows XP, you need to close the TP-LINK Utility before using the Windows Wireless Utility. For Mac OS X Browse the CD, go to Archer T4U > Mac OS X Driver, unzip the Mac OS X version.zip file and run the Installer. Follow the wizard to complete the installation. Installer.pkg Uninstall.pkg For Mac OS X Option 1: Via TP-LINK Utility Select the Available Network tab of the pop-up utility window. Select your Wi-Fi network and click Connect. The connection status can be viewed on the Link Status screen. TP-LINK Wireless Configuration Utility Link Status Pro les Available Network WPS Information Associated SSID TP-LINK_A 34567_TEST abcdef_0903 AAAAAA Channel 6 2 149 5 Network Type Encryption Infrastructure WPA2-PSK AES Infrastructure WPA2-PSK AES Infrastructure No Encryption Infrastructure No Encryption BSSID 721018010003 021018010002 0051e1022044 001018a95d8d Refresh Connect Option 2: Via Wi-Fi Protected Setup (WPS) A: Press the WPS button on your router. B: Within 2 minutes, press and hold the WPS button on the adapter until the following screen appears. TP-LINK Wireless Configuration Utility Link Status Pro les Available Network WPS Information WPS SSID Channel Security BSSID TP-LINK_A 6 WPA2-PSK AES 721018010003 34567_TEST 2 WPA2-PSK AES 021018010002 abcdef_0903 149 No Encryption 0051e1022044 AAAAAA 5 No Encryption 001018a95d8d SCAN WPS Progress : Please key the PIN code into your AP's com g page PIN: XXXXXXXX Scan Active WPS AP 28 sec PIN PBC Cancel C: When you are prompted "WPS Protocol Finished", click OK. ©2015 TP-LINK
-
 1
1
 |
 |
