TP-Link Archer VR300 Archer VR300EU V1 Quick Installation Guide - Page 1
TP-Link Archer VR300 Manual
 |
View all TP-Link Archer VR300 manuals
Add to My Manuals
Save this manual to your list of manuals |
Page 1 highlights
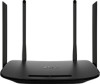
Quick Installation Guide AC1200 Wireless VDSL/ADSL Modem Router VR300 1. Connect the Hardware Phone Jack Power Adapter Phone Cable 1 3 Push in to turn on the modem router. ON/OFF LINE DSL Splitter PHONE MODEM Phone Cable Power ON/OFF RESET WPS LAN2 LAN3 LAN4/WAN DSL 2 If you don't need the phone service, just directly connect the modem router to the phone jack with the Phone (Optional) provided phone cable, then follow steps 3 and 4 to complete the hardware connection. 4 Wait for about 1 to 2 minutes, then verify that the LED is slowly flashing orange before continuing. Modem Router Note: If the LED turns solid orange, refer to FAQ > Q2. 2. Configure the Modem Router Before You Start 1. You'll usually need an internet service username and password, given to you by your internet service provider (ISP) when you first signed up with them. If you are unsure, please check with your ISP. 2. Find the product label at the bottom of your router. Printed on the label are your router's default SSIDs (network names) and wireless password. Method 1: Via Web Browser 1. Connect your device to the router using an Ethernet cable or wirelessly. SSIDs (network names) and wireless password are on the product label. Power ON/OFF RESET WPS LAN2 LAN3 LAN4/WAN DSL Ethernet Cable 2. Launch a web browser and type in http://tplinkmodem.net or 192.168.1.1. Create a password and get started. Note: If the login page does not appear, please refer to FAQ > Q1. http://tplinkmodem.net New Password Low Middle High Confirm Password Let's Get Started 3. Follow the step-by-step instructions to set up an internet connection and register the TP-Link Cloud service. Now you can enjoy your internet. Method 2: Via TP-Link Tether App 1. Download the TP-Link Tether app. or Scan to download 2. Connect your smartphone to the router. SSIDs (network names) and wireless password are on the product label. 3. Launch the Tether app and select Archer VR300. Device Local Device Archer VR300 50-C7-BF-02-EA-DC 4. Follow the steps to connect to the internet and register the TP-Link Cloud service. Now you can enjoy your internet.
-
 1
1 -
 2
2
 |
 |
