TP-Link RE650 RE650EU V1 User Guide - Page 6
LED Explanation, 1. 2. 2. Port and Button Description, Status, Indication, Ports or Buttons - how to reset
 |
View all TP-Link RE650 manuals
Add to My Manuals
Save this manual to your list of manuals |
Page 6 highlights
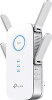
Chapter 1 Get to Know About Your Extender 1. 2. 1. LED Explanation You can check the extender's working status by following the LED Explanation table. Name (RE) 2.4GHz 5GHz Power Status Solid blue Solid red Blinking Off On Off On Off On Blinking Off Indication The extender is connected to the router, and is in a good location. The extender is connected to the router, but is too far away from it. WPS connection is in progress. No active connection. The extender is connected to the 2.4GHz wireless network of your host router. No 2.4GHz wireless connection. The extender is connected to the 5GHz wireless network of your host router. No 5GHz wireless connection. The extender is on. The extender is initializing. The extender is off. 1. 2. 2. Port and Button Description Ports or Buttons Description WPS Button Press the WPS button on your host router, and immediately press the WPS button on the extender. The LED of the extender should change to solid blue, indicating successful WPS connection. Power Button Press the Power button to turn on or off the extender. LED Button Press the LED button to turn on or off all the LEDs. Reset (Hole) Use a pin to press and hold the Reset button until all the LEDs turn on momentarily to reset the extender. Ethernet Port Connect your Ethernet-only device to the Ethernet port of the extender to join the Wi-Fi network. 4
-
 1
1 -
 2
2 -
 3
3 -
 4
4 -
 5
5 -
 6
6 -
 7
7 -
 8
8 -
 9
9 -
 10
10 -
 11
11 -
 12
12 -
13
-
14
-
15
-
16
-
17
-
18
-
19
-
20
-
21
-
22
-
23
-
24
-
25
-
26
-
27
-
28
-
29
-
30
-
31
-
32
-
33
-
34
-
35
-
36
-
37
-
38
-
39
-
40
-
41
 |
 |
