TP-Link TD-8810 User Guide - Page 10
Hardware installation procedures, TD-8810, LINE WAN, Step 1 - modem
 |
UPC - 845973030223
View all TP-Link TD-8810 manuals
Add to My Manuals
Save this manual to your list of manuals |
Page 10 highlights
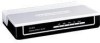
TD-8810 External ADSL2+ Router User Guide ¾ LAN: Connect with your computer's NIC. ¾ LINE (WAN): Connect to the MODEM Port of Splitter or Connect with the telephone line. 2.3 Hardware installation procedures The procedure to install the Router can be described in general terms in the following steps: Step 1: Connecting the MODEM port of Splitter with the TD-8810 ADSL Router LINE port by telephone line. While you need to use a telephone, please attach telephone line into the phone of Splitter. Step 2: Connect category 5 cable with RJ45 jacks to the ADSL Router's LAN port and your computer's NIC. Step 3: Plug one end of the AC Power Adapter into the Power jack on the Ethernet ADSL2+ Router and the other end to a standard electrical outlet. Step 4: Check the line connection to see if everything is ready. Power up finally. Figure 2-1 5
-
 1
1 -
2
-
3
-
4
-
 5
5 -
 6
6 -
 7
7 -
 8
8 -
 9
9 -
 10
10 -
 11
11 -
 12
12 -
 13
13 -
 14
14 -
 15
15 -
16
-
17
-
18
-
19
-
20
-
21
-
22
-
23
-
24
-
25
-
26
-
27
-
28
-
29
-
30
-
31
-
32
-
33
-
34
-
35
-
36
-
37
-
38
-
39
-
40
-
41
-
42
-
43
 |
 |
