TP-Link TL-SF1005D User Guide - Page 7
Installation, 1 Mounting the Switch on a Desk, 2 Power - power supply
 |
UPC - 845973020064
View all TP-Link TL-SF1005D manuals
Add to My Manuals
Save this manual to your list of manuals |
Page 7 highlights
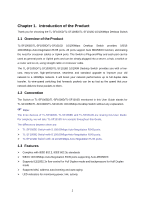
¾ Plastic case, desktop or wall-mounting design ¾ External Power Adapter supply Chapter 2. Installation 2.1 Mounting the Switch on a Desk To install the Switch, please follow the steps: 1) You can place the Switch on a flat desk. 2) Please inspect the Power Adapter carefully and make sure that it is properly connected to a power source. 3) Ensure adequate ventilation space around the switch for dissipating heat and air. ) Note: Please avoid any heavy thing placed on the switch. 2.2 Power On Powering on the Switch, it will automatically initialize and its LED indicators will respond as follows: 1) All of the Link/Act LED indicators will flash momentarily, which represents a resetting of the system. 2) The Power LED indicator will light all the time. ) Note: If the LED indicators don't respond as described above, please check the power supply and its connection. 2
-
 1
1 -
 2
2 -
 3
3 -
 4
4 -
 5
5 -
 6
6 -
 7
7 -
 8
8 -
 9
9 -
 10
10
 |
 |