TRENDnet N900 User's Guide - Page 12
Getting Started, Installation, will have a power button on the back.
 |
View all TRENDnet N900 manuals
Add to My Manuals
Save this manual to your list of manuals |
Page 12 highlights
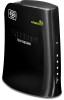
Getting Started Installation Note: Do not connect/install the TEW-680MB to your network until instructed to do so. Make sure your network adapter settings are set to obtain an IP address automatically. 1. Connect one end of the provided RJ-45 network cable to one of the TEW-680MB's LAN ports. Connect the other end of the cable to your computer's network port. 2. Connect the Power Adapter to the TEW-680MB and then to a power outlet (EU Versions will have a power button on the back. Push the power button to the "On" position. ). Wait 30 seconds for the TEW-680MB to boot up. 3. Plug in the power adapter and verify the Power & Ethernet LEDs are light. 12
-
 1
1 -
2
-
3
-
4
-
5
-
6
-
 7
7 -
 8
8 -
 9
9 -
 10
10 -
 11
11 -
 12
12 -
 13
13 -
 14
14 -
 15
15 -
 16
16 -
 17
17 -
18
-
19
-
20
-
21
-
22
-
23
-
24
-
25
-
26
-
27
-
28
-
29
-
30
-
31
-
32
-
33
-
34
-
35
-
36
-
37
-
38
-
39
-
40
-
41
-
42
-
43
-
44
-
45
-
46
-
47
-
48
-
49
 |
 |

12
Getting Started
Installation
Note:
Do not connect/install the TEW-680MB to your network until instructed to do so.
Make sure your network adapter settings are set to obtain an IP address automatically.
1.
Connect one end of the provided RJ-45 network cable to one of the TEW-680MB’s LAN
ports.
Connect the other end of the cable to your computer’s network port.
2.
Connect the Power Adapter to the TEW-680MB and then to a power outlet (EU Versions
will have a power button on the back.
Push the power button to the “On” position. ). Wait
30 seconds for the TEW-680MB to boot up.
3.
Plug in the power adapter and verify the Power & Ethernet LEDs are light.